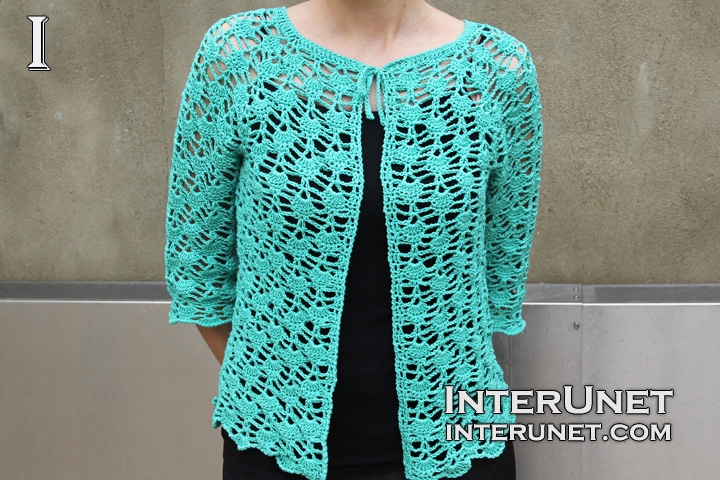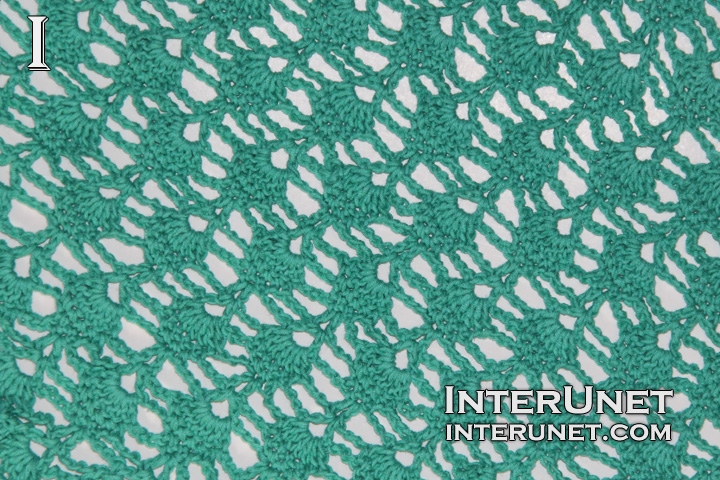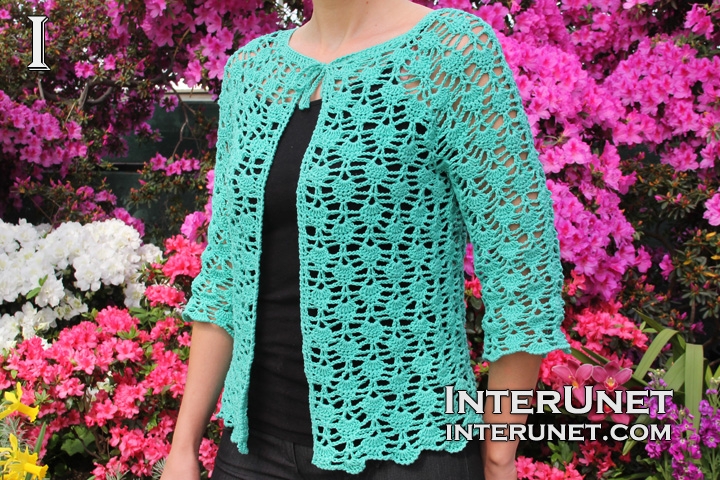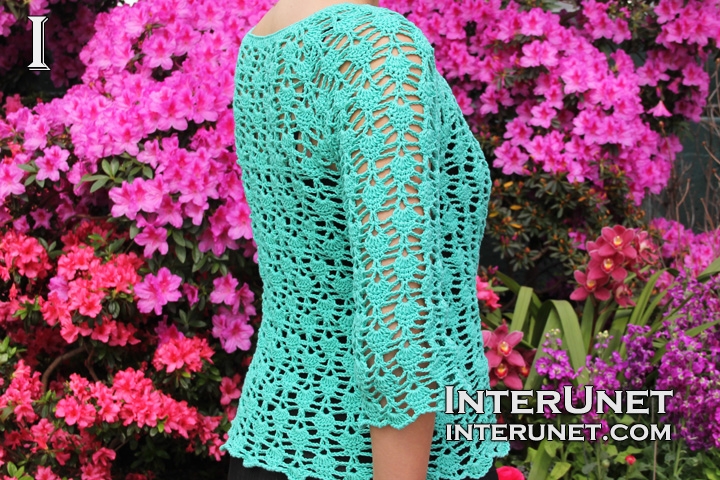
Yarn - Bernat Cotton-ish (turquoise) / light 3 / 2.4 oz (70 g) / 282 yards (258 m) / about 5 balls needed
Hook - F/5 – 3.75 mm, G/6 4.25mm, and H/8 5mm or other size hooks needed for the gauge
Gauge - 1 repeat is about 3 inches (7.6 cm) wide
Cardigan Size - S/M
Complexity - Beginners friendly stitch

Crochet beginners stitch lace summer top – front tie cardigan jacket crochet pattern
Step-by-step crochet instructions
Part 1 in the video tutorial
Crochet the cardigan from the top to bottom.
Step 1
Make a foundation chain of 102 chains. I count all loops including the loop on my hook.
Step 2
1st row (right side) – h3ch, dc14, dc3 into 1ch, dc19, dc3 into 1ch, dc29, dc3 into 1ch, dc19, dc3 into 1ch, dc14 + RC2
2nd row (wrong side) – h3ch, dc2, ch2, sk2, Vst1, ch3, sk3, sc3, ch3, sk3, corner*, ch3, sk3, sc3, ch3, sk3, Vst1, ch3, sk3, sc3, ch3, sk3, corner, (ch3, sk3, sc3, ch3, sk3, Vst1) x 2, ch3, sk3, sc3, ch3, corner, ch3, sk3, sc3, ch3, sk3, Vst1, ch3, sk3, sc3, ch3, corner, ch3, sk3, sc3, ch3, sk3, Vst1, ch2, sk2, dc2 + RC2
*corner for the 2nd row – Vst1 between 1st & 2nd dc of dc3 into 1ch of prev.row, ch1, Vst1 between 2nd & 3rd dc of dc3 into 1ch of prev.row
3rd row – h3ch, dc2, dc7 into Vst of prev.row, ch3, inc1 into 2nd sc ch, ch3, corner*, ch3, inc1 into 2nd sc ch, ch3, dc7 into Vst, ch3, inc1 into 2nd sc ch, ch3, corner, (ch3, inc1 into 2nd sc ch, ch3, dc7 into Vst) x 2, ch3, inc1 into 2nd sc ch, ch3, corner, ch3, inc1 into 2nd sc ch, ch3, dc7 into Vst, ch3, inc1 into 2nd sc ch, ch3, corner, ch3, inc1 into 2nd sc ch, ch3, dc7 into Vst, dc2 + RC1
*corner for the 3rd row – dc7 into Vst, ch1, dc7 into Vst
4th row – h2ch, sc2, ch1, sk1, sc5, ch3, Vst1 into inc, ch3, sk1 dc, sc5, corner*, (sk1 dc, sc5, ch3, Vst1 into inc, ch3) x 2, sk1 dc, sc5, corner, (sk1 dc, sc5, ch3, Vst1 into inc, ch3) x 3, sk1 dc, sc5, corner, (sk1 dc, sc5, ch3, Vst1 into inc, ch3) x 2, sk1 dc, sc5, corner, sk1 dc, sc5, ch3, Vst1 into inc, ch3, sk1 dc, sc5, ch1, sk1, sc2 + RC1
*corner for the 4th row - ch2, Vst1 under ch, ch2
5th row – h2ch, sc2, ch3, sk2, sc3, [ch3, dc7 into Vst, ch3, sk1 sc, sc3] to last 4chs; ch3, sk2, sc2 + RC2
Step 3
Continue the pattern using a larger size crochet hook
6th row – h3ch, dc2, ch3, inc1 into 2nd sc ch, ch3, [sk1 dc, sc5, ch3, inc1 into 2nd sc ch, ch3] to end; dc2 + RC2
7th row – h3ch, dc2, ch2, Vst1 into inc, ch3, sk1 sc, sc3, ch3, Vst1 into inc, corner, (Vst1 into inc, ch3, sk1 sc, sc3, ch3) x 2, Vst1 into inc, corner, (Vst1 into inc, ch3, sk1 sc, sc3, ch3) x 3, Vst1 into inc, corner, (Vst1 into inc, ch3, sk1 sc, sc3, ch3) x 2, Vst1 into inc, corner, Vst1 into inc, ch3, sk1 sc, sc3, ch3, Vst1 into inc, ch2, dc2 + RC2
*corner for the 7th row – ch4, sk1 sc, sc3, ch4

Part 2 in the video tutorial
Step 4
8th row – h3ch, dc2, dc7 into Vst, ch3, inc1 into 2nd sc ch, ch3, dc7 into VSt, ch3, corner*, (ch3, dc7 into VSt, ch3, inc1 into 2nd sc ch) x 2, ch3, dc7 into Vst, ch3, corner, (ch3, dc7 into VSt, ch3, inc1 into 2nd sc ch) x 3, ch3, dc7 into Vst, ch3, corner, (ch3, dc7 into VSt, ch3, inc1 into 2nd sc ch) x 2, ch3, dc7 into Vst, ch3, corner, ch3, dc7 into Vst, ch3, inc1 into 2nd sc ch, ch3, dc7 into Vst, dc2 + RC1
*corner for the 8th row – dc3 into 2nd sc ch
9th row – h2ch, sc2, ch1, sk1, sc5, ch3, Vst1 into inc, ch3, sk1 dc, sc5, ch3, corner*, ch3, (sk1 dc, sc5, ch3, Vst1 into inc, ch3) x 2, sk1 dc, sc5, ch3, corner, ch3, (sk1 dc, sc5, ch3, Vst1 into inc, ch3) x 3, sk1 dc, sc5, ch3, corner, ch3, (sk1 dc, sc5, ch3, Vst1 into inc, ch3) x 2, sk1 dc, sc5, ch3, corner, ch3, sk1 dc, sc5, ch3, Vst1 into inc, ch3, sk1 dc, sc5, ch1, sk1, sc2 + RC1
*corner for the 9th row – Vst1 between 1st & 2nd dc of dc3 into 1ch of prev.row, ch1, Vst1 between 2nd & 3rd dc of dc3 into 1ch of prev.row
10th row – h2ch, sc2, ch3, sk2, sc3, ch3, dc7 into Vst, ch3, sk1 sc, sc3 ch3, corner*, (ch3, sk1 sc, sc3, ch3, dc7 into VSt) x 2, ch3, sk1 sc, sc3, ch3, corner, (ch3, sk1 sc, sc3, ch3, dc7 into VSt) x 3, ch3, sk1 sc, sc3, ch3, corner, (ch3, sk1 sc, sc3, ch3, dc7 into VSt) x 2, ch3, sk1 sc, sc3, ch3, corner, ch3, sk1 sc, sc3, ch3, dc7 into Vst, ch3, sk1 sc, sc3, ch3, sk2, sc2 + RC2
*corner for the 10th row – dc7 into Vst, ch1, dc7 into Vst
11th row – h3ch, dc2, (ch3, inc1 into 2nd sc ch, ch3, sk1 dc, sc5) x 2, corner*, (sk1 dc, sc5, ch3, inc1 into 2nd sc ch, ch3) x 3, sk1 dc, sc5, corner, (sk1 dc, sc5, ch3, inc1 into 2nd sc ch, ch3) x 4, sk1 dc, sc5, corner, (sk1 dc, sc5, ch3, inc1 into 2nd sc ch, ch3) x 3, sk1 dc, sc5, corner, (sk1 dc, sc5, ch3, inc1 into 2nd sc ch, ch3) x 2, dc2 + RC2
*corner for the 11th row – ch2, inc1 under ch, ch2
Step 5
12th row – h3ch, dc2, ch2, Vst1 into inc, [ch3, sk1 sc, sc3, ch3, Vst1 into inc1] to end; ch2, dc2 + RC2
13th row – h3ch, dc2, dc7 into Vst, [ch3, inc1 into 2nd sc ch, ch3, dc7 into Vst] to end; dc2 + RC1
14th row – h2ch, sc2, ch1, sk1, sc5, [ch3, Vst1 into inc, ch3, sk1 dc, sc5] to last 3 chs; ch1, sk1, sc2 + RC1
15th row – h2ch, sc2, ch3, sk2, sc3, [ch3, dc7 into Vst, ch3, sk1 sc, sc3] to last 4 chs; ch3, sk2, sc2 + RC2
Step 6
16th row – h3ch, dc2, (ch3, inc1 into 2nd sc ch, ch3, sk1 dc, sc5) x 2, ch3, corner*, ch3, (sk1 dc, sc5, ch3, inc1 into 2nd sc ch, ch3) x 3, sk1 dc, sc5, ch3, corner, ch3, (sk1 dc, sc5, ch3, inc1 into 2nd sc ch, ch3) x 4, sk1 dc, sc5, ch3, corner, ch3, (sk1 dc, sc5, ch3, inc1 into 2nd sc ch, ch3) x 3, sk1 dc, sc5, ch3, corner, ch3, (sk1 dc, sc5, ch3, inc1 into 2nd sc ch, ch3) x 2, dc2 + RC2
*corner for the 16th row – dc3 into 2nd sc ch
17th row – h3ch, dc2, ch2, (Vst1 into inc, ch3, sk1 sc, sc3, ch3) x 2, corner*, ch3, sk1 sc, sc3, ch3, (Vst1 into inc, ch3, sk1 sc, sc3, ch3) x 3, corner, ch3, sk1 sc, sc3, ch3, (Vst1 into inc, ch3, sk1 sc, sc3, ch3) x 4, corner, ch3, sk1 sc, sc3, ch3, (Vst1 into inc, ch3, sk1 sc, sc3, ch3) x 3, corner, (ch3, sk1 sc, sc3, ch3, Vst1 into inc) x 2, ch2, dc2 + RC2
*corner for the 17th row – Vst1 between 1st & 2nd dc of dc3 into 1ch of prev.row, ch1, Vst1 between 2nd & 3rd dc of dc3 into 1ch of prev.row
Repeat the pattern starting from the 3rd row, increasing a number of repeats/chains until your front and back parts will be wide enough to your chest circumference accordingly.
18th row crochet like 3rd row, working more repeats in each part.
Step 7
Join front and back parts together
19th row – h2ch, sc2, ch1, sk1, (sc5, ch3, Vst1 into inc, ch3, sk1 dc) x 2, sc5, ch2, Vst1 under ch, ch5, sk shoulder part, Vst1 under ch, ch2, (sk1 dc, sc5, ch3, Vst1 into inc, ch3) x 5, sk1 dc, sc5, ch2, Vst1 under ch, sk shoulder part, Vst1 under ch, ch2, (sk1 dc, sc5, ch3, Vst1 into inc, ch3) x 2, sk1 dc, sc5, ch1, sk1, sc2 + RC1
20th row – h2ch, sc2, ch3, sk2, sc3, (ch3, dc7 into Vst, ch3, sk1 sc, sc3) x 2, ch3, dc7 into Vst, ch3, sk1, sc3, (ch3, dc7 into Vst, ch3, sk1 sc, sc3) x 6, ch3, dc7 into Vst, ch3, sk1, sc3, (ch3, dc7 into Vst, ch3, sk1 sc, sc3) x 3, ch3, sk2, sc2 + RC2
Step 8
21st row = 6th row
22nd row = 12th row
23rd row = 13th row
24th row = 14th row
25th row = 15th row
Repeat the pattern starting from the 21st row until you crochet to about waist line, then continue crocheting the 5 above rows using a larger size crochet hook to widen the garment.
Step 9
Sleeves
Attach the yarn underarm above 2nd sc ch.
1st round – ch5, dc1 into sm.ch, ch3, sk1 dc, sc5, ch3, [Vst into inc, ch3, sk1 dc, sc5, ch3] to end + sl.st.1 into 3rd ch
2nd round – ch3, dc6 into Vst, ch3, sk1 sc, sc3, ch3, [dc7 into Vst, ch3, sk1 sc, sc3, ch3] to end + sl.st.1 into 3rd ch
3rd round – ch1, sc5, ch3, inc into 2nd sc ch, ch3, [sk1 dc, sc5, ch3, inc into 2nd sc ch, ch3] to end + sl.st.1 into 2nd ch
4th round – ch1, sc3, ch3, Vst into inc, ch3, [sk1 sc, sc3, ch3, Vst into inc, ch3] to end + sl.st.1 into 2nd ch
5th round – sl.st.1, ch3, dc1 into sm.ch, ch3, dc7 into Vst, ch3, [inc1 into 2nd sc ch, ch3, dc7 into Vst, ch3] to end + sl.st.1 into 3rd ch
Repeat the pattern starting from the 1st round. After you crochet about 15 rounds, continue crocheting the 5 rounds using a smaller size crochet hook until you crochet the desire length of each sleeve.
Step 10
Borders
Work reverse single crochet to end.
Step 11
Tie – ch40, h2ch, sl.sts to end

Abbreviations
ch – chain
dc – double crochet
h#ch – insert a hook into a 3rd or 2nd chain from your hook
inc – increase – dc2 into 1ch
RC – returning chain
sc – single crochet
sm.ch – the same base chain
Vst – V stitch – dc1, ch2, dc1 into 1ch or inc
Crochet lace jacket - two parts video tutorial

Comments
Hi, Sana,
Hi, Sana,
Thank you for sharing of this lovely project.
I have a few questions about this cardigan:
1. I crocheted 102 chains as you did with 4-ply yarn and bigger crochet hooks, I choose to crochet the method for XL/L at the underarm part, but I am stuck at the 20th row, as I do not know how to continue the patterns?
2. Is it to work on the front parts and back part separately? or continue the round?
3. Can I use the S/M size of method for the underarm of my project?
Thanks you so much.
Tania
Hi beadswonder,
Hi beadswonder,
Your work is very beautiful. You've written that you chose the method for XL, but in the video I said for XS. Is it a typo or you really need a different size? Continue the 20th row as you crocheted the front part - sc3, ch3, dc7 into Vst, ch3 to end of the row. To use a method for the S/M size, it will be necessary to redo the 19th row.
Hi, Sana,
Hi, Sana,
Thank you for your quick response. It was my bad, somehow when I watched the video on the tablet, I misheard XL/L instead of XS, then I went on to the computer to view the video again. I found out that I made a mistake. LOL. I already changed the urderarm part for S/M size, and it works out perfectly. I will post the final work as soon as I finish it. Thank you for your help.
Tania
You're welcome, beadswonder.
You're welcome, beadswonder. I will be happy to see your final work.
Hi, Sana,
Hi, Sana,
I attached the photo that I did to the underarm part.
Thanks.
Tania
After the sc3, ch3, then work
After the sc3, ch3, then work dc7 into Vst of previous row (the one you created while joining the front and back parts together). Then continue ch3, sk1 sc, sc3 and so on. It is hard to understand from the picture, but it looks like you have the Vst between front and back parts. So, you are on the right way. Happy crocheting!
thank you so beautiful
thank you so beautiful cardigan! I want to use thinner thread (size 1.5mm hook) and so I need to make much more number of chains.. I used the XL size you proposed but still not large enough.. what do you suggest , how many increase should I have for each side?
Hi coreen,
Hi coreen,
The exact number of chains will depend on your size and gauge. I would suggest trying to add one repeat to each front part, one repeat to each shoulder part, and two repeats to the back part. For that make a foundation chain of 162 chs. If your neckline will be too wide, you may decrease chains while working border (step 10). Happy crocheting!
thank you for the advice . I
thank you for the advice . I started crotchet, and realise because of the thinner thread I used, the length is not as long as yours, if I followed your instruction on the rows, I wouldn't reach the required length at the shoulder part. so my question is, how should I design my rows? I have stopped now at row 6, should I repeat certain rows, until a certain length?
Hi coreen,
Hi coreen,
You may read in step 6 to repeat the pattern after 17th row, starting from the 3rd row. So, you crochet your 18th row as your 3rd one (you will work more repeats), your 19th row as your 4th one, and so on until your front and back parts will be wide enough to your chest circumference accordingly. Happy crocheting!
Pages