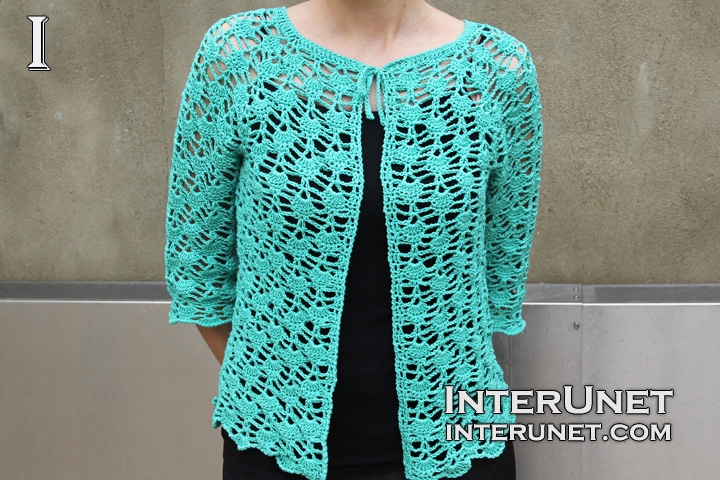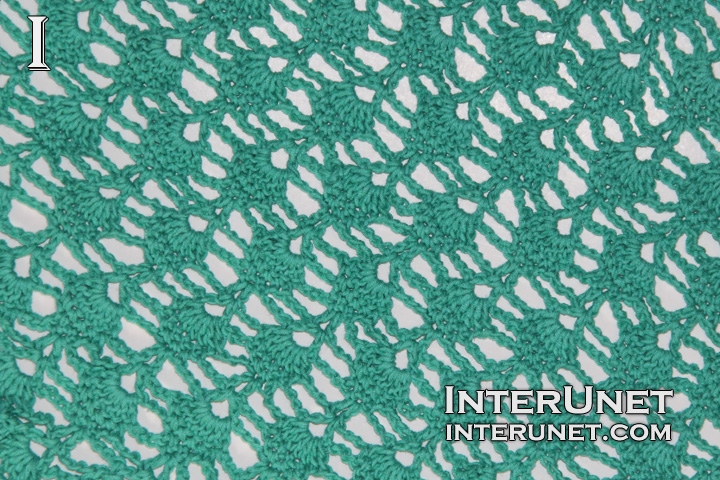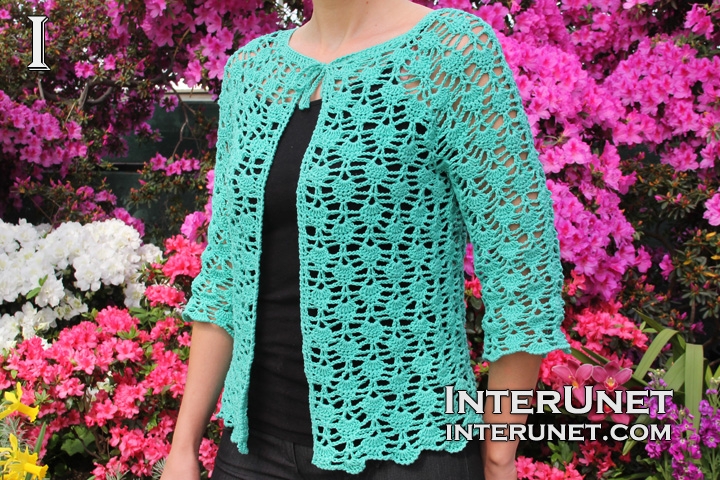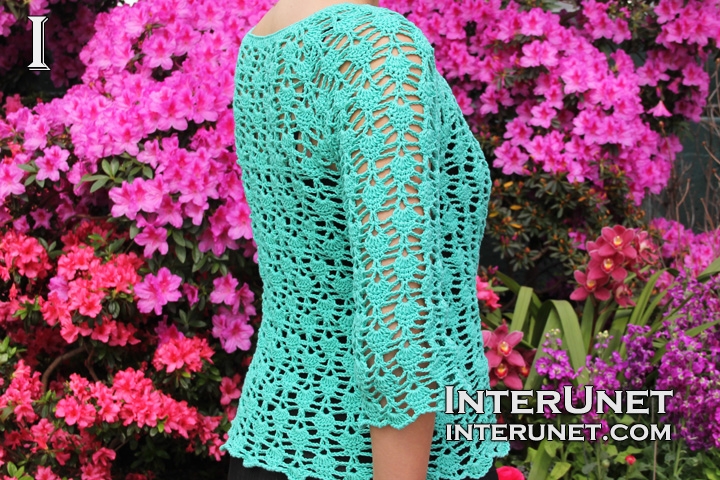
Yarn - Bernat Cotton-ish (turquoise) / light 3 / 2.4 oz (70 g) / 282 yards (258 m) / about 5 balls needed
Hook - F/5 – 3.75 mm, G/6 4.25mm, and H/8 5mm or other size hooks needed for the gauge
Gauge - 1 repeat is about 3 inches (7.6 cm) wide
Cardigan Size - S/M
Complexity - Beginners friendly stitch

Crochet beginners stitch lace summer top – front tie cardigan jacket crochet pattern
Step-by-step crochet instructions
Part 1 in the video tutorial
Crochet the cardigan from the top to bottom.
Step 1
Make a foundation chain of 102 chains. I count all loops including the loop on my hook.
Step 2
1st row (right side) – h3ch, dc14, dc3 into 1ch, dc19, dc3 into 1ch, dc29, dc3 into 1ch, dc19, dc3 into 1ch, dc14 + RC2
2nd row (wrong side) – h3ch, dc2, ch2, sk2, Vst1, ch3, sk3, sc3, ch3, sk3, corner*, ch3, sk3, sc3, ch3, sk3, Vst1, ch3, sk3, sc3, ch3, sk3, corner, (ch3, sk3, sc3, ch3, sk3, Vst1) x 2, ch3, sk3, sc3, ch3, corner, ch3, sk3, sc3, ch3, sk3, Vst1, ch3, sk3, sc3, ch3, corner, ch3, sk3, sc3, ch3, sk3, Vst1, ch2, sk2, dc2 + RC2
*corner for the 2nd row – Vst1 between 1st & 2nd dc of dc3 into 1ch of prev.row, ch1, Vst1 between 2nd & 3rd dc of dc3 into 1ch of prev.row
3rd row – h3ch, dc2, dc7 into Vst of prev.row, ch3, inc1 into 2nd sc ch, ch3, corner*, ch3, inc1 into 2nd sc ch, ch3, dc7 into Vst, ch3, inc1 into 2nd sc ch, ch3, corner, (ch3, inc1 into 2nd sc ch, ch3, dc7 into Vst) x 2, ch3, inc1 into 2nd sc ch, ch3, corner, ch3, inc1 into 2nd sc ch, ch3, dc7 into Vst, ch3, inc1 into 2nd sc ch, ch3, corner, ch3, inc1 into 2nd sc ch, ch3, dc7 into Vst, dc2 + RC1
*corner for the 3rd row – dc7 into Vst, ch1, dc7 into Vst
4th row – h2ch, sc2, ch1, sk1, sc5, ch3, Vst1 into inc, ch3, sk1 dc, sc5, corner*, (sk1 dc, sc5, ch3, Vst1 into inc, ch3) x 2, sk1 dc, sc5, corner, (sk1 dc, sc5, ch3, Vst1 into inc, ch3) x 3, sk1 dc, sc5, corner, (sk1 dc, sc5, ch3, Vst1 into inc, ch3) x 2, sk1 dc, sc5, corner, sk1 dc, sc5, ch3, Vst1 into inc, ch3, sk1 dc, sc5, ch1, sk1, sc2 + RC1
*corner for the 4th row - ch2, Vst1 under ch, ch2
5th row – h2ch, sc2, ch3, sk2, sc3, [ch3, dc7 into Vst, ch3, sk1 sc, sc3] to last 4chs; ch3, sk2, sc2 + RC2
Step 3
Continue the pattern using a larger size crochet hook
6th row – h3ch, dc2, ch3, inc1 into 2nd sc ch, ch3, [sk1 dc, sc5, ch3, inc1 into 2nd sc ch, ch3] to end; dc2 + RC2
7th row – h3ch, dc2, ch2, Vst1 into inc, ch3, sk1 sc, sc3, ch3, Vst1 into inc, corner, (Vst1 into inc, ch3, sk1 sc, sc3, ch3) x 2, Vst1 into inc, corner, (Vst1 into inc, ch3, sk1 sc, sc3, ch3) x 3, Vst1 into inc, corner, (Vst1 into inc, ch3, sk1 sc, sc3, ch3) x 2, Vst1 into inc, corner, Vst1 into inc, ch3, sk1 sc, sc3, ch3, Vst1 into inc, ch2, dc2 + RC2
*corner for the 7th row – ch4, sk1 sc, sc3, ch4

Part 2 in the video tutorial
Step 4
8th row – h3ch, dc2, dc7 into Vst, ch3, inc1 into 2nd sc ch, ch3, dc7 into VSt, ch3, corner*, (ch3, dc7 into VSt, ch3, inc1 into 2nd sc ch) x 2, ch3, dc7 into Vst, ch3, corner, (ch3, dc7 into VSt, ch3, inc1 into 2nd sc ch) x 3, ch3, dc7 into Vst, ch3, corner, (ch3, dc7 into VSt, ch3, inc1 into 2nd sc ch) x 2, ch3, dc7 into Vst, ch3, corner, ch3, dc7 into Vst, ch3, inc1 into 2nd sc ch, ch3, dc7 into Vst, dc2 + RC1
*corner for the 8th row – dc3 into 2nd sc ch
9th row – h2ch, sc2, ch1, sk1, sc5, ch3, Vst1 into inc, ch3, sk1 dc, sc5, ch3, corner*, ch3, (sk1 dc, sc5, ch3, Vst1 into inc, ch3) x 2, sk1 dc, sc5, ch3, corner, ch3, (sk1 dc, sc5, ch3, Vst1 into inc, ch3) x 3, sk1 dc, sc5, ch3, corner, ch3, (sk1 dc, sc5, ch3, Vst1 into inc, ch3) x 2, sk1 dc, sc5, ch3, corner, ch3, sk1 dc, sc5, ch3, Vst1 into inc, ch3, sk1 dc, sc5, ch1, sk1, sc2 + RC1
*corner for the 9th row – Vst1 between 1st & 2nd dc of dc3 into 1ch of prev.row, ch1, Vst1 between 2nd & 3rd dc of dc3 into 1ch of prev.row
10th row – h2ch, sc2, ch3, sk2, sc3, ch3, dc7 into Vst, ch3, sk1 sc, sc3 ch3, corner*, (ch3, sk1 sc, sc3, ch3, dc7 into VSt) x 2, ch3, sk1 sc, sc3, ch3, corner, (ch3, sk1 sc, sc3, ch3, dc7 into VSt) x 3, ch3, sk1 sc, sc3, ch3, corner, (ch3, sk1 sc, sc3, ch3, dc7 into VSt) x 2, ch3, sk1 sc, sc3, ch3, corner, ch3, sk1 sc, sc3, ch3, dc7 into Vst, ch3, sk1 sc, sc3, ch3, sk2, sc2 + RC2
*corner for the 10th row – dc7 into Vst, ch1, dc7 into Vst
11th row – h3ch, dc2, (ch3, inc1 into 2nd sc ch, ch3, sk1 dc, sc5) x 2, corner*, (sk1 dc, sc5, ch3, inc1 into 2nd sc ch, ch3) x 3, sk1 dc, sc5, corner, (sk1 dc, sc5, ch3, inc1 into 2nd sc ch, ch3) x 4, sk1 dc, sc5, corner, (sk1 dc, sc5, ch3, inc1 into 2nd sc ch, ch3) x 3, sk1 dc, sc5, corner, (sk1 dc, sc5, ch3, inc1 into 2nd sc ch, ch3) x 2, dc2 + RC2
*corner for the 11th row – ch2, inc1 under ch, ch2
Step 5
12th row – h3ch, dc2, ch2, Vst1 into inc, [ch3, sk1 sc, sc3, ch3, Vst1 into inc1] to end; ch2, dc2 + RC2
13th row – h3ch, dc2, dc7 into Vst, [ch3, inc1 into 2nd sc ch, ch3, dc7 into Vst] to end; dc2 + RC1
14th row – h2ch, sc2, ch1, sk1, sc5, [ch3, Vst1 into inc, ch3, sk1 dc, sc5] to last 3 chs; ch1, sk1, sc2 + RC1
15th row – h2ch, sc2, ch3, sk2, sc3, [ch3, dc7 into Vst, ch3, sk1 sc, sc3] to last 4 chs; ch3, sk2, sc2 + RC2
Step 6
16th row – h3ch, dc2, (ch3, inc1 into 2nd sc ch, ch3, sk1 dc, sc5) x 2, ch3, corner*, ch3, (sk1 dc, sc5, ch3, inc1 into 2nd sc ch, ch3) x 3, sk1 dc, sc5, ch3, corner, ch3, (sk1 dc, sc5, ch3, inc1 into 2nd sc ch, ch3) x 4, sk1 dc, sc5, ch3, corner, ch3, (sk1 dc, sc5, ch3, inc1 into 2nd sc ch, ch3) x 3, sk1 dc, sc5, ch3, corner, ch3, (sk1 dc, sc5, ch3, inc1 into 2nd sc ch, ch3) x 2, dc2 + RC2
*corner for the 16th row – dc3 into 2nd sc ch
17th row – h3ch, dc2, ch2, (Vst1 into inc, ch3, sk1 sc, sc3, ch3) x 2, corner*, ch3, sk1 sc, sc3, ch3, (Vst1 into inc, ch3, sk1 sc, sc3, ch3) x 3, corner, ch3, sk1 sc, sc3, ch3, (Vst1 into inc, ch3, sk1 sc, sc3, ch3) x 4, corner, ch3, sk1 sc, sc3, ch3, (Vst1 into inc, ch3, sk1 sc, sc3, ch3) x 3, corner, (ch3, sk1 sc, sc3, ch3, Vst1 into inc) x 2, ch2, dc2 + RC2
*corner for the 17th row – Vst1 between 1st & 2nd dc of dc3 into 1ch of prev.row, ch1, Vst1 between 2nd & 3rd dc of dc3 into 1ch of prev.row
Repeat the pattern starting from the 3rd row, increasing a number of repeats/chains until your front and back parts will be wide enough to your chest circumference accordingly.
18th row crochet like 3rd row, working more repeats in each part.
Step 7
Join front and back parts together
19th row – h2ch, sc2, ch1, sk1, (sc5, ch3, Vst1 into inc, ch3, sk1 dc) x 2, sc5, ch2, Vst1 under ch, ch5, sk shoulder part, Vst1 under ch, ch2, (sk1 dc, sc5, ch3, Vst1 into inc, ch3) x 5, sk1 dc, sc5, ch2, Vst1 under ch, sk shoulder part, Vst1 under ch, ch2, (sk1 dc, sc5, ch3, Vst1 into inc, ch3) x 2, sk1 dc, sc5, ch1, sk1, sc2 + RC1
20th row – h2ch, sc2, ch3, sk2, sc3, (ch3, dc7 into Vst, ch3, sk1 sc, sc3) x 2, ch3, dc7 into Vst, ch3, sk1, sc3, (ch3, dc7 into Vst, ch3, sk1 sc, sc3) x 6, ch3, dc7 into Vst, ch3, sk1, sc3, (ch3, dc7 into Vst, ch3, sk1 sc, sc3) x 3, ch3, sk2, sc2 + RC2
Step 8
21st row = 6th row
22nd row = 12th row
23rd row = 13th row
24th row = 14th row
25th row = 15th row
Repeat the pattern starting from the 21st row until you crochet to about waist line, then continue crocheting the 5 above rows using a larger size crochet hook to widen the garment.
Step 9
Sleeves
Attach the yarn underarm above 2nd sc ch.
1st round – ch5, dc1 into sm.ch, ch3, sk1 dc, sc5, ch3, [Vst into inc, ch3, sk1 dc, sc5, ch3] to end + sl.st.1 into 3rd ch
2nd round – ch3, dc6 into Vst, ch3, sk1 sc, sc3, ch3, [dc7 into Vst, ch3, sk1 sc, sc3, ch3] to end + sl.st.1 into 3rd ch
3rd round – ch1, sc5, ch3, inc into 2nd sc ch, ch3, [sk1 dc, sc5, ch3, inc into 2nd sc ch, ch3] to end + sl.st.1 into 2nd ch
4th round – ch1, sc3, ch3, Vst into inc, ch3, [sk1 sc, sc3, ch3, Vst into inc, ch3] to end + sl.st.1 into 2nd ch
5th round – sl.st.1, ch3, dc1 into sm.ch, ch3, dc7 into Vst, ch3, [inc1 into 2nd sc ch, ch3, dc7 into Vst, ch3] to end + sl.st.1 into 3rd ch
Repeat the pattern starting from the 1st round. After you crochet about 15 rounds, continue crocheting the 5 rounds using a smaller size crochet hook until you crochet the desire length of each sleeve.
Step 10
Borders
Work reverse single crochet to end.
Step 11
Tie – ch40, h2ch, sl.sts to end

Abbreviations
ch – chain
dc – double crochet
h#ch – insert a hook into a 3rd or 2nd chain from your hook
inc – increase – dc2 into 1ch
RC – returning chain
sc – single crochet
sm.ch – the same base chain
Vst – V stitch – dc1, ch2, dc1 into 1ch or inc
Crochet lace jacket - two parts video tutorial

Comments
Hi Shanie,
Hi Shanie,
You may visit this webpage http://interunet.com/crochet-two-piece-sweater to see how I work reverse single crochet. Begin watching the video starting from about 25:50. Happy crochet!
Hi Sana thanks a lot.
Hi Sana thanks a lot.
Best Regards
Shanie
Just Beautiful, Iwant to use
Just Beautiful, Iwant to use #5 thread but want to make s/m sweater , how many chains should I start with and should I use same size hooks as you did or smaller , don't want to use steel ones , I made this with a #3 thread but want to make it with 5 acrylic I used cotton on the other came out perfect with your instructions , just want to use the 5 thread
Hi lama503,
Hi lama503,
You may use any yarn you like for the project, but practice your gauge before making any estimates. Happy crochet!
a guage question should 10
a guage question should 10 stitches equal 3 inches? I made the first sweater perfect with your hook sizes and #3 thread but using the # 5 thread should I use the pattern for 124 sts instead can't use a big hook for the fine thread, really confused, my first sweater was the first one I ever made just want a thinner thread
I thought about trying to use
I thought about trying to use 124 ch and usind D,E, andF hooks
I am trying 142 ch with the
I am trying 142 ch with the thin thread DEandF hooks, I wear small or do you think I should do 124 when I used 3 cotton thread it was prefic following your directions to a t, oh and thank you so much for sharing this beautiful and easy to follow pattern
Hi lama503,
Hi lama503,
If you plan to add one repeat to each front part and 2 repeats to the back part, I would suggest adding 1 repeat (10 chs) for each shoulder part. So, your foundation chain should be about 162 chs. Different crocheters produce different gauge using the same yarn and hook. You may try 162 chs for the project, and then if it will be too big, you may join front and back parts together as for the XS size. Happy crochet!
With the thin thread I need
With the thin thread I need to lengthen I read after 17 to do this do I have to do a complete pattern so row 19 will be right? And how many rows is the pattern I know I start at row 3i don't need to lengthen much, so when I join I have to start at 19 right? Thanks in advance this is the only place a have a problem with I just used a bigger hook for the thread and it is ok otherwise, it is working otherwise if you could just explain this part for me I read rage other comment where someone else used thin thread but I am still confused
Hi lama503,
Hi lama503,
Crochet as many rows as necessary to get the desired armhole depth. Even though corners will different, but beg. and end. of rows are repeated every 5 rows. So, your row 24 will be similar to row 19 (not corners). When you join front and back parts, the most important thing is to make your repeats work. I'll help you out with that when you get there. Happy crochet!
Pages