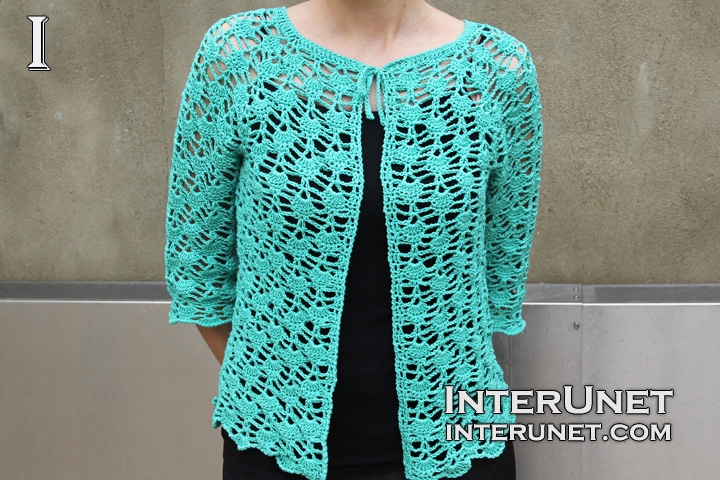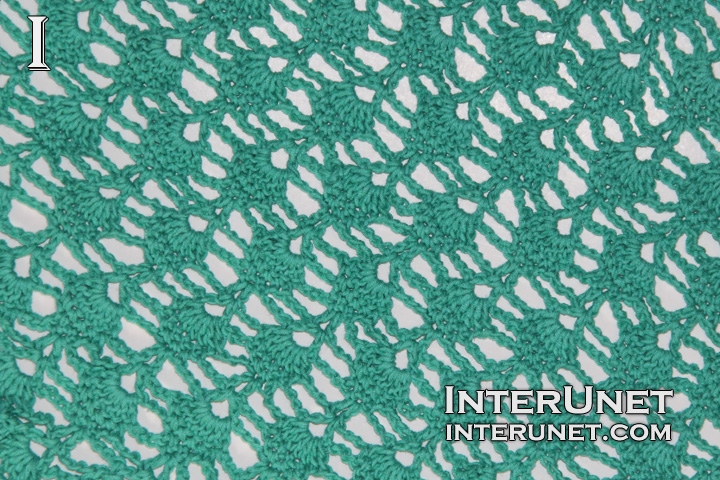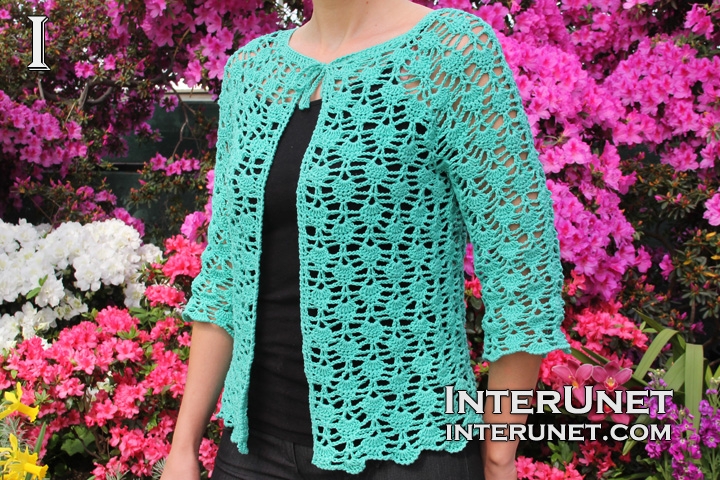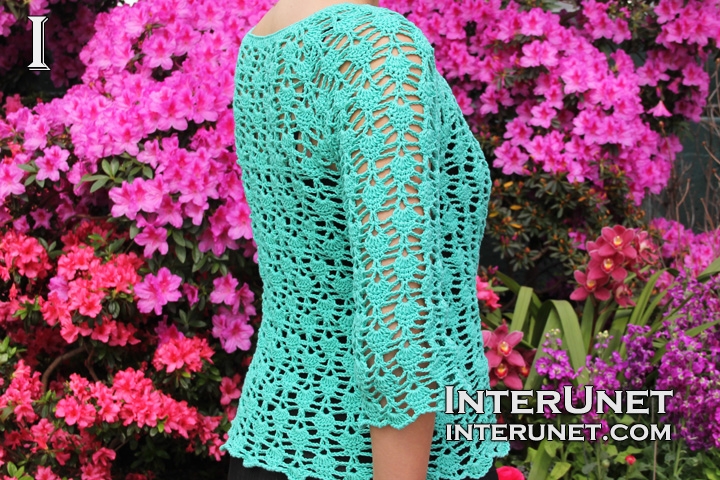
Yarn - Bernat Cotton-ish (turquoise) / light 3 / 2.4 oz (70 g) / 282 yards (258 m) / about 5 balls needed
Hook - F/5 – 3.75 mm, G/6 4.25mm, and H/8 5mm or other size hooks needed for the gauge
Gauge - 1 repeat is about 3 inches (7.6 cm) wide
Cardigan Size - S/M
Complexity - Beginners friendly stitch

Crochet beginners stitch lace summer top – front tie cardigan jacket crochet pattern
Step-by-step crochet instructions
Part 1 in the video tutorial
Crochet the cardigan from the top to bottom.
Step 1
Make a foundation chain of 102 chains. I count all loops including the loop on my hook.
Step 2
1st row (right side) – h3ch, dc14, dc3 into 1ch, dc19, dc3 into 1ch, dc29, dc3 into 1ch, dc19, dc3 into 1ch, dc14 + RC2
2nd row (wrong side) – h3ch, dc2, ch2, sk2, Vst1, ch3, sk3, sc3, ch3, sk3, corner*, ch3, sk3, sc3, ch3, sk3, Vst1, ch3, sk3, sc3, ch3, sk3, corner, (ch3, sk3, sc3, ch3, sk3, Vst1) x 2, ch3, sk3, sc3, ch3, corner, ch3, sk3, sc3, ch3, sk3, Vst1, ch3, sk3, sc3, ch3, corner, ch3, sk3, sc3, ch3, sk3, Vst1, ch2, sk2, dc2 + RC2
*corner for the 2nd row – Vst1 between 1st & 2nd dc of dc3 into 1ch of prev.row, ch1, Vst1 between 2nd & 3rd dc of dc3 into 1ch of prev.row
3rd row – h3ch, dc2, dc7 into Vst of prev.row, ch3, inc1 into 2nd sc ch, ch3, corner*, ch3, inc1 into 2nd sc ch, ch3, dc7 into Vst, ch3, inc1 into 2nd sc ch, ch3, corner, (ch3, inc1 into 2nd sc ch, ch3, dc7 into Vst) x 2, ch3, inc1 into 2nd sc ch, ch3, corner, ch3, inc1 into 2nd sc ch, ch3, dc7 into Vst, ch3, inc1 into 2nd sc ch, ch3, corner, ch3, inc1 into 2nd sc ch, ch3, dc7 into Vst, dc2 + RC1
*corner for the 3rd row – dc7 into Vst, ch1, dc7 into Vst
4th row – h2ch, sc2, ch1, sk1, sc5, ch3, Vst1 into inc, ch3, sk1 dc, sc5, corner*, (sk1 dc, sc5, ch3, Vst1 into inc, ch3) x 2, sk1 dc, sc5, corner, (sk1 dc, sc5, ch3, Vst1 into inc, ch3) x 3, sk1 dc, sc5, corner, (sk1 dc, sc5, ch3, Vst1 into inc, ch3) x 2, sk1 dc, sc5, corner, sk1 dc, sc5, ch3, Vst1 into inc, ch3, sk1 dc, sc5, ch1, sk1, sc2 + RC1
*corner for the 4th row - ch2, Vst1 under ch, ch2
5th row – h2ch, sc2, ch3, sk2, sc3, [ch3, dc7 into Vst, ch3, sk1 sc, sc3] to last 4chs; ch3, sk2, sc2 + RC2
Step 3
Continue the pattern using a larger size crochet hook
6th row – h3ch, dc2, ch3, inc1 into 2nd sc ch, ch3, [sk1 dc, sc5, ch3, inc1 into 2nd sc ch, ch3] to end; dc2 + RC2
7th row – h3ch, dc2, ch2, Vst1 into inc, ch3, sk1 sc, sc3, ch3, Vst1 into inc, corner, (Vst1 into inc, ch3, sk1 sc, sc3, ch3) x 2, Vst1 into inc, corner, (Vst1 into inc, ch3, sk1 sc, sc3, ch3) x 3, Vst1 into inc, corner, (Vst1 into inc, ch3, sk1 sc, sc3, ch3) x 2, Vst1 into inc, corner, Vst1 into inc, ch3, sk1 sc, sc3, ch3, Vst1 into inc, ch2, dc2 + RC2
*corner for the 7th row – ch4, sk1 sc, sc3, ch4

Part 2 in the video tutorial
Step 4
8th row – h3ch, dc2, dc7 into Vst, ch3, inc1 into 2nd sc ch, ch3, dc7 into VSt, ch3, corner*, (ch3, dc7 into VSt, ch3, inc1 into 2nd sc ch) x 2, ch3, dc7 into Vst, ch3, corner, (ch3, dc7 into VSt, ch3, inc1 into 2nd sc ch) x 3, ch3, dc7 into Vst, ch3, corner, (ch3, dc7 into VSt, ch3, inc1 into 2nd sc ch) x 2, ch3, dc7 into Vst, ch3, corner, ch3, dc7 into Vst, ch3, inc1 into 2nd sc ch, ch3, dc7 into Vst, dc2 + RC1
*corner for the 8th row – dc3 into 2nd sc ch
9th row – h2ch, sc2, ch1, sk1, sc5, ch3, Vst1 into inc, ch3, sk1 dc, sc5, ch3, corner*, ch3, (sk1 dc, sc5, ch3, Vst1 into inc, ch3) x 2, sk1 dc, sc5, ch3, corner, ch3, (sk1 dc, sc5, ch3, Vst1 into inc, ch3) x 3, sk1 dc, sc5, ch3, corner, ch3, (sk1 dc, sc5, ch3, Vst1 into inc, ch3) x 2, sk1 dc, sc5, ch3, corner, ch3, sk1 dc, sc5, ch3, Vst1 into inc, ch3, sk1 dc, sc5, ch1, sk1, sc2 + RC1
*corner for the 9th row – Vst1 between 1st & 2nd dc of dc3 into 1ch of prev.row, ch1, Vst1 between 2nd & 3rd dc of dc3 into 1ch of prev.row
10th row – h2ch, sc2, ch3, sk2, sc3, ch3, dc7 into Vst, ch3, sk1 sc, sc3 ch3, corner*, (ch3, sk1 sc, sc3, ch3, dc7 into VSt) x 2, ch3, sk1 sc, sc3, ch3, corner, (ch3, sk1 sc, sc3, ch3, dc7 into VSt) x 3, ch3, sk1 sc, sc3, ch3, corner, (ch3, sk1 sc, sc3, ch3, dc7 into VSt) x 2, ch3, sk1 sc, sc3, ch3, corner, ch3, sk1 sc, sc3, ch3, dc7 into Vst, ch3, sk1 sc, sc3, ch3, sk2, sc2 + RC2
*corner for the 10th row – dc7 into Vst, ch1, dc7 into Vst
11th row – h3ch, dc2, (ch3, inc1 into 2nd sc ch, ch3, sk1 dc, sc5) x 2, corner*, (sk1 dc, sc5, ch3, inc1 into 2nd sc ch, ch3) x 3, sk1 dc, sc5, corner, (sk1 dc, sc5, ch3, inc1 into 2nd sc ch, ch3) x 4, sk1 dc, sc5, corner, (sk1 dc, sc5, ch3, inc1 into 2nd sc ch, ch3) x 3, sk1 dc, sc5, corner, (sk1 dc, sc5, ch3, inc1 into 2nd sc ch, ch3) x 2, dc2 + RC2
*corner for the 11th row – ch2, inc1 under ch, ch2
Step 5
12th row – h3ch, dc2, ch2, Vst1 into inc, [ch3, sk1 sc, sc3, ch3, Vst1 into inc1] to end; ch2, dc2 + RC2
13th row – h3ch, dc2, dc7 into Vst, [ch3, inc1 into 2nd sc ch, ch3, dc7 into Vst] to end; dc2 + RC1
14th row – h2ch, sc2, ch1, sk1, sc5, [ch3, Vst1 into inc, ch3, sk1 dc, sc5] to last 3 chs; ch1, sk1, sc2 + RC1
15th row – h2ch, sc2, ch3, sk2, sc3, [ch3, dc7 into Vst, ch3, sk1 sc, sc3] to last 4 chs; ch3, sk2, sc2 + RC2
Step 6
16th row – h3ch, dc2, (ch3, inc1 into 2nd sc ch, ch3, sk1 dc, sc5) x 2, ch3, corner*, ch3, (sk1 dc, sc5, ch3, inc1 into 2nd sc ch, ch3) x 3, sk1 dc, sc5, ch3, corner, ch3, (sk1 dc, sc5, ch3, inc1 into 2nd sc ch, ch3) x 4, sk1 dc, sc5, ch3, corner, ch3, (sk1 dc, sc5, ch3, inc1 into 2nd sc ch, ch3) x 3, sk1 dc, sc5, ch3, corner, ch3, (sk1 dc, sc5, ch3, inc1 into 2nd sc ch, ch3) x 2, dc2 + RC2
*corner for the 16th row – dc3 into 2nd sc ch
17th row – h3ch, dc2, ch2, (Vst1 into inc, ch3, sk1 sc, sc3, ch3) x 2, corner*, ch3, sk1 sc, sc3, ch3, (Vst1 into inc, ch3, sk1 sc, sc3, ch3) x 3, corner, ch3, sk1 sc, sc3, ch3, (Vst1 into inc, ch3, sk1 sc, sc3, ch3) x 4, corner, ch3, sk1 sc, sc3, ch3, (Vst1 into inc, ch3, sk1 sc, sc3, ch3) x 3, corner, (ch3, sk1 sc, sc3, ch3, Vst1 into inc) x 2, ch2, dc2 + RC2
*corner for the 17th row – Vst1 between 1st & 2nd dc of dc3 into 1ch of prev.row, ch1, Vst1 between 2nd & 3rd dc of dc3 into 1ch of prev.row
Repeat the pattern starting from the 3rd row, increasing a number of repeats/chains until your front and back parts will be wide enough to your chest circumference accordingly.
18th row crochet like 3rd row, working more repeats in each part.
Step 7
Join front and back parts together
19th row – h2ch, sc2, ch1, sk1, (sc5, ch3, Vst1 into inc, ch3, sk1 dc) x 2, sc5, ch2, Vst1 under ch, ch5, sk shoulder part, Vst1 under ch, ch2, (sk1 dc, sc5, ch3, Vst1 into inc, ch3) x 5, sk1 dc, sc5, ch2, Vst1 under ch, sk shoulder part, Vst1 under ch, ch2, (sk1 dc, sc5, ch3, Vst1 into inc, ch3) x 2, sk1 dc, sc5, ch1, sk1, sc2 + RC1
20th row – h2ch, sc2, ch3, sk2, sc3, (ch3, dc7 into Vst, ch3, sk1 sc, sc3) x 2, ch3, dc7 into Vst, ch3, sk1, sc3, (ch3, dc7 into Vst, ch3, sk1 sc, sc3) x 6, ch3, dc7 into Vst, ch3, sk1, sc3, (ch3, dc7 into Vst, ch3, sk1 sc, sc3) x 3, ch3, sk2, sc2 + RC2
Step 8
21st row = 6th row
22nd row = 12th row
23rd row = 13th row
24th row = 14th row
25th row = 15th row
Repeat the pattern starting from the 21st row until you crochet to about waist line, then continue crocheting the 5 above rows using a larger size crochet hook to widen the garment.
Step 9
Sleeves
Attach the yarn underarm above 2nd sc ch.
1st round – ch5, dc1 into sm.ch, ch3, sk1 dc, sc5, ch3, [Vst into inc, ch3, sk1 dc, sc5, ch3] to end + sl.st.1 into 3rd ch
2nd round – ch3, dc6 into Vst, ch3, sk1 sc, sc3, ch3, [dc7 into Vst, ch3, sk1 sc, sc3, ch3] to end + sl.st.1 into 3rd ch
3rd round – ch1, sc5, ch3, inc into 2nd sc ch, ch3, [sk1 dc, sc5, ch3, inc into 2nd sc ch, ch3] to end + sl.st.1 into 2nd ch
4th round – ch1, sc3, ch3, Vst into inc, ch3, [sk1 sc, sc3, ch3, Vst into inc, ch3] to end + sl.st.1 into 2nd ch
5th round – sl.st.1, ch3, dc1 into sm.ch, ch3, dc7 into Vst, ch3, [inc1 into 2nd sc ch, ch3, dc7 into Vst, ch3] to end + sl.st.1 into 3rd ch
Repeat the pattern starting from the 1st round. After you crochet about 15 rounds, continue crocheting the 5 rounds using a smaller size crochet hook until you crochet the desire length of each sleeve.
Step 10
Borders
Work reverse single crochet to end.
Step 11
Tie – ch40, h2ch, sl.sts to end

Abbreviations
ch – chain
dc – double crochet
h#ch – insert a hook into a 3rd or 2nd chain from your hook
inc – increase – dc2 into 1ch
RC – returning chain
sc – single crochet
sm.ch – the same base chain
Vst – V stitch – dc1, ch2, dc1 into 1ch or inc
Crochet lace jacket - two parts video tutorial

Comments
Hola, no hablo tu idioma,
Hola, no hablo tu idioma, pero trato de seguir tus manos para hacer estos bellos tejidos, espero poder hacerlo y que me quedé igual de bello que el tuyo, quisiera saber con cuantas cadenas empiezo para una talla L, espero me puedas ayudar
Hola,
Hola,
Empezar con 124 cadenas. Mira mi primer comentario a Luz.
Hi Sana,
Hi Sana,
Will it make a big difference if I use a 4.5mm hook instead of a 4.25mm?
hi sana
hi sana
can you use 4.5mm crochet hook instead of 4.25? How will it impact the pattern
Hi aurelia123,
Hi aurelia123,
If you use a larger size crochet hook, it should widen your garment. I would suggest to work a small sample of the pattern to learn your gauge before starting the big project. Happy crochet!
why are most clothes not
why are most crochet warn items not fitted or made for us bigger gals?
(2X-5X)
Hi sparkie925,
Hi sparkie925,
Please write me your size, and I'll suggest you how to adjust the pattern. Happy crochet!
what does RC-returning chain
what does RC-returning chain mean on ur abbreviation?
RC = chains at the very end
RC = chains at the very end of a row before turning your work to the other side of a garment. Happy crochet!
Hello Sana please can you
Hello Sana please can you tell me how many chains I need to make for a UK size 38.
Pages