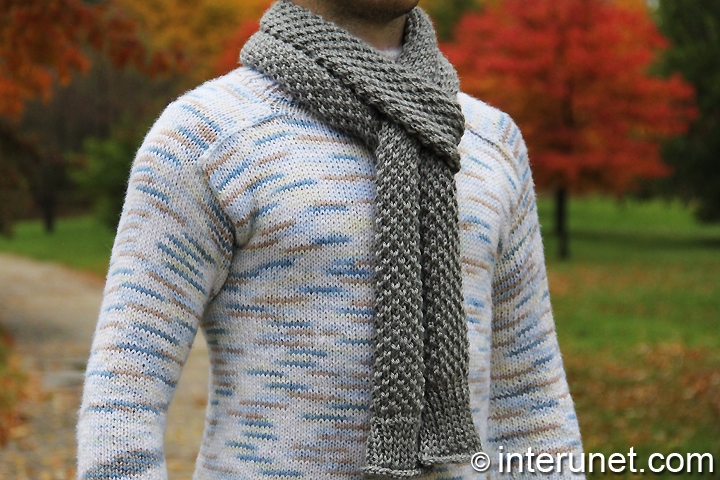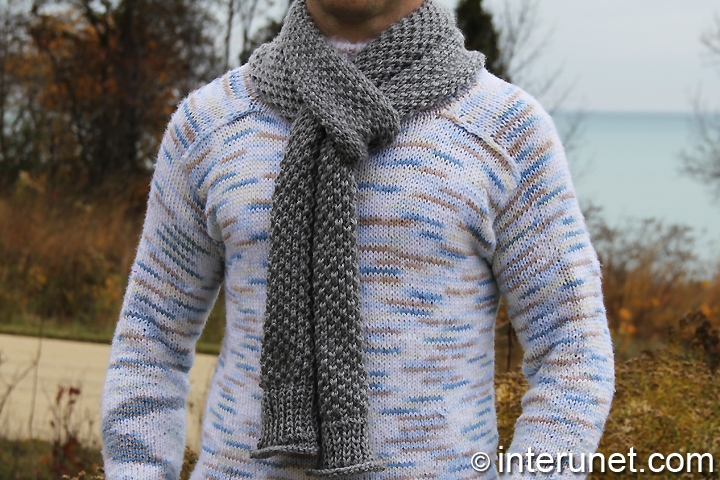
Yarn - Red Heart Soft (color - Charcoal gray) / worsted 4 / Net Weight - 113 g / 212 yds (194 m) / 1.5 balls needed
Needles - 29 in. long circular needles US 5
Scarf Length - 85 inches
Complexity - Easy

Men’s scarf knitting pattern
Step-by-step knitting instructions
Step 1
Cast on 22 stitches on two needles in order to make the loops bigger. That way it will be easier to knit the first row.
Remove one needle.
Step2
1st row (right side) – knit all stitches to end
2nd row (wrong side) – sl.st.1, purl all stitches to end
3rd row – sl.st.1, k to end
4th row – sl.st.1, p to end
Step3
Ribbing
1st row (right side) – sl.st.1, [p1, k1] to last one st; p1
2nd row – sl.st.1, [sl.st.1*, k1] to last one st; p1
*keep yarn in front of your work
Alternate 1st and 2nd rows for 12 rows.
Step 4
1st row – sl.st.1, k to end
2nd row – sl.st.1, p to end
Step 5
Pattern
1st row (right side) – sl.st.1, [yo, sl.st.1**, k1] to last one st; k1
**keep yarn behind your work
2nd row – sl.st.1, [p1, p st and loop together] to last 1st; p1
3rd row – sl.st.1, [k1, yo, sl.st.1**] to last one st; k1
4th row – sl.st.1, [p st and loop together, p1] to last 1st; p1
Repeat the above till you reach the desired length of the scarf.
Step 6
Repeat steps 4, 3, and 2.
Step 7
Cast off, secure, and hide the tail of the yarn. I used all the yarn up for the scarf. However, it might not be your case and you may need to cut the yarn after casting off and then secure it.
Abbreviations
[ ] - repeat
k – knit
p – purl
sl.st. – slip stitch
st – stitch
yo – yarn over
Knit a scarf for a man

Comments
Hi Nikita,
Hi Nikita,
I'll show all the steps in a new video. I'll write you when it will be ready. Happy knitting!
The remaining steps you may
The remaining steps you may find in this video https://youtu.be/IpLcTuyMd2o. Happy knitting!
Hi, i absolutely love this
Hi, i absolutely love this
Hi, i absolutely love this
Hi, i absolutely love this pattern. I have a question please. How would I knit this scarf without curling? Can you explain step 5 to me please as I don’t understand.
You have said to knit 24sts and add a stitch. Is that a knit stitch for each step? For step 5
would I just follow the steps exactly the way they are with 24 sts.
Do I slst yo twice?
Or do I slst, slst yo 1 and then knit 2 ?
can you please explain each row for step 5 how I would carry it out.
Hi Anneka,
Hi Anneka,
Please write me the minute of the video where I said 'knit 24sts and add a stitch'.
You may watch the video starting from about 8:52 to see how I started the step 5.
On my Youtube channel I have a full video of the scarf pattern.
Happy knitting!
Hi Sana,
Hi Sana,
Thank you very much for the response. You didn’t specifically say add ‘24sts’ in the video. I read one of your comments to another member.
I completed the scarf but I had to pull it apart due to curling :(
I’m making the scarf with only step 5 so from the beginning to end i only used step 5.
so for the scarf not to curl how would I carry out step 5 so it does not curl?
If you can please explain to me how to bypass the curling in step 5 that would be great.
Really appreciate the response!! Hope to hear from you soon again. Thank you Sana
For more reference this is
For more reference this is how the scarf looks with only step 5. But when I lift the scarf up it unfortunately curls. Can you please help me so the curl doesn’t happen
Thank you
Hi Anneka,
Hi Anneka,
I've designed the scarf to look like that. If I wanted the scarf look different, I would change the pattern slightly. Cast on any even number of chains.
1st row (right side) – sl.st.1, p1, [yo, sl.st.1**, k1] to last 2 sts; p1, k1
**keep yarn behind your work
2nd row – sl.st.1, k1, [p1, p st and loop together] to last 2 sts; k2
3rd row – sl.st.1, p1, [k1, yo, sl.st.1**] to last 2 sts; p1, k1
4th row – sl.st.1, k1, [p st and loop together, p1] to last 2 sts; k2
Repeat the above till you reach the desired length of the scarf.
Hi thanks Sana,
Hi thanks Sana,
I’ve followed the new pattern and knitted half way through and the scarf still curled :( it’s not as bad as before though.
But thanks for the pattern :)
Pages