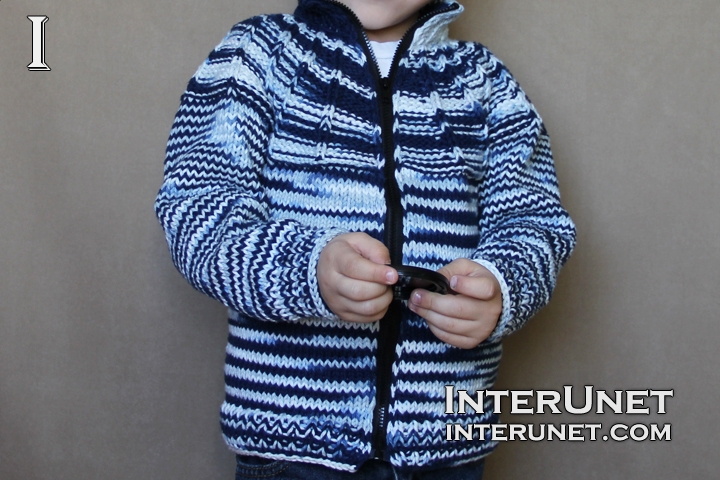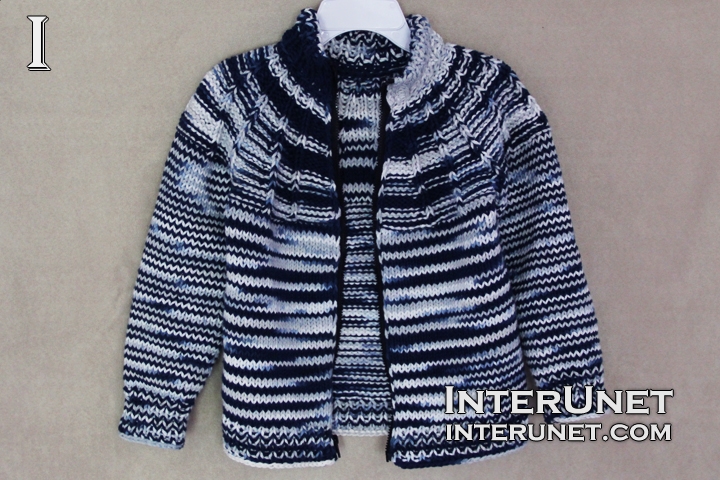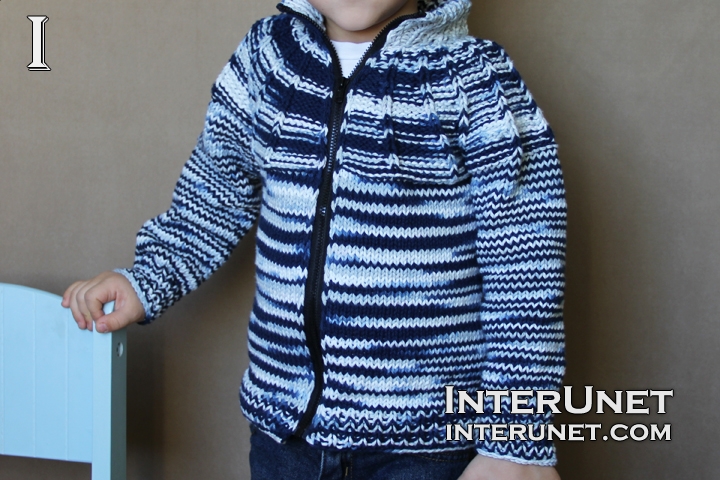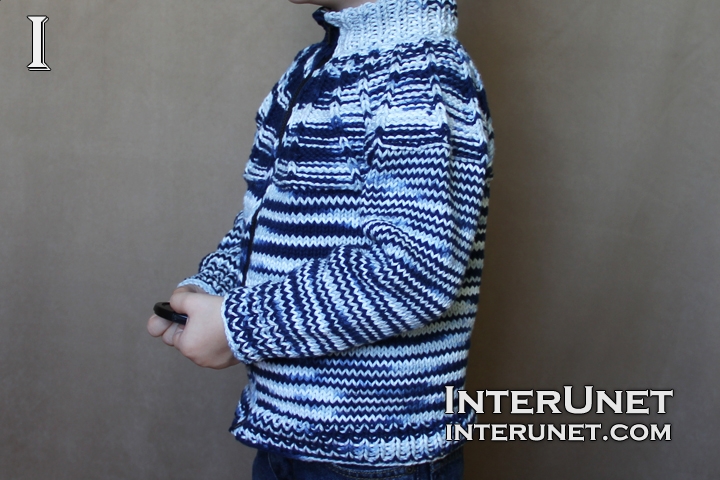
Yarn - Bernat Handicrafter (color: cool grey ombre) / medium 4 / 12 oz (340 g) / 608 yards (556 m) / less than 1ball needed
Knitting Needles - Circular 29" Size 5 (3.75 mm), circular 16" Size 5 (3.75 mm), and double pointed US 3 (3.25 mm) or other size needles needed for the gauge
Gauge - About 16 stitches go into 4 inches
Jacket Size - 3T – 4T
Complexity - Beginner friendly pattern

Jacket knitting pattern – long-sleeve sweater with a zipper
Step-by-step knitting instructions
Knit the jacket from the top (neck line) to bottom.
Step 1
Cast on loosely (or using two knitting needles) 41 stitches or multiples of 2 sts plus 1 additional st. Make as many sts as necessary to fit around the neck line.
Step 2
1st row (wrong side) – sl.st.1, [k1, p1] to last 1st; k1 and turn the work to the right side
Starting from the second row, increase 10 sts every other row making about even intervals between each increase.
2nd row (right side) – sl.st.1, [p1, k1, inc1, k1] to end
3rd and all odd rows – sl.st.1, knit all k sts and purl all p sts
4th row – sl.st.1, [inc1, k1, p2, k1] to end
6th row – sl.st.1, [p2, k1, p1, inc1, k1] to end
8th row – sl.st.1, [p1, inc1, k1, p3, k1] to end
10th row – sl.st.1, [p3, k1, p2, inc1, k1] to end
12th row – sl.st.1, [p2, inc1, k1, p4, k1] to end
14th row – sl.st.1, [p4, k1, p3, inc1, k1] to end
16th row – sl.st.1, [p3, inc1, k1, p5, k1] to end
18th row – sl.st.1, [p5, k1, p4, inc1, k1] to end
20th row – sl.st.1, [p4, inc1, k1, p6, k1] to end
22th row – sl.st.1, [p6, k1, p5, inc1, k1] to end
24th row – sl.st.1, [p5, inc1, k1, p7, k1] to end
26th row – sl.st.1, [p7, k1, p6, inc1, k1] to end
28th row – sl.st.1, [p6, inc1, k1, p8, k1] to end
29th row = 3rd row
You should have 181 stitches in total.
Step 3
Join the back and two front parts together
30th row – sl.st.1, p8, (k1, p8) x 2, slide 37 sts onto a safety pin, p8, (k1, p8) x 5, slide 37 sts onto a second safety pin, (p8, k1) x 3
31st row – sl.st.1, k17, p1, k16, p1, (k17, p1) x 2, k16, p1, k18
Step 4
Stockinette stitch
32nd row (right side) – sl.st.1, k to end
33rd row – sl.st.1, p to end
Alternate the 32 and 33 row for about 50 rows or until you knit the desire length of the jacket.
Step 5
Ribbing
Knit 10 rows – k1 x p1
Cast off all the stitches. Cut the yarn and secure it.
Step 6
Sleeves
Slide the sts from a safety pin onto circular needles or double pointed needles, attach the yarn, and pick up about 5 sts underarm in order not to develop a hole.
Knit all sts in the round decreasing 1st every 5 rounds until you reach the desire length of the sleeve or have about 32 sts left. Then work the ribbing – k1 x p1. Cast off all the sts, cut the yarn, and secure it.
Step 7
Collar
Pick up loosely 41 sts using other loops of the initial cast on sts. Then work the ribbing – k1 x p1 for about 20 rows. Cast off all the sts, cut the yarn, and secure it.
Step 8
Zipper
Fix a 16 inch long zipper (or as long as necessary) into place from the bottom of the jacket to the middle of the collar with safety pins. Fold the other half of the collar to wrap it around the zipper to the neck line and hand sew all the way around the neck line from the wrong side of the garment. Then sew the zipper onto the garment permanently (hand sew or use a sewing machine).

Abbreviations
inc – increase – make above one purl stitch two p sts. For that, place a loop of the previous row onto a left needle then purl these two loops
k – knit stitch
p – purl stitch
sl.st. – slip stitch – slide one stitch from the left needle to the right one without knitting it
st – stitch

Jacket knitting pattern - knit a jacket for a child

Comments
For dijana vidra,
For dijana vidra,
To make a smaller size jacket, it is necessary to stop increasing sts when your front and back parts will be wide enough to the child's chest circumference (leave some space for growth). The exact number of rows to work will depend on your gauge/tension also. Then join the front and back parts together similar to how I did (knit the pattern for the 1st front part, slip 1st shoulder part on a safety pin, continue knitting the back part, slip 2nd shoulder part on a safety pin, and then finish knitting the 2nd front part). Please ask questions (if any) on this page. Happy knitting!
Hi Sana
Hi Sana
Thank you for your reply.
Here is my question, if I stop increasing at row 22, how many stitches do I need to separate for sleeves?
Is there a formula to dividing stitches for sleeves?
Please let me know.
Hi Dijana,
Hi Dijana,
To join front and back parts together, I used 3 repeats for each front part, 4 repeats for each shoulder part, and 6 repeats for the back part (Video - 8:20).
You may work the 22nd row as follows:
22nd row - sl.st.1, p6, (k1, p6) x 2, slide 29 sts onto a safety pin (shoulder part), p6, (k1, p6) x 5, slide 29 sts onto a safety pin, (p6, k1) x 3.
Happy knitting!
Excellent. Thanks for your
Excellent. Thanks for your help
Hi, thanks a lot for your
Hi, thanks a lot for your amazing video, as well as the great instruction.
I'm making this cardigan for my son, but i'm still wondering. When i finish the 29th row, the width seems to be enough. But the length doesn't reach the under-arm. (As i mesure, i got 12cm from shoulder to the under-arm. But there are only about 9-10cm after finishing row 29th)
So as your opinion, do i have to stop increasing and just knit until i got the length i need?
Thank you so much!
Hi Sabine,
Hi Sabine,
Thanks for the good question. Yes, I would stop increasing sts also (otherwise, the sleeves might be too wide). Happy knitting!
Hi, this video is great. Very
Hi, this video is great. Very well explained and easy to follow. I am trying to make the same thing with Lion brand 6 ply (super bulky) wool. How many to cast on? How many to increase every row?
Hi piyali,
Hi piyali,
It will depend on your gauge/tension. I would suggest to knit a small sample first before starting the project to know your gauge, and then estimate how many sts it is necessary to work to a child's chest circumference accordingly. If you write me your gauge, I'll be able to help you out. Happy knitting!
Hi sana,
Hi sana,
this is fantastic jacket. I have 4ply yarn for which i need to use 3.5 to 4.00 mm needles. I want to make it for 13 years old boy... please help me with the pattern
To help you out. I need to
To help you out. I need to know your gauge and the boy's chest circumference.
Pages