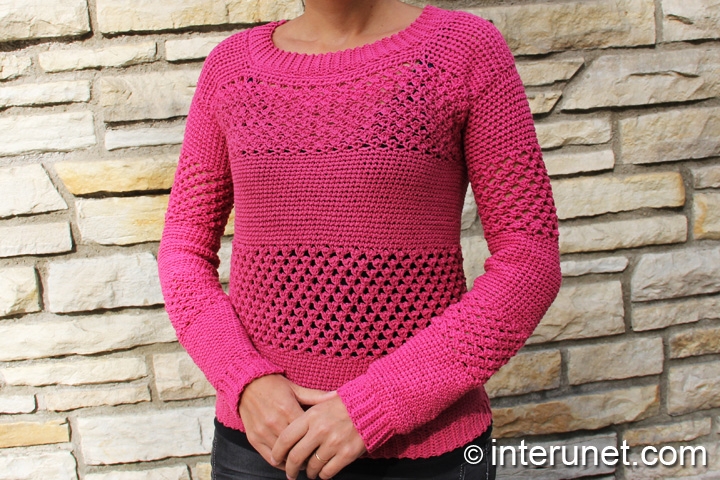
Yarn - Bernat Cotton-ish (cotton candy) / light 3 / 2.4 oz (70 g) / 282 yards (258 m) / 4 balls needed
Hook - G/6 (4.25 mm) and F (3.75 mm) or other size hooks needed for the gauge
Gauge - About 16 chains go into 4 inches (10 cm.)
Sweater Size - US 6
Complexity - Intermediate

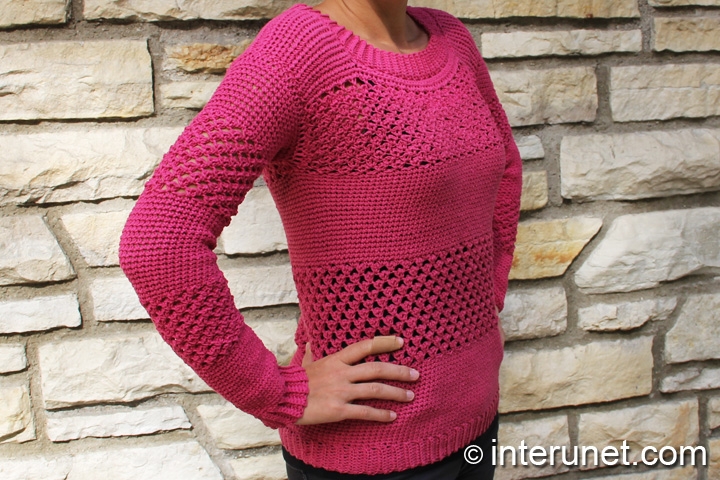
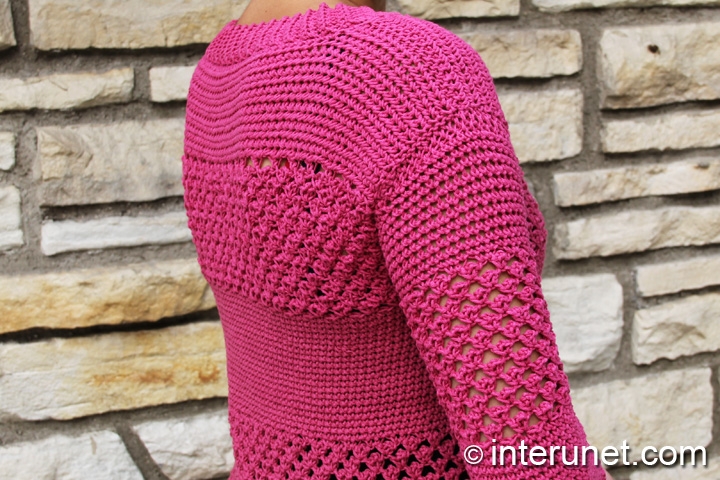
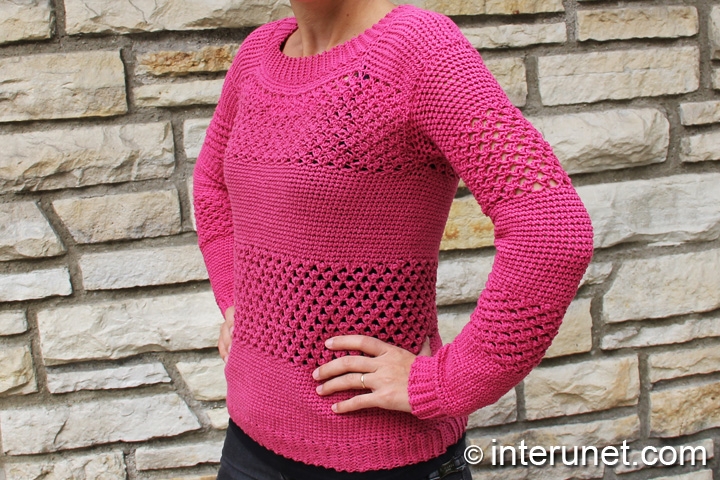
Women’s long sleeve sweater crochet pattern - raspberry stripes stitch
Step-by-step crochet instructions
Step 1
Bottom ribbing
With a larger size crochet hook, make a foundation chain of 11 chain stitches
1st row – sc to end plus RC1
2nd row – blsc to end + RC1
3 -120 rows = 2nd row
The ribbing should have 120 rows or 60 ribs (each rib equals 2 rows). Join the very last row of the ribbing with very 1st one. Flip the garment to the wrong side to hide the seam. Now your wrong side becomes your right side.
Step 2
Main part
First stripe - 20 single crochet rounds
1st round – work on the edge of the ribbing sc1 in each row and one extra sc every 6 rows or 3 ribs. At the end of the 1st round you should have 140 chains in total.
2 – 19 rounds – sc to end
20th round – sc to end plus sl.st.1
Second stripe - Raspberry pattern
*bump – (sc1, ch3, sc1) in the same base chain
21st round – ch1, [bump*1, ch2, sk2] to end
22nd round – [bump1, ch2, skip bump and the 1st ch. of the prev. round] to end
23 – 32 rounds = 22nd round
Third stripe - 20 sc rounds
33rd round – [ch1 (above a bump of the prev.round), sc2] to end
34 – 51 rounds – sc to end
52nd round – sc to end plus sl.st.1
Step 3
Front part
(use half of your chains [70chs])
Raspberry pattern
1st row (right side) – ch2, [bump1, loose ch1, sk2] to end; work sc1 in the last chain of the row + RC2
2 – 11 rows – h4ch, [bump1, loose ch1, sk bump] to end; work sc1 in the last chain of the row + RC2
12th row – like 2nd row, but do not work returning chains
Single crochet rows
13th row – ch1, [sc1, ch2 (above a bump of the prev.row)] to end; work sc1 in the very last ch. + RC1
14th row – blsc to end + RC1
Step 4
Front shoulder pieces
(work 16 chains)
15th row (right side) – sc to end + RC1
16th row (wrong side) – blsc to end plus RC1
17, 19, 21, 23, 25, and 27 = 15th row
18, 20, 22, 24, 26, and 28 = 16th row
Step 5
Back part
Attach the yarn on the 52nd round (last round). Crochet the back part similar to the front part.
Work the 12 rows of the raspberry pattern for the back part totally the same as for the front part.
Sc rows
13th row (back part) = 13th row (front part)
14th row (back part) = 14th row (front part)
15th row – sc to end + RC1
16, 18, 20, 22, and 24 = 14th row
17, 19, 21, and 23 = 15th row
Step 6
Back shoulder pieces
(work 16 chains)
26 and 28 rows = 14th row
25 & 27 rows = 15th row
Step 7
Join the front and back shoulder pieces together from the wrong side.
Step 8
Sleeves
Work sleeves similar to the main part. Start with the ribbing and make a foundation chain of 11 chain sts. Crochet 30 rows the same way as you worked the bottom ribbing. Join the very last row with the 1st one and flip the fabric to the wrong side.
First stripe - 20 sc rounds
On the edge, [work sc6, inc1] to end. At the end, you should have 35 chains.
Work sc35 for 19 more rounds
Second stripe - Raspberry pattern
Crochet 12 rounds of the raspberry pattern
Third stripe - 20 sc rounds
Increase 3 chains and work sc38 to end
Fourth stripe - Raspberry pattern
Repeat the 12 rounds of the raspberry pattern
Fifth stripe - sc rounds
Work 11 sc rounds increasing one chain in each round. You should have 49 chains at the end.
Step 9
Join sleeves into the garment from the wrong side.
Step 10
Neckline
1st round – sc to end (use a smaller size crochet hook)
Neck ribbing
Make a ribbing of 100 rows and join it to the neckline from the wrong side. Work the ribbing similar to the bottom or sleeve ribbings.
Hint: crochet fewer rows for the ribbing compare to the number of sc chains you worked for the neckline.

Abbreviations
ch – chain
blsc – back loop single crochet
h4ch – insert a hook into the 4th chain from the hook
inc – increase a chain
RC – returning chain
sc – single crochet
sl.st. – slip stitch

How to crochet a sweater - raspberry stitch stripes

Comments
Thank you so much!!
Thank you so much!!
I was wondering if you use
I was wondering if you use the smaller hook for the neckline ribbon or the size G that the main sweater was worked with. Thank you!
Hi Bobbi,
Hi Bobbi,
Thanks for the good question. I used the same size crochet hook, but you may use a small one if desired. For the neckline, I picked up 120 chains (step 10) and created 100 ribbing rows. So, I joined one chain of the neckline with one row of the neck ribbing and skipped every 6th chain because I had fewer ribbing rows compare to neckline chains. Happy crocheting!
I am trying to make this a
I am trying to make this a size 16 (45" bust measurement) - can you help me with what I need to do for body and sleeves? Thank you so much for this pattern and the video. This is my first sweater :) Very excited.
You're welcome labshop. For
You're welcome labshop. For the 45" chest circumference, I would work as many bottom ribbing rows as necessary to fit it snugly around your hips and pick up 176 chains, assuming that your gauge/tension will be the same as mine. The patter requires multiples of 3 chs plus 2 additional chs or (3 x 58) + 2 = 176 chs. I count all the chains including the chain on a hook. You should work the sleeves similarly to the body (step 8). Happy crocheting!
Hello! Thanks a ton for this
Hello! Thanks a ton for this video, I'm loving the sweater so far :)
A small question... at 22:21 you show the front part, but how many rows of alternating single crochet and reverse single crochet do we have to do? I don't think it's mentioned in the video, I tried listening several times :)
Hi k@vi,
Hi k@vi,
Thanks for the good question. Please watch the video starting from about 22:34 where I said to alternate the rows for 12 rows or read above the step 5 - rows 13 - 24. Happy crocheting!
My raspberry stitch stripe is
My raspberry stitch stripe is not turning out how it looks in the picture. The gaps between the rows are small, so the bumps stick out and overlap and there isn't a holey look like in the tutorial. I only have a 5 or 6 mm (I can't remember exactly which size it is) hook. Could that be the problem? If so, is there a way to fix it without undoing the whole sweater?
Hi Syldiin,
Hi Syldiin,
You may attach a picture of the pattern (close look). That way it will be easier for me to say what might be wrong. Thank you.
asalamoalaikum......madam i'm
asalamoalaikum......madam i'm 23 year old..... the size u made it will suitable for me or not?
Pages