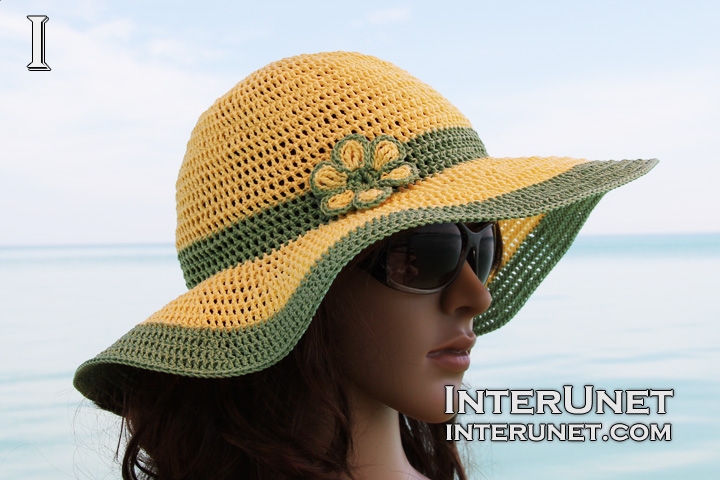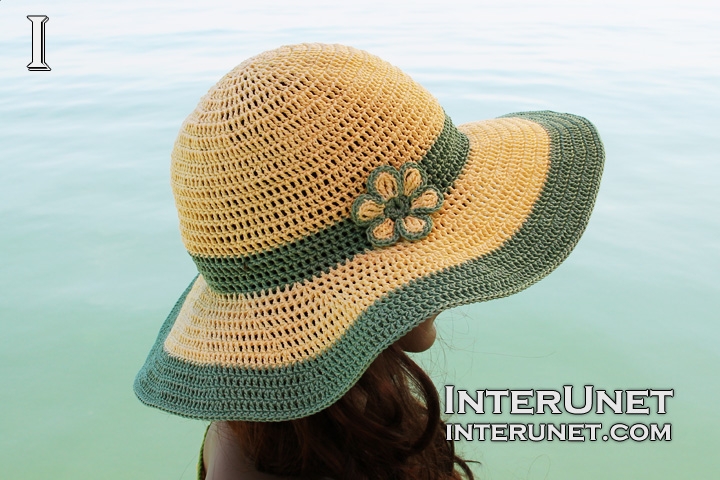
Yarn - Aunt Lydias crochet thread Fashion 3 / weight 1 super fine / 137 m (150 yd) / Less than 1.5 balls of the main color and less than 1 ball of the second color needed
Hook - 1 / 2.75 mm or other size hook needed for the gauge
Gauge - About dc21 in 4 inches (10 cm)
Complexity - Easy

Women’s summer hat crochet pattern
Step-by-step crochet instructions
Step 1
Foundation chain
Make a foundation chain of 7 chains. Join it into a ring with the slip stitch.
Step 2
1st increase
1st round – ch3, dc13 into the ring plus sl.st.1 into 3rd ch. after starting point
2nd round – ch3, dc1 into sm.ch., inc1 to end + sl.st.1
3rd round – ch3, dc1 into sm.ch., dc1, [inc1, dc1] to end + sl.st.1
4th round – ch3, dc1, inc1, [dc2, inc1] to end + sl.st.1
5th round – ch3, dc1 into sm.ch., dc3, [inc1, dc3] to end + sl.st.1
6th round – ch3, dc1, inc1, [dc4, inc1] to end; dc2 + sl.st.1
7th round – ch3, dc3, inc1, [dc5, inc1] to end; dc1 + sl.st.1
8th round – ch3, dc5, inc1, [dc6, inc1] to end + sl.st.1
Step 3
Work the pattern without increasing chains
9th round – ch3, dc to end + sl.st.1
10 – 16 rounds = 9th round
17 – 20 rounds = 9th round (crochet with different color yarn)
Step 4
2nd increase
Begin to increase chains starting from the 8th round
21st round = 8th round
22nd round – ch3, dc1 into sm.ch., dc7, [inc1, dc7] to end + sl.st.1
23rd round – ch3, dc1, inc1, [dc8, inc1] to end; dc6 + sl.st.1
24th round – ch3, dc3, inc1, [dc9, inc1] to end; dc5 + sl.st.1
25th round – ch3, dc5, inc1, [dc10, inc1] to end; dc4 + sl.st.1
26th round – ch3, dc7, inc1, [dc11, inc1] to end; dc3 + sl.st.1
27th round – ch3, dc9, inc1, [dc12, inc1] to end; dc2 + sl.st.1
Continue crocheting round using a different color yarn
28th round – ch3, dc11, inc1, [dc13, inc1] to end; dc1 + sl.st.1
29th round – ch3, dc13, inc1, [dc14, inc1] to end + sl.st.1
30th round – ch3, dc1 into sm.ch., dc15, [inc1, dc15] to end + sl.st.1
31st round – ch3, dc1, inc1, [dc16, inc1] to end; dc14 + sl.st.1
Step 5
Edges/borders
Work sc to end.
Cut the yarn and secure it.
Step 6
Shape the hat
Apply a fabric stiffener to make the hat rigid/hard.
Decorate it with one or more flowers.

Abbreviations
ch – chain
dc – double crochet
inc – increase one chain – work dc2 into one base chain
sl.st. – slip stitch

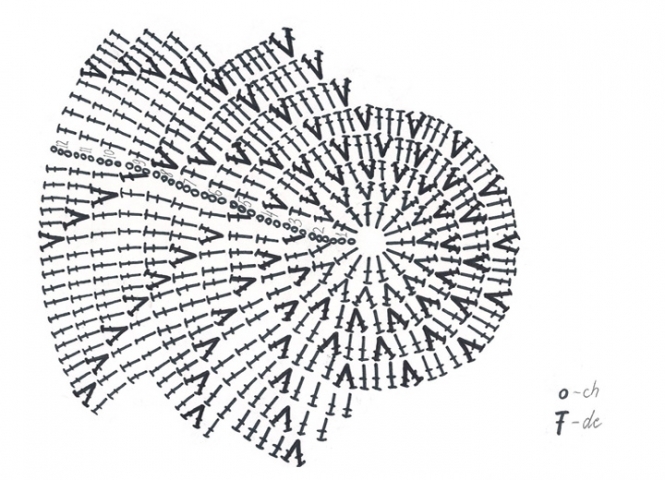
Hat crochet chart
How to crochet summer sun protective hat

Comments
This hat is beautiful and I
This hat is beautiful and I can't wait to make it. I am finishing up a big project right now so when I am finished with that I will start on this!! I love your color combination!
Hi Goldie,
Hi Goldie,
I'm glad that you liked the hat and color combination. Thank you for the comment. I appreciate it. Happy crocheting!
This is such a beautiful hat!
This is such a beautiful hat! I hope I will be able to make one as beautiful as yours. What size head circumference is this for? If I need to make it larger, how do I do it?
Hi judydemott,
Hi judydemott,
I'm glad that you liked the hat pattern. Thanks for the comment and good question. The hat's size is S/M and for that I worked 8 increase rounds. If you need to make a larger one, it is necessary to crochet one or more increase rounds after the first 8 rounds. 9th rounds work like 22nd round, 10th round crochet like 23 round and so on. When you begin working the brim, start from the last increase round. Happy crocheting!
Can you please provide
Can you please provide instructions for the flower embellishment? Love your work and cant wait to finish it.
Hi Shoffman67,
Hi Shoffman67,
Thanks for the good question. Please visit http://interunet.com/crochet-flower. I'm glad that you liked my work. Thank you for the comment. Enjoy your crocheting!
having issues o the brim
having issues o the brim im a watcher a doer but i cant understand when you just speak on the brim , im on the 10th row right now was expecting the brim pattern like you show the hat do you have the brim pattern? thank you!
Hi Bernie A Wishinski,
Hi Bernie A Wishinski,
Thanks for the good question. Yes, you may read the step 4 (second increase) to work the hat's brim. It is necessary to continue crocheting dc rounds gradually increasing intervals between each increase. Happy crocheting!
Hi there! Thank you so very
Hi there! Thank you so very much for thispattern. I absolutely love this hat! Your colors are beautiful! After 30 years of NOT crocheting, i just finished one of your hats for myself but I'm having a terrible time sniffing it. Will you send me instructions on how you did it? Thanks again and God bless!
Hi redirpot,
Hi redirpot,
Thanks for the good question. In the written instruction I suggested to use just a fabric stiffener because many people would prefer just to buy it rather than make their own. I used a homemade fabric stiffener. Ingredients: 1 cup of water and 1 table spoon of potato starch. Directions: boil the water and pour slowly the potato starch into the boiling water stirring the two ingredients together all the time. Again, you may purchase the potato starch or make your own. Boil it for about 2 - 3 minutes. Add some water (the less water you put, the harder fabric will be). Then soak the hat in the liquid and shape it. I put my hat over an old cap that I did not use anymore.
I applied the fabric stiffener twice. First time, I added about 3/4 cup of water after the boiling. When the hat was dried, the hat's crown was fine, but I felt like the brim was not hard enough. The second time, I did not add any water after the boiling and applied it only on the brim. Then it became hard enough, the way I wanted. Hope this will help.
Pages