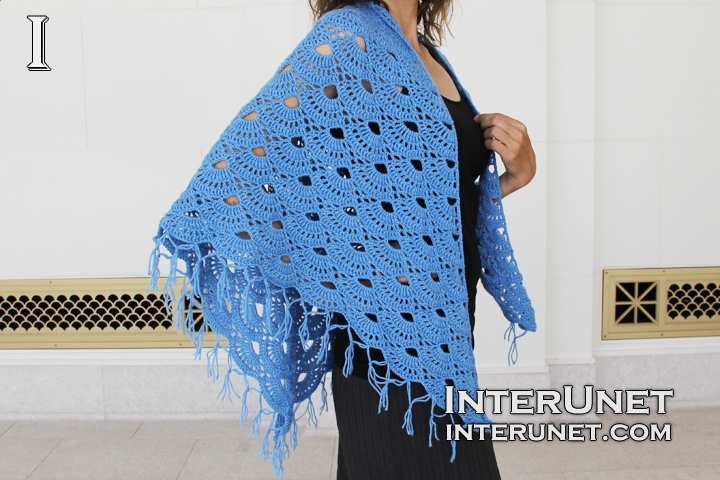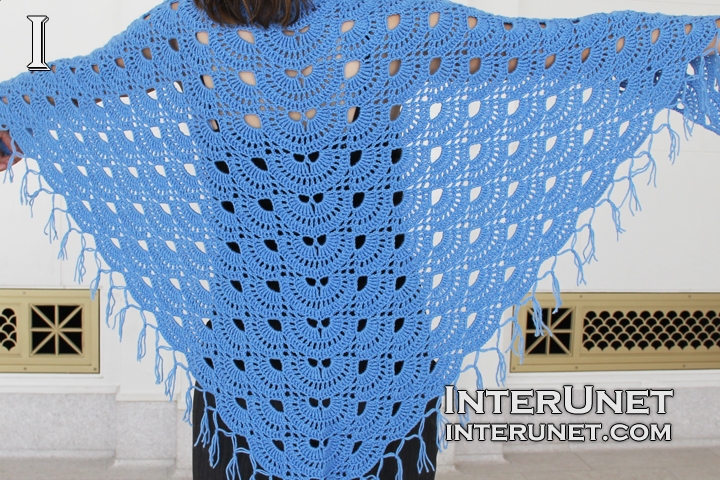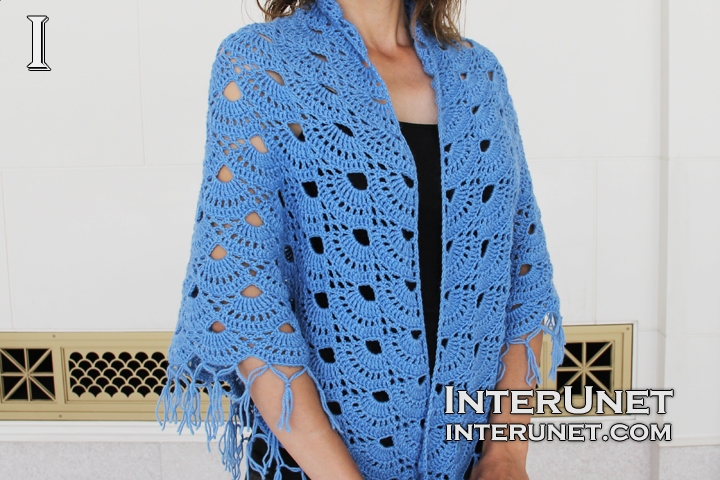
Yarn - Lion Brand Yarns Baby Soft (color: Bluebell) / light 3 / 5 oz (140 g) / 459 yd (420 m) / about 2.5 balls needed
Hook - E/4 – 3.50 mm or other size hook needed for the gauge
Gauge - One shell/repeat go into about 3 inches (7.6 cm)
Shawl Measurements - Width 62 inches (157.5 cm) and Length 32 inches (81 cm)
Complexity - Beginner friendly stitch

Shawl crochet pattern – great project to learn how to crochet
Row-by-row crochet instructions
Make a foundation chain of 10 chs and join it into a ring with the slip stich.
1st row (right side) – ch4, trc15 into a ring + RC4
2nd row (wrong side) – h6ch, dc1, [ch1, dc1] to end + RC3
3rd row – h5ch, dc to end + RC8
4th row – h12ch, sc1, (ch3, sk2, sc1) x 3, (ch5, sk2, sc1) x 2, (ch3, sk2, sc1) x 3, ch5, sk2, dc1 + RC4
5th row – trc7 under arch of 5 chs, sc1 under arch of 3 chs, (ch3, sc1 under arch of 3 chs) x 2, (trc8 under arch of 5 chs) x 2, sc1 under arch of 3 chs, (ch3, sc1 under arch of 3 chs) x 2, trc7 under arch of 8 chs, trc1 into last ch* + RC4
*3rd ch from the end of the arch of 8chs
6th row – h6ch, dc1, (ch1, dc1) x 6, sc1 under arch of 3 chs, ch3, sc1 under arch of 3 chs, dc1 above 1st trc of prev.row, (ch1, dc1) x 15, sc1 under arch of 3 chs, ch3, sc1 under arch of 3 chs, dc1 above 1st trc of prev.row, (ch1, dc1) x 7 + RC3
7th row – h5ch, dc14, sc1 under arch of 3 chs, dc1 above 1st dc of prev.row, dc30, sc1 under arch of 3chs, dc1 above 1st dc of prev.row, dc14 + RC8
8th row - h12ch, sc1, (ch3, sk2, sc1) x 3, ch5, sk6, sc1, (ch3, sk2, sc1) x 3, (ch5, sk2, sc1) x 2, (ch3, sk2, sc1) x 3, ch5, sk6, sc1, (ch3, sk2, sc1) x 3, ch5, sk2, dc1 + RC4
9th row – trc7 under arch of 5 chs, [sc1 under arch of 3 chs, (ch3, sc1 under arch of 3 chs) x 2, trc8 under arch of 5 chs] x 2, [trc8 under arch of 5chs, sc1 under arch of 3 chs, (ch3, sc1 under arch of 3 chs) x 2] x 2, trc7 under arch of 8 chs, trc1 into last ch* + RC4
10th row – h6ch, dc1, (ch1, dc1) x 6, [sc1 under arch of 3 chs, ch3, sc1 under arch of 3 chs, dc1 above 1st trc of prev.row, (ch1, dc1) x 7] x 2, (ch1, dc1) x 8, [sc1 under arch of 3 chs, ch3, sc1 under arch of 3 chs, dc1 above 1st trc of prev.row, (ch1, dc1) x 7] x 2 + RC3
11th row – h5ch, [dc14, sc1 under arch of 3 chs, dc1 above 1st dc of prev.row] x 2, dc30, [sc1 under arch of 3chs, dc1 above 1st dc of prev.row, dc14] x 2 + RC8
Repeat the pattern starting from the 8th row working more repeats until you crochet the desired length of the shall.
12th row – h12ch, sc1, (ch3, sk2, sc1) x 3, [ch5, sk6, sc1, (ch3, sk2, sc1) x 3] x 2, (ch5, sk2, sc1) x 2, (ch3, sk2, sc1) x 3, [ch5, sk6, sc1, (ch3, sk2, sc1) x 3] x 2, ch5, sk2, dc1 + RC4
Edge
Single crochet the front edge of the shall (straight side) and attach tassels to arches.
To make one tassel, *take 2 pieces of yarn about 10 inches long. Insert a hook into a chain from the wrong side of the garment, grab the yarns, and pull it trough. Then draw the end of the yarns through the just created loop, and pull it tight. You should have a tassel of 4 strands. Skip 7 chs from the first tassel and repeat from *. After that **take two strands of each of 2 neighboring tassels and tie it into a knot. Repeat from **.

Abbreviations
[ ] – repeat
ch – chain
dc – double crochet
h#ch – insert a hook into the # chain from the hook
RC – returning chain
sc – single crochet
sk – skip a chain
sl.st. – slip stitch
trc – triple crochet
Shawl crochet pattern

Comments
Hi Kira,
Hi Kira,
I still work on the project. I've crocheted 36" x 36" square and filmed the pattern. I need to crochet a border and film it. It should be ready soon. Happy crochet!
I hope the tutorial will be
I hope the tutorial is up by
I hope the tutorial is up by tomorrow. I can't wait to see it
Я не могу дождаться просмотра
Я не могу дождаться просмотра видео. Так взволнован, чтобы видеть это
Sana,
Sana,
You said the tutorial should be up soon. And you said that last week. I have been waiting for quite a while for it. Please upload it by tomorrow. I have been checking so many times and nothing is there. I really want to see how it looks.
I understand that you also
I understand that you also need to write a written pattern for it. And I understand that you may be busy but please upload it soon. The tutorial will make my day
Hi Kira,
Hi Kira,
I appreciate your patience and understanding. I mostly finished editing the video, and I plan to upload the video tomorrow morning. Happy crochet!
I also made 2 shawls and
I also made 2 shawls and sewed them together
Beautiful work and blanket,
Beautiful work and blanket, Kira. Thank you for sharing.
And I made a corner to corner
And I made a corner to corner blanket. It is pretty and you should consider it for the future
Pages