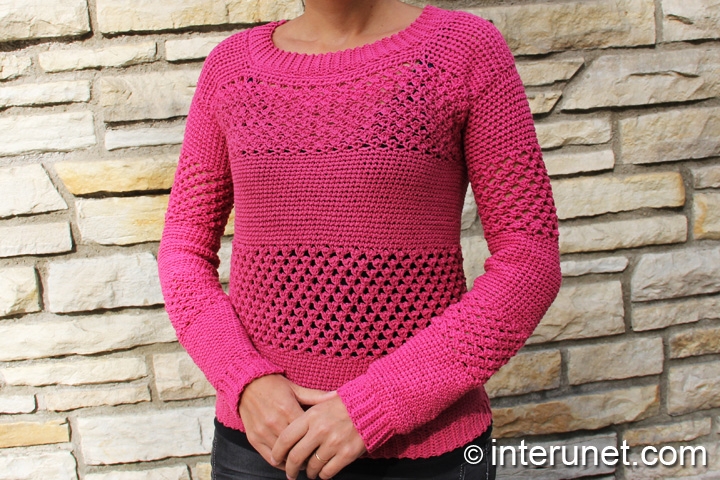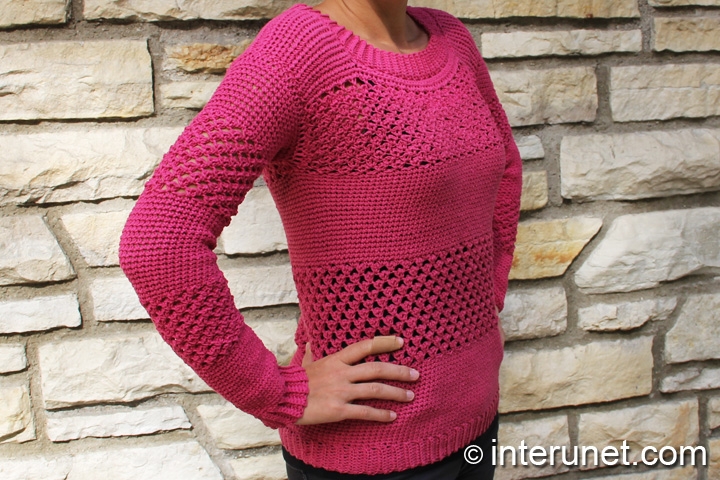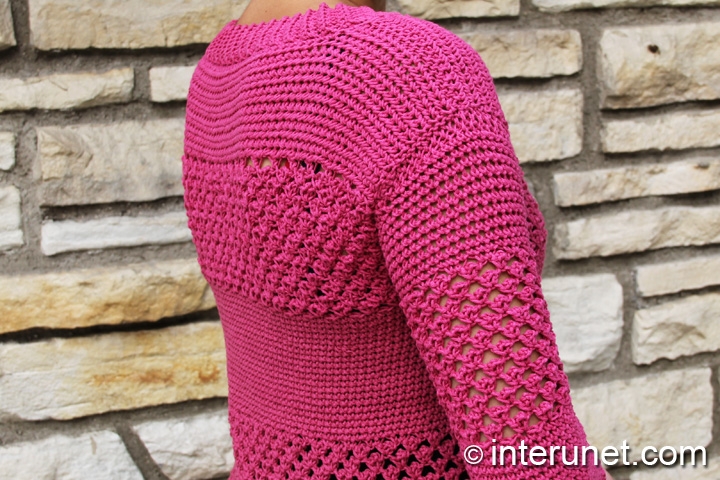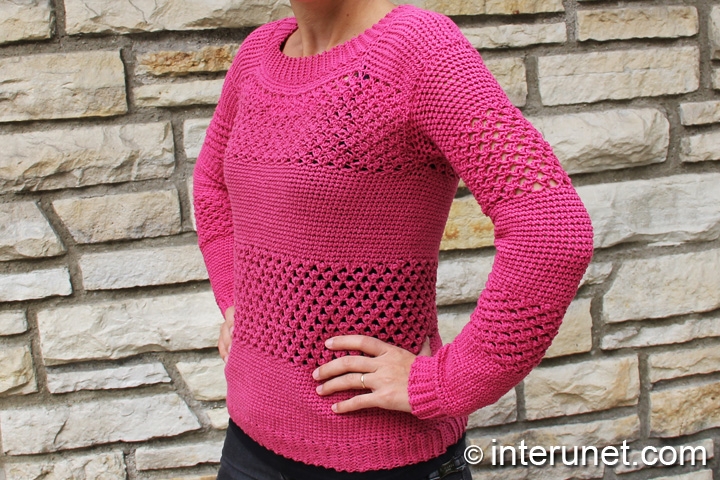
Yarn - Bernat Cotton-ish (cotton candy) / light 3 / 2.4 oz (70 g) / 282 yards (258 m) / 4 balls needed
Hook - G/6 (4.25 mm) and F (3.75 mm) or other size hooks needed for the gauge
Gauge - About 16 chains go into 4 inches (10 cm.)
Sweater Size - US 6
Complexity - Intermediate

Women’s long sleeve sweater crochet pattern - raspberry stripes stitch
Step-by-step crochet instructions
Step 1
Bottom ribbing
With a larger size crochet hook, make a foundation chain of 11 chain stitches
1st row – sc to end plus RC1
2nd row – blsc to end + RC1
3 -120 rows = 2nd row
The ribbing should have 120 rows or 60 ribs (each rib equals 2 rows). Join the very last row of the ribbing with very 1st one. Flip the garment to the wrong side to hide the seam. Now your wrong side becomes your right side.
Step 2
Main part
First stripe - 20 single crochet rounds
1st round – work on the edge of the ribbing sc1 in each row and one extra sc every 6 rows or 3 ribs. At the end of the 1st round you should have 140 chains in total.
2 – 19 rounds – sc to end
20th round – sc to end plus sl.st.1
Second stripe - Raspberry pattern
*bump – (sc1, ch3, sc1) in the same base chain
21st round – ch1, [bump*1, ch2, sk2] to end
22nd round – [bump1, ch2, skip bump and the 1st ch. of the prev. round] to end
23 – 32 rounds = 22nd round
Third stripe - 20 sc rounds
33rd round – [ch1 (above a bump of the prev.round), sc2] to end
34 – 51 rounds – sc to end
52nd round – sc to end plus sl.st.1
Step 3
Front part
(use half of your chains [70chs])
Raspberry pattern
1st row (right side) – ch2, [bump1, loose ch1, sk2] to end; work sc1 in the last chain of the row + RC2
2 – 11 rows – h4ch, [bump1, loose ch1, sk bump] to end; work sc1 in the last chain of the row + RC2
12th row – like 2nd row, but do not work returning chains
Single crochet rows
13th row – ch1, [sc1, ch2 (above a bump of the prev.row)] to end; work sc1 in the very last ch. + RC1
14th row – blsc to end + RC1
Step 4
Front shoulder pieces
(work 16 chains)
15th row (right side) – sc to end + RC1
16th row (wrong side) – blsc to end plus RC1
17, 19, 21, 23, 25, and 27 = 15th row
18, 20, 22, 24, 26, and 28 = 16th row
Step 5
Back part
Attach the yarn on the 52nd round (last round). Crochet the back part similar to the front part.
Work the 12 rows of the raspberry pattern for the back part totally the same as for the front part.
Sc rows
13th row (back part) = 13th row (front part)
14th row (back part) = 14th row (front part)
15th row – sc to end + RC1
16, 18, 20, 22, and 24 = 14th row
17, 19, 21, and 23 = 15th row
Step 6
Back shoulder pieces
(work 16 chains)
26 and 28 rows = 14th row
25 & 27 rows = 15th row
Step 7
Join the front and back shoulder pieces together from the wrong side.
Step 8
Sleeves
Work sleeves similar to the main part. Start with the ribbing and make a foundation chain of 11 chain sts. Crochet 30 rows the same way as you worked the bottom ribbing. Join the very last row with the 1st one and flip the fabric to the wrong side.
First stripe - 20 sc rounds
On the edge, [work sc6, inc1] to end. At the end, you should have 35 chains.
Work sc35 for 19 more rounds
Second stripe - Raspberry pattern
Crochet 12 rounds of the raspberry pattern
Third stripe - 20 sc rounds
Increase 3 chains and work sc38 to end
Fourth stripe - Raspberry pattern
Repeat the 12 rounds of the raspberry pattern
Fifth stripe - sc rounds
Work 11 sc rounds increasing one chain in each round. You should have 49 chains at the end.
Step 9
Join sleeves into the garment from the wrong side.
Step 10
Neckline
1st round – sc to end (use a smaller size crochet hook)
Neck ribbing
Make a ribbing of 100 rows and join it to the neckline from the wrong side. Work the ribbing similar to the bottom or sleeve ribbings.
Hint: crochet fewer rows for the ribbing compare to the number of sc chains you worked for the neckline.

Abbreviations
ch – chain
blsc – back loop single crochet
h4ch – insert a hook into the 4th chain from the hook
inc – increase a chain
RC – returning chain
sc – single crochet
sl.st. – slip stitch

How to crochet a sweater - raspberry stitch stripes

Comments
Yes, if your back part is one
Yes, if your back part is one bump wider that won't be visible. However, the shoulder pieces should have the same width before joining them.
Since you crochet in the round, the side that facing you will be your right side of the garment. When you work rows instead of rounds, you may count rows to know which side is right and which is wrong or look at your rounds. Happy crochet!
Hello!
Hello!
I'm here to show you my sweater! =) Thank you very much for your tutorial. I have to modify certain parts. Like for the sleeves, instead of 20 rounds of sc before the final raspberry stripes, I reduced it to 10 rounds. I feel that following your number of rounds exactly makes the sleeves too long for me. I also did some tweaking here and there to suit my needs. =) Thank you for your support and wonderful tutorial. I'm going to wear this to Korea for my honeymoon in next year March! I'm so excited. =) I wanted to try knitting actually but it's just too complicated for me.
Due to changing colours, I had an ugly seam there which I need to cover up with a pocket. I like the pocket though, it can be used to place some stuff when I'm traveling. ;)
Let me know if you think it's pretty! =)
Hi lydiachai,
Hi lydiachai,
I do think that your sweater is very pretty. I love your yarn colors combination and the pocket too. Your work is very beautiful indeed. Congratulations!
Hehe! Thank you!! =)) All my
Hehe! Thank you!! =)) All my friends like the sweater that I posted. Some even asked me to sell.. but I don't think I'm confident to sell to others. Haha.. I rip off many times before I get the exact size that I desire.
I'm fancy of Irish knit sweaters. They look so delicate and beautiful. If you have time to do one, it'd be great. Cables look fancy but =( difficult for first timers.
I tried to learn knitting. I know the basics. However, whenever I have a drop stitch, I'll get panic and unravel everything instead of repairing from that point onwards. I cannot amend my work as easily as crochet.. =( It's frustrating. Knitted work has more elasticity in contrast to crochet, though using the same yarn. Right? Wished one day I can master knitting too.
By the way, this sweater is the 3rd garment I made using your tutorial! =))
You're really very talented and a great teacher Interunet! I'm thankful that you are in Youtube! =)))
Hi lydiachai,
Hi lydiachai,
If you want to learn knitting without frustration, be reasonable with your expectations and learn gradually. I mean start knitting from something basic and simple like scarfs or shawls. Then when you have more practice and experience, you may try knitting something more difficult like sweaters. I'll consider your suggestion to knit a cable sweater. Happy crochet and knitting!
i love this blouse i thought
i love this blouse i thought you done a great but i really would like to know did you teach your self to knit and crochet and are they your own patterns.you sure do a good job and i am making another one of your patterns an its bernet cotton-ish your look thicker than mine is there a difference
You may find the answers to
You may find the answers to your questions at the bottom of this page http://interunet.com/crochet-two-piece-sweater?page=2 where you've asked them first. Happy crochet!
here is mine i crocheted the
here is mine i crocheted the yarn looks like it smaller than what you used mine bernet cotton-ish
Thank you for sharing your
Thank you for sharing your work with us. It looks just like mine. Congratulations! Happy crochet!
Hi dear Sana, I love yr
Hi dear Sana, I love yr patterns on YouTube and I decided to try this one out. I have never crocheted a sweater before, but I have done other projects so bear with me: I'm a size 16 can you show me how many rows of ribbing to use and how much to add on the overall pattern? Thanks very much
Pages