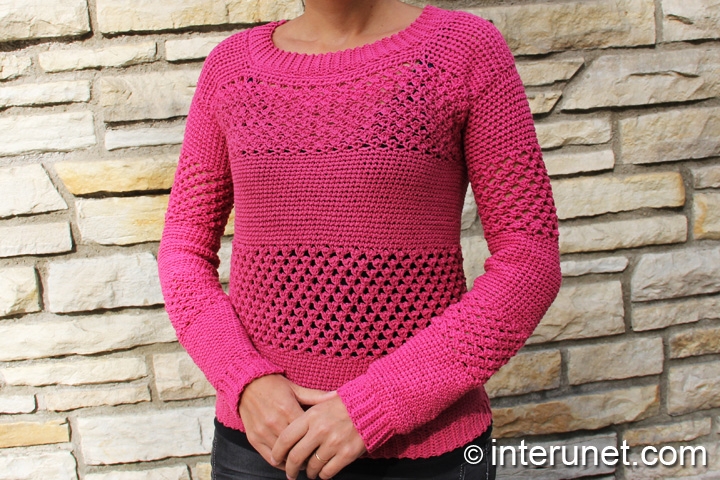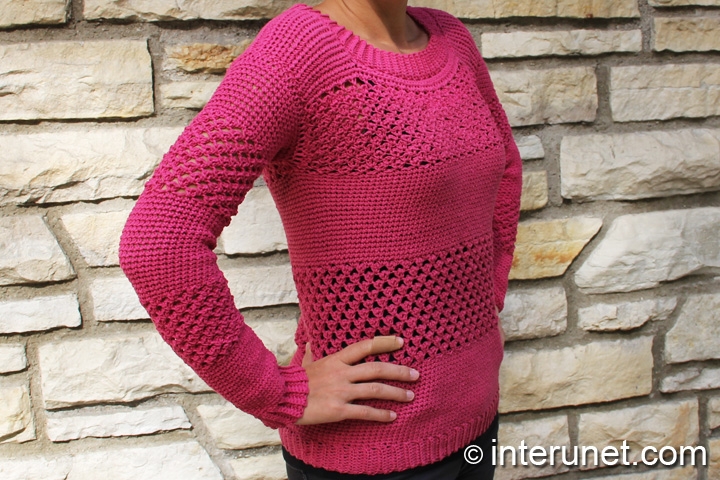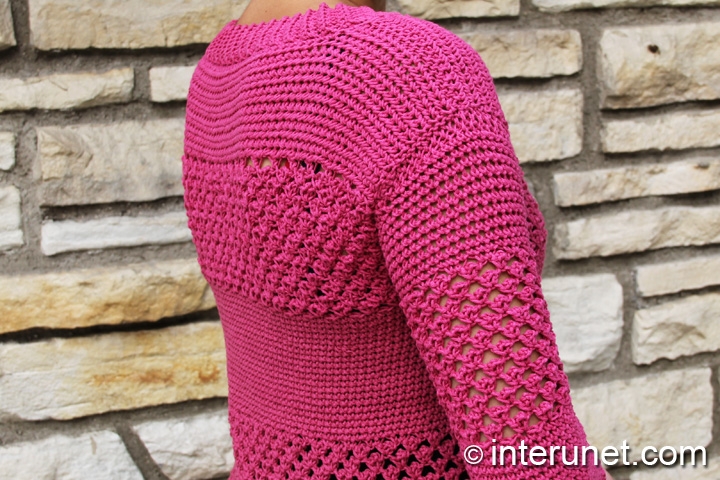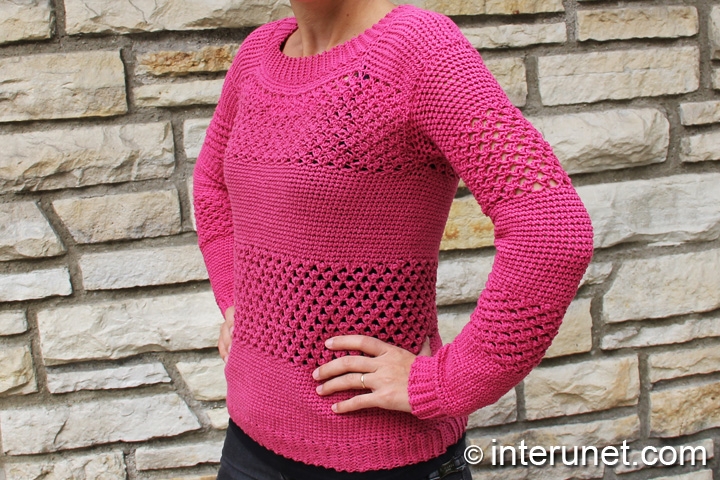
Yarn - Bernat Cotton-ish (cotton candy) / light 3 / 2.4 oz (70 g) / 282 yards (258 m) / 4 balls needed
Hook - G/6 (4.25 mm) and F (3.75 mm) or other size hooks needed for the gauge
Gauge - About 16 chains go into 4 inches (10 cm.)
Sweater Size - US 6
Complexity - Intermediate

Women’s long sleeve sweater crochet pattern - raspberry stripes stitch
Step-by-step crochet instructions
Step 1
Bottom ribbing
With a larger size crochet hook, make a foundation chain of 11 chain stitches
1st row – sc to end plus RC1
2nd row – blsc to end + RC1
3 -120 rows = 2nd row
The ribbing should have 120 rows or 60 ribs (each rib equals 2 rows). Join the very last row of the ribbing with very 1st one. Flip the garment to the wrong side to hide the seam. Now your wrong side becomes your right side.
Step 2
Main part
First stripe - 20 single crochet rounds
1st round – work on the edge of the ribbing sc1 in each row and one extra sc every 6 rows or 3 ribs. At the end of the 1st round you should have 140 chains in total.
2 – 19 rounds – sc to end
20th round – sc to end plus sl.st.1
Second stripe - Raspberry pattern
*bump – (sc1, ch3, sc1) in the same base chain
21st round – ch1, [bump*1, ch2, sk2] to end
22nd round – [bump1, ch2, skip bump and the 1st ch. of the prev. round] to end
23 – 32 rounds = 22nd round
Third stripe - 20 sc rounds
33rd round – [ch1 (above a bump of the prev.round), sc2] to end
34 – 51 rounds – sc to end
52nd round – sc to end plus sl.st.1
Step 3
Front part
(use half of your chains [70chs])
Raspberry pattern
1st row (right side) – ch2, [bump1, loose ch1, sk2] to end; work sc1 in the last chain of the row + RC2
2 – 11 rows – h4ch, [bump1, loose ch1, sk bump] to end; work sc1 in the last chain of the row + RC2
12th row – like 2nd row, but do not work returning chains
Single crochet rows
13th row – ch1, [sc1, ch2 (above a bump of the prev.row)] to end; work sc1 in the very last ch. + RC1
14th row – blsc to end + RC1
Step 4
Front shoulder pieces
(work 16 chains)
15th row (right side) – sc to end + RC1
16th row (wrong side) – blsc to end plus RC1
17, 19, 21, 23, 25, and 27 = 15th row
18, 20, 22, 24, 26, and 28 = 16th row
Step 5
Back part
Attach the yarn on the 52nd round (last round). Crochet the back part similar to the front part.
Work the 12 rows of the raspberry pattern for the back part totally the same as for the front part.
Sc rows
13th row (back part) = 13th row (front part)
14th row (back part) = 14th row (front part)
15th row – sc to end + RC1
16, 18, 20, 22, and 24 = 14th row
17, 19, 21, and 23 = 15th row
Step 6
Back shoulder pieces
(work 16 chains)
26 and 28 rows = 14th row
25 & 27 rows = 15th row
Step 7
Join the front and back shoulder pieces together from the wrong side.
Step 8
Sleeves
Work sleeves similar to the main part. Start with the ribbing and make a foundation chain of 11 chain sts. Crochet 30 rows the same way as you worked the bottom ribbing. Join the very last row with the 1st one and flip the fabric to the wrong side.
First stripe - 20 sc rounds
On the edge, [work sc6, inc1] to end. At the end, you should have 35 chains.
Work sc35 for 19 more rounds
Second stripe - Raspberry pattern
Crochet 12 rounds of the raspberry pattern
Third stripe - 20 sc rounds
Increase 3 chains and work sc38 to end
Fourth stripe - Raspberry pattern
Repeat the 12 rounds of the raspberry pattern
Fifth stripe - sc rounds
Work 11 sc rounds increasing one chain in each round. You should have 49 chains at the end.
Step 9
Join sleeves into the garment from the wrong side.
Step 10
Neckline
1st round – sc to end (use a smaller size crochet hook)
Neck ribbing
Make a ribbing of 100 rows and join it to the neckline from the wrong side. Work the ribbing similar to the bottom or sleeve ribbings.
Hint: crochet fewer rows for the ribbing compare to the number of sc chains you worked for the neckline.

Abbreviations
ch – chain
blsc – back loop single crochet
h4ch – insert a hook into the 4th chain from the hook
inc – increase a chain
RC – returning chain
sc – single crochet
sl.st. – slip stitch

How to crochet a sweater - raspberry stitch stripes

Comments
& i'm smart also
& i'm smart also
Hi dua'huma,
Hi dua'huma,
The size doesn't depend on your age, but a chest/bust circumference. I need more info to answer your question. Happy crochet!
I NEED YOUR REPLY URGENTLY
I NEED YOUR REPLY URGENTLY INTERUNET.. PLEASE REPLY ME ASAP -
I crocheted up to round 9 of Second stripe - Raspberry pattern.. something is not right. It looks like it is expanding sideways, like an inverted cone. I tried the last row 22nd round – [bump1, ch2, skip bump and the 1st ch. of the prev. round] to end for round 10 to try and see if will decrease the circumference.. the answer is no, it doesn't help. Please help. I followed your instructions exactly. The raspbettery pattern rows are not working properly. It looks like it keeps on expand the sweater's circumference. I hope I have explained my problem clear enough. Please help. I attached the part where I meant.
Also, just to confirm, when doing single crochet around for 20 rounds, do I need to put slip stitch at the end and put a single chain before starting the single crochet? For the first 20 rows single crochet stripe, I didn't do slip stitch but crochet in rounds. Have I done correctly?
Please reply me asap. I'm in a hurry to get this sweater done.
Just to add on something -
Just to add on something -
I increased up to 140 chains from 120 chains ribbing. So, I should have 46 raspberries in a round considering the formula is multiples of 3 + 2.
I counted and have exactly 46 raspberries in a round. Problem is, the circumference seems to be constantly expanding. Something is not right.
Please do reply me as soon as possible. I couldn't figure out where has gone wrong.
Hi lydiachai,
Hi lydiachai,
You may watch the video again starting from about 7:10 to see how I start the first round (raspberry pattern) and pause the video at about 9:30 to see how I ended the round.
From the picture, it looks like you increase your number of bumps in each round. In addition, even your 1st round looks wider than the previous sc round. I'm not sure what causes it. I would suggest to work the raspberry pattern using a smaller size crochet hook to adjust your gauge and use a larger size crochet hook again when you start working sc rounds. In order to keep the same number of bumps in each round, please watch the video again (suggested minutes) to be sure that you begin and end rounds totally the same as I did. Happy crochet!
I try to do it again, tighter
I try to do it again, tighter tension. See how it goes. I didn't do any mistakes. I checked your video once again.
Can you please confirm with me regarding the 20 rounds sc, are they going continuously in a round without slip stitch or at the end I need to put a slip stitch before I start a new round? Currently, I'm using a stitch marker to make sure I know where is my first stitch.
Hi lydiachai,
Hi lydiachai,
Hope that changing the hook size will solve the problem. If not, then you may try to skip one more chain between bumps and use a larger size crochet hook in order not to make the garment too tight. I would suggest to practice it on a small sample first before making any estimates/decisions.
Since I used one color yarn, I worked sc sts in an endless round. If I would use different color yarns, I would work a slip stitch at the end of each round. Then I would ch2 to pick up the height, sc1 into the following ch, sc into each ch to end. At the end of a round, sl.st.1 into 2nd ch. Happy crochet!
Hello again! I managed to
Hello again! I managed to solve the raspberry stitches with a smaller size hook. So my next problem now is that.. for the second raspberry stitch part.
For the first raspberry stripe, I made sure I counted 22 bumps in a row. I also made sure all my rounds are marked and therefore I shouldn't have miscounted 140 chains per round. Problem is now when I'm doing the back part of second raspberry stripe, I managed to crochet 23 bumps instead of 22. So, should I reduce 3 chains front and back of the row so that I can get 22 bumps, similar to the front part OR it doesn't matter to have 23 bumps instead for the back part. Please do reply soon. Finishing soon.
Oh by the way 1 more thing, I think I do not know how to see/judge which surface is front and which is back. =/ Any tips on how to see front or back of the garment? Both surfaces look more a less the same to me.
Hi lydiachai,
Hi lydiachai,
You may do either way, I had the same number of bumps in a row for both front and back parts. I'm not sure that I understood your question correctly about front and back parts surfaces. You mean which part is front and which part is back or which side is right and which is wrong. Please clarify that for me.
So you sure nothing is wrong
So you sure nothing is wrong if 1 row has 22 bumps (front) and back row has 23 bumps instead? The sweater won't turn out looking weird , right ?
Yeah, I meant I don't know how to see which side is right and which is wrong.
Pages