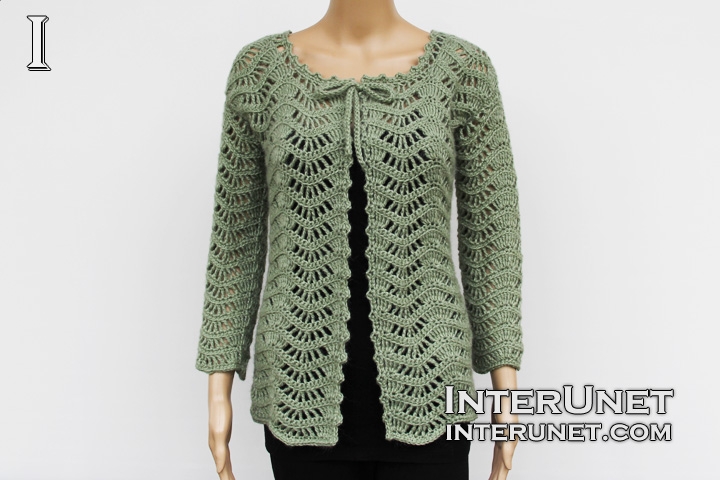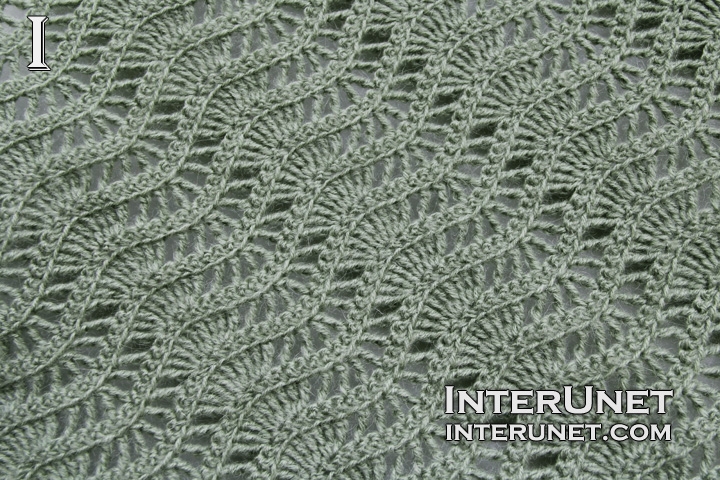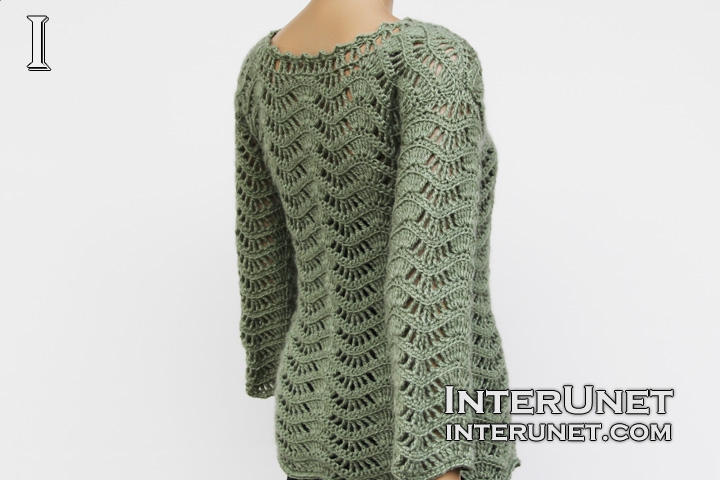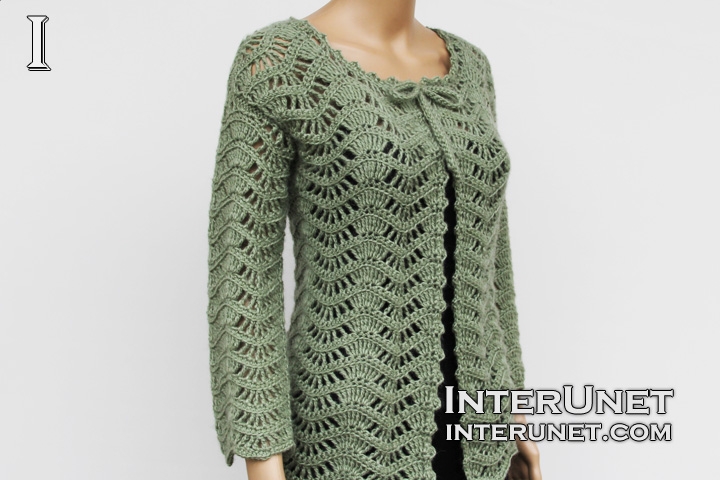
Yarn - Premier yarns Deborah Norville Collection Alpaca Dance (color – Dusty green) / medium 4 / 3.5 oz (100 g) / 371 yds (340 m) / about 2.5 balls needed
Hook - G/6 4.25mm or other crochet hook needed for the gauge
Gauge - One repeat is about 4.3 inches (11 cm.)
Jacket Size - XS/S
Complexity - Beginners friendly stitch

Lace cardigan jacket crochet pattern
Step-by-step crochet instructions
Part 1 video tutorial
Begin crocheting the cardigan from the bottom to top.
Step 1
Make a foundation chain of 133 chs or multiples of 16 chs plus 5 additional chs.
Ripple stitch
1st row (right side) – h4ch, trc2 into 1ch, trc3 into 1ch, ch1, (sk1, trc1) x 2, sk1, trc dec1, (sk1, trc1) x 2, ch1, sk1, trc3 into 1ch, [(trc3 into 1ch) x 2, ch1, (sk1, trc1) x 2, sk1, trc dec1, (sk1, trc1) x 2, ch1, sk1, trc3 into 1ch] to last 1ch; trc2 into 1ch + RC1
2nd row (wrong side) – h2ch, flsc to end + RC3
Repeat the pattern starting from the 1st row until you crochet 26 rows.
Step 2
Increase
27th row – h4ch, trc2 into 1ch, trc3 into 1ch, ch1, (sk1, trc1) x 2, sk1, trc dec1, (sk1, trc1) x 2, ch1, sk1, trc3 into 1ch, [(trc3 into 1ch) x 2, ch1, (sk1, trc1) x 2, sk1, trc dec1, (sk1, trc1) x 2, ch1, sk1, trc3 into 1ch], trc4 into 1ch, trc3 into 1ch, ch1, (sk1, trc1) x 2, sk1, trc dec1, (sk1, trc1) x 2, ch1, sk1, trc3 into 1ch, [(trc3 into 1ch) x 2, ch1, (sk1, trc1) x 2, sk1, trc dec1, (sk1, trc1) x 2, ch1, sk1, trc3 into 1ch] to last 2 repeats; trc4 into 1ch, trc3 into 1ch, ch1, (sk1, trc1) x 2, sk1, trc dec1, (sk1, trc1) x 2, ch1, sk1, trc3 into 1ch, [(trc3 into 1ch) x 2, ch1, (sk1, trc1) x 2, sk1, trc dec1, (sk1, trc1) x 2, ch1, sk1, trc3 into 1ch], trc2 into 1ch + RC1
28th row = 2nd row
Step 3
First front part
Work 2 repeats
29th row =1st row
30th row = 2nd row
Repeat the 2 rows of the pattern until you crochet 6 rows. At the end of the 34th row, work RC1 instead of RC3.
Step 4
First front shoulder part
35th row – h2ch, sc1, sc3 into 1ch, ch1, sk1, dc1, sk1, trc1, sk1, trc dec1, sk1, trc1, sk1, dc1, ch1, sk1, (hdc1, dc2) into 1ch, trc2 into 1ch, trc3 into 1ch, ch1, (sk1, trc1) x 2, sk1, trc dec1, (sk1, trc1) x 2, ch1, sk1, trc3 into 1ch, trc2 into 1ch + RC1
36th row – h2ch, flsc17 + RC3
37th row – h4ch, trc2 into 1ch, trc3 into 1ch, ch1, (sk1, trc1) x 2, sk1, trc dec1, (sk1, trc1) x 2, ch1, sk1, trc3 into 1ch, trc2 into 1ch + RC1
38th row = 36th row
39th row = 37th row
40th row – h2ch, flsc17 + RC1
41st row – h2ch, sc1, sc3 into 1ch, ch1, sk1, dc1, sk1, trc1, sk1, trc dec1, sk1, trc1, sk1, dc1, ch1, sk1, sc3 into 1ch, sc1
Step 5
Second front part
Count 33 chs from the beginning of your 28th row and attach the yarn.
29th row – ch3, trc2 into sm.ch, trc3 into 1ch, ch1, (sk1, trc1) x 2, sk1, trc dec1, (sk1, trc1) x 2, ch1, sk1, trc3 into 1ch, [(trc3 into 1ch) x 2, ch1, (sk1, trc1) x 2, sk1, trc dec1, (sk1, trc1) x 2, ch1, sk1, trc3 into 1ch] to last 1ch; trc2 into 1ch + RC1
30th row = 2nd row
31st row = 1st row
Alternate the 30th and 31st rows until you crochet 6 rows.
Step 6
Second front shoulder part
35th row = 37th row (step 4)
36th row = 2nd row
Alternate the 2 above rows of the pattern until you crochet 6 rows. At the end of the 40th row, work RC1.
41st row = 41st row (step 4)
After that slip stitch down to your 35th row and finish crocheting the 35th row as a mirror reflection to the beginning of 35th row (step 4) – (dc2, hdc1) into 1ch, ch1, sk1, dc1, sk1, trc1, sk1, trc dec1, sk1, trc1, sk1, dc1, ch1, sk1, sc3 into 1ch, sc1

Part 2 video tutorial
Step 7
Back part
Slip stitch down to your 28th row or attach the yarn, then chain 3 to pick up the height.
Work 4 repeats for the back part.
29th row = 1st row
30th row = 2nd row
Repeat the 2 above rows of the pattern until you crochet 8 rows.
Back shoulder parts
Crochet your 1st back shoulder piece the same as the 2nd front shoulder piece (step 6).
37th row = 37th row (step 4)
38th row = 2nd row
Alternate the 2 above rows of the pattern until you crochet 6 rows. At the end of the 42nd row, work RC1.
43rd row = 41st row (step 4)
After that slip stitch down to your 37th row
37th row – (dc2, hdc1) into 1ch, ch1, sk1, dc1, sk1, trc1, sk1, trc dec1, sk1, trc1, sk1, dc1, ch1, sk1, sc3 into 1ch, sc1, sc3 into 1ch, ch1, sk1, dc1, sk1, trc1, sk1, trc dec1, sk1, trc1, sk1, dc1, ch1, sk1, (hdc1, dc2) into 1ch, then crochet your 2nd back shoulder piece totally the same as the 1st front shoulder piece - trc2 into 1ch, trc3 into 1ch, ch1, (sk1, trc1) x 2, sk1, trc dec1, (sk1, trc1) x 2, ch1, sk1, trc3 into 1ch, trc2 into 1ch + RC1
38th row – h2ch, flsc17 + RC3
39th row – h4ch, trc2 into 1ch, trc3 into 1ch, ch1, (sk1, trc1) x 2, sk1, trc dec1, (sk1, trc1) x 2, ch1, sk1, trc3 into 1ch, trc2 into 1ch + RC1
40th row = 38th row (step 4)
41st row = 39th row (step 4)
42nd row = 40th row (step 4)
43rd row = 41st row (step 4)
Step 8
Join shoulder pieces together
Put right side to right side, wrong sides should face you. Match closely chains. To join shoulder pieces, you may use a sewing needle or crochet hook.
Step 9
Sleeves
Begin crocheting each sleeve using a smaller size crochet hook to about your elbows, and then use a larger size crochet hook to widen the garment.
Make a foundation chain of 49 chs or multiples of 16 chs plus 1 additional ch. Join into a ring with a sl.st.
1st round – ch4, trc1 into sm.ch, trc3 into 1ch, trc3 into 1ch, ch1, (sk1, trc1) x 2, sk1, trc dec1, (sk1, trc1) x 2, ch1, sk1, trc3 into 1ch, [(trc3 into 1ch) x 2, ch1, (sk1, trc1) x 2, sk1, trc dec1, (sk1, trc1) x 2, ch1, sk1, trc3 into 1ch] to end; trc1 into 1ch + sl.st.1 into 4th ch
2nd round – ch2, blsc to end + sl.st.1 into 2nd ch
Repeat the pattern starting from the 1st round until you crochet desired length of your sleeves. Crochet sleeves at the same time from different yarn balls to make sure that you will have the same gauge.
27th or last round – ch2, sc3 into 1ch, ch1, sk1, dc1, ch1, sk1, trc1, ch1, sk1, trc dec1, ch1, sk1, trc1, ch1, sk1, dc1, ch1, sk1, sc3 into 1ch, [sc1, sc3 into 1ch, ch1, sk1, dc1, ch1, sk1, trc1, ch1, sk1, trc dec1, ch1, sk1, trc1, ch1, sk1, dc1, ch1, sk1, sc3 into 1ch] to end + sl.st.1 into 2nd ch
Step 10
Join sleeves into the garment using a sewing needle or a crochet hook.
Step 11
Finish up
First tie
Attach the yarn at the end of your front part, chain 42, and then h2ch and work sl.sts back
Edge
Sc9, ch1, sk1, hdc1, ch1, sk1, dc1, [ch1, sk1, trc dec1] to your second front part, ch1, sk1, dc1, ch1, sk1, hdc1, ch1, sk1, sc9, sl.st.1
Second tie work totally the same as the first one.
Edge from the end of your front part (2nd tie) to bottom (initial foundation chain) – sc1, picot1, [sc3, picot1] to end
For the bottom edge, work just sc to end
Edge from the bottom up (front part) – picot1, [sc3, picot1] to end; sc1
Edge around the neckline – sc1, picot1, [sc3, picot1] to end
Edge around sleeves – sc to end

Abbreviations
[ ] – repeat
blsc – back loop single crochet
ch – chain
dc – double crochet
flsc – front loop single crochet
h#ch – insert a hook into the # chain from your hook
hdc – half double crochet
picot – ch2, sc1 into 1ch of the two
RC – returning chain
sc – single crochet
sk – skip a chain
sm.ch – the same base chain
trc – triple crochet
trc dec – triple crochet decrease – work like unfinished trc, when you have 2 loops on your hook, sk1, and work second unfinished trc. Then draw the yarn through all 3 loops on the hook.
Lace cardigan sweater with sleeves crochet pattern.

Comments
Hi Sana, the xl that you
Hi Sana, the xl that you suggested for me I think it's a little bigger so I did the 149 chains.Do I have to do the increase part step 2? I did skip and I'm on step 3 right now. Pls advise. Thanks.
No, you do not have to work
No, you do not have to work step 2 the increase. To widen the back part, I would suggest working dc2 before the patterns starts, before the very first dc2 into 1ch, and then dc2 at the very end of a row after last dc2 into 1ch. But then it will be necessary to decrease those extra chains to work the back shoulder pieces totally the same as front shoulder pieces.
I just measured my 3 repeats
I just measured my 3 repeats and is 18 inches. I don't want to frog it , If it's small then I just give to my sister and make a new one for me.
Hi Sana
Hi Sana
Could i have the pattern to your blouse? I would love to make it. Also the long sleved green cardigan that was on here,i would like the pattern to this if i can?
Du.mmy
The written instruction is
The written instruction is for the size S. To adjust the pattern to a different size you may read comments or write me your size, and I'll give you my suggested number of chains to start with. Happy crochet!
Hi Sana, I really like this
Hi Sana, I really like this sweater. Can you recommended some other yarn types.
Hi Loripjoyner,
Hi Loripjoyner,
You may use any yarn you like. The most important thing is to match your gauge to mine to get the same size. Happy crocheting!
Hi Sana, pls. Advise, I'm on
Hi Sana, pls. Advise, I'm on the sleeves now and I noticed it that the opening where I'll attach the sleeves is too wide to the sleeves. Maybe it will not look good. By the way it's snuggy on the chest.But I don't want to frog it.
Hi Luz,
Hi Luz,
You may widen the top of a sleeve by using a larger size crochet hook. In addition, the last 27th round (step 9) is an increase round. So, I would suggest you to try to finish a sleeve and see whether it will be wide enough to your armhole accordingly.
Hi Sana, I tried already with
Hi Sana, I tried already with the larger hook and still wide. so I just attach the yarn on the armhole and made a short sleeves instead. Thank you again.
Pages