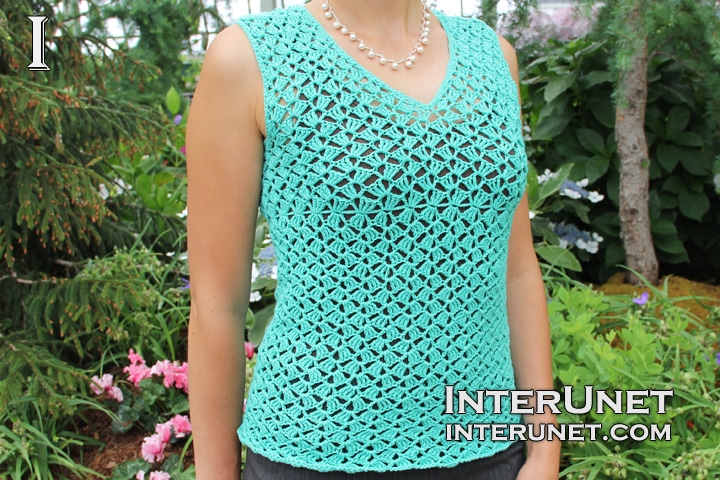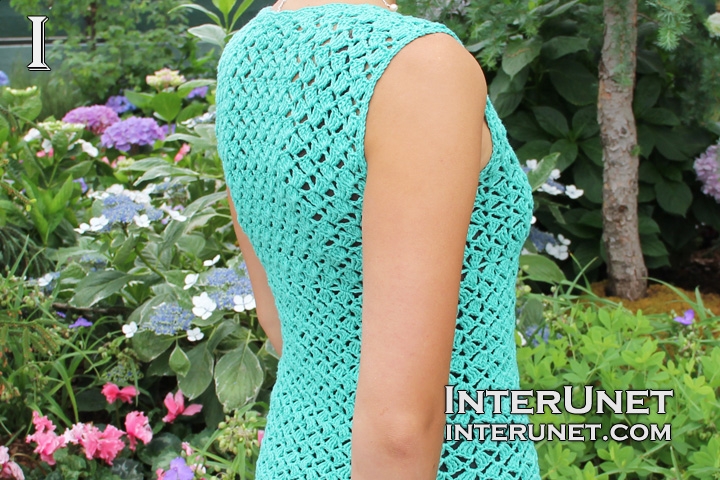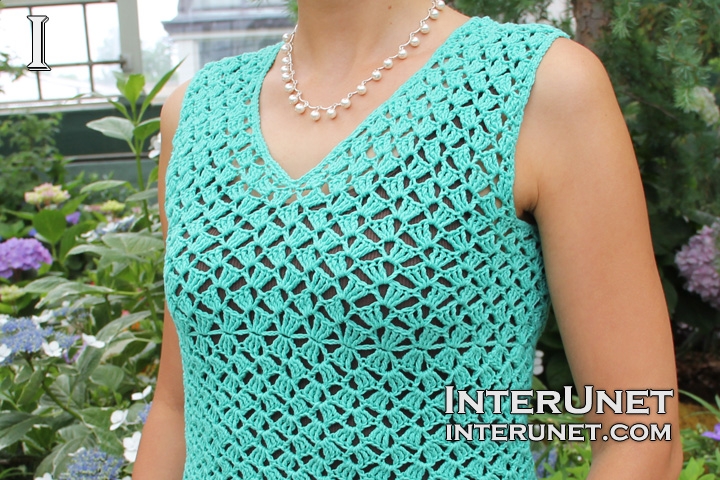
Yarn - Bernat Cotton-ish (turquoise) / light 3 / 2.4 oz (70 g) / 282 yards (258 m) / about 2.5 balls needed
Hook - D/3 – 3.25 mm and E/4 – 3.50 mm or other size hooks needed for the gauge
Gauge - About 4 repeats go into 4 inches (10 cm)
Blouse Size - S
Complexity - Easy/Beginners friendly stitch

Crochet V-neck blouse - triple crochet stitch
Step-by-step crochet instructions
Step 1
Make a foundation chain of 160 chains or multiples of 5 chs. Join the last and first chains with a slip stitch to continue crocheting in the round.
Step 2
1st round (right side) – ch4, (trc2 CW, ch2, dc1) into sm.ch., sk4, [(trc3 CW, ch2, dc1) into 1ch, sk4] to end plus sl.st.1 into 4th ch. after starting point. Turn the work to the wrong side and work sl.st.1 into the 1st opening between dc1 and trc3.
2nd round (wrong side) – ch4, (trc2 CCW, ch2, dc1) into sm.op., [(trc3 CCW, ch2, dc1) into 1op.] to end plus sl.st.1 into 4th ch. after starting point. Turn the work to the right side and work sl.st.1 into the 1st opening between dc1 and trc3.
3rd round (right side) – ch4, (trc2 CW, ch2, dc1) into sm.op., [(trc3 CW, ch2, dc1) into 1op.] to end plus sl.st.1 into 4th ch. after starting point. Turn the work to the wrong side and work sl.st.1 into the 1st opening between dc1 and trc3.
Repeat the pattern starting from the 2nd round.
After you crochet about 10 rounds of the pattern, use a larger size crochet hook to make the garment wider.
Step 3
Crochet from the middle (foundation chain) of the blouse up
Attach the yarn and crochet 1st round (step2) regular way using loops of initial foundation chain. Then alternate 2nd and 3rd rounds until you crochet about 7 rounds in total.
Step 4
Back part
(work 14 repeats / [])
1st row (wrong side) – ch3, [(trc3 CCW, ch2, dc1) into 1op.] to end, sk2, dc1 plus RC3
2nd row (right side) – [(trc3 CW, ch2, dc1) into 1op.] to end, sk2, dc1 plus RC3
3rd row (wrong side) – [(trc3 CCW, ch2, dc1) into 1op.] to end, sk2, dc1 plus RC3
Alternate 2nd and 3rd rows until you crochet 12 rows in total or as many as necessary.
Step 5
Right front part
Skip 2 repeats/[] from the back part and work 7 repeats.
1st row = 1st row
2nd row = 2nd row
Decrease chains
3rd row (wrong side) – Vst. into op., [(trc3 CCW, ch2, dc1) into 1op.] to end, sk2, dc1 + RC3
4th row (right side) – [(trc 3 CW, ch2, dc1) into 1op.] to end, dc1 into Vst. + RC3
5, 7 rows = 3rd row
6, 8 rows = 4th row
Work rows without decreasing chains
9, 11 rows – [(trc3 CCW, ch2, dc1) into 1op.] to end, sk2, dc1 + RC3
10, 12 rows = 2nd row
Step 6
Left front part
(work like a mirror reflection to the right front part)
Skip 2 repeats from the back part
1st row = 1st row
Decrease
2nd row (right side) – Vst. into op., [(trc3 CW, ch2, dc1) into 1op.] to end, sk2, dc1 + RC3
3rd row (wrong side) – [(trc 3 CCW, ch2, dc1) into 1op.] to end, dc1 into Vst. + RC3
4, 6 rows = 2nd row
5, 7 rows = 3rd row
Continue crocheting rows without decreasing chains
8, 10, 12 rows = 2nd row (step 4 – back part)
9, 11 rows = 3rd row (step 4 – back part)
Step 7
Finish up
Join the front and back shoulder pieces matching closely repeats on both sides. For that, you may work sl.st. on the wrong side of the garment or sew them together.
Edges – sc to end.

Abbreviations
ch – chain
dc – double crochet
op – opening between dc and trc
RC – returning chain
sc – single crochet
sk – skip a base chain
sl.st. – slip stitch
sm.ch. – same chain (reuse the same base chain)
trc CW – triple crochet clockwise (wrap the yarn around a hook clockwise)
trc CCW – triple crochet counterclockwise (wrap the yarn around the hook counterclockwise)
V-neck blouse crochet pattern

Comments
Not gluing, I meant going.
Not gluing, I meant going. Typo!
Hi luckylady1,
Hi luckylady1,
Thanks for the suggestion, I'll consider it. I know that you are new to crocheting (I used to be in your shoes), but you'll get used to it with some practice. To get the number of repeats, it is necessary to divide the total number of foundation chains by the number of multiples. Happy crocheting!
Hi Sana! This is my new
Hi Sana! This is my new blouse, it is my first big crochet blouse, so don't be strict )
Because I did several changes by mistake, not intentional ))
I got U neck, not V-neck and S-edge on shoulders.
At first I made it from 200 stitches and it was ok on hips, but very big on other parts )))
Then I did it from 170 stitches and it was good everywhere but small on hips, so I cut the edge and made something like a small frill )
Thank you very much!
Hi anna-kuz,
Hi anna-kuz,
Thank you for sharing your another beautiful work with us. I've noticed that it looks a little bit different from the top, but I like your adjustments to the pattern. Your blouse looks nice and that's all that matters. Congratulations!
I made a mistake crocheting
I made a mistake crocheting front part and I didn't want to re-do it. I've did it twice already ))))
I also had problems with counter clock, but I helped to pull with the nail. And yes, counter clock row went slowly.
It need to get used to. Thank you!
Yes, you are right it
Yes, you are right it requires some practice to work counterclockwise triple crochets, but you did great job. You are a very good knitter and crocheter. Keep up the good work!
Hi Sana,
Hi Sana,
I am having a very very difficult time with the "CCW" part of this step: 2nd round (wrong side) – ch4, (trc2 CCW, ch2, dc1) into sm.op. It's taking me much to long to do a round. Is it ok if I substitute the "CCW" with "CW". Look forward to hearing from you.
Hi DMPeterson,
Hi DMPeterson,
Thanks for the good question. I've shown how to work this stitch slower in my other video 'Crochet pineapple stitch blouse - Part 1 of 2' (Youtube) from about 16:05 to 17:50. You may also find the video by visiting this page http://interunet.com/crochet-a-raglan-blouse-pineapple-pattern. The CCW stitch is not as hard as might seem like, it just require some practice. However, you may substitute the CCW and CW stitches. By using the CW sts only, you'll get more texture, but it still should look good. Happy crocheting!
Hi Sana
Hi Sana
Thank you for your reply. Before I give up I will keep trying but it's good to know I have that option.
DMPeterson
Hi DMPeterson,
Hi DMPeterson,
Please do not give up. As I've written earlier, it isn't scary as it might look. To work trc CCW, it is necessary to wrap a yarn around a crochet hook counterclockwise twice, then insert the hook into a base chain, grab the yarn, and pull it through. You should have 4 loops on your hook. Note, when you work regular trc stitch, you draw the yarn through the first two loops on your hook tree times to the front of your work. However, with trc CCW, it is more convenient to pull the yarn through the first two loops on your hook to the back of your work (3 loops left). Please watch the video 'Crochet pineapple stitch blouse - Part 1 of 2' from about 16:53 to 16:55. Second time, draw the yarn through the 1st two loops on the hook to the front of your work the same as you would do with regular trc (2 loops left). Last time, grab the yarn and pull it through the remaining two loops on your hook. Hope this will help.
Pages