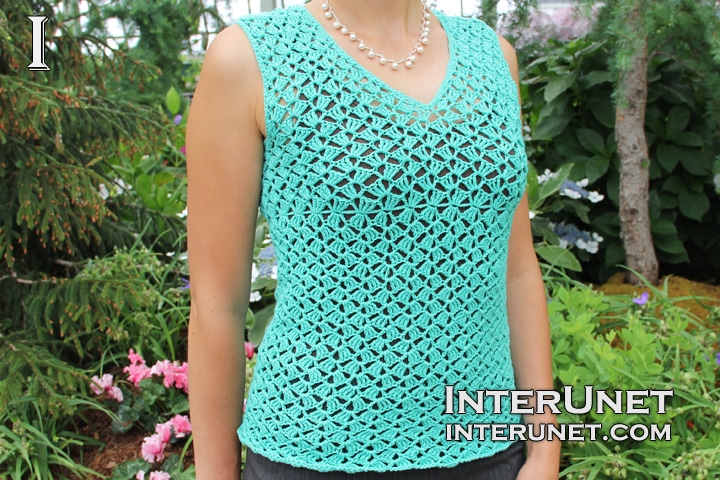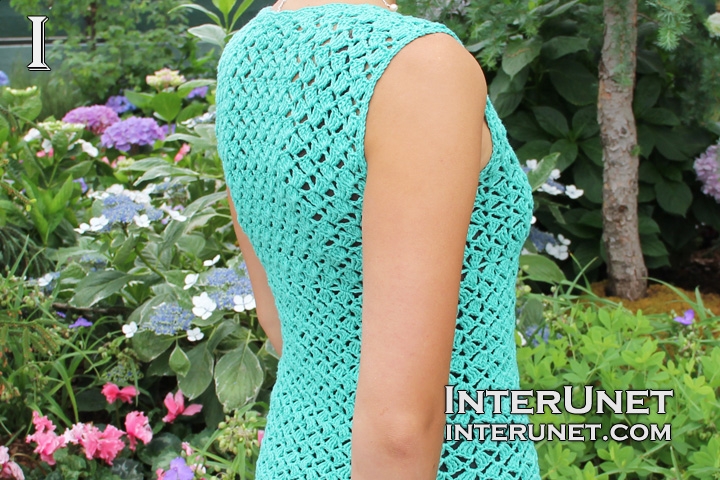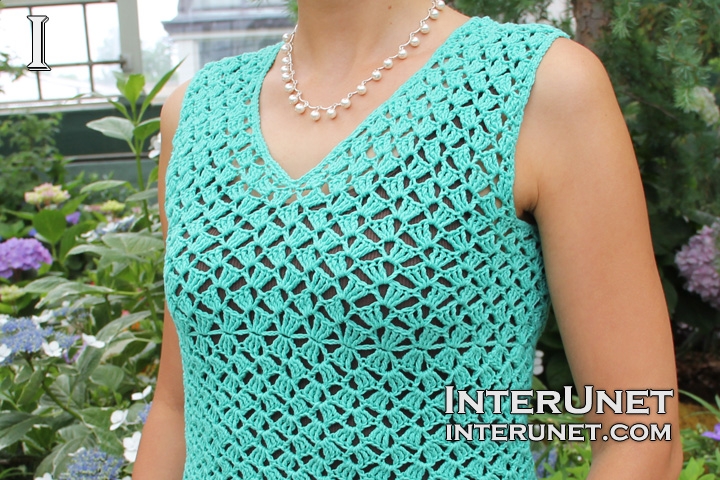
Yarn - Bernat Cotton-ish (turquoise) / light 3 / 2.4 oz (70 g) / 282 yards (258 m) / about 2.5 balls needed
Hook - D/3 – 3.25 mm and E/4 – 3.50 mm or other size hooks needed for the gauge
Gauge - About 4 repeats go into 4 inches (10 cm)
Blouse Size - S
Complexity - Easy/Beginners friendly stitch

Crochet V-neck blouse - triple crochet stitch
Step-by-step crochet instructions
Step 1
Make a foundation chain of 160 chains or multiples of 5 chs. Join the last and first chains with a slip stitch to continue crocheting in the round.
Step 2
1st round (right side) – ch4, (trc2 CW, ch2, dc1) into sm.ch., sk4, [(trc3 CW, ch2, dc1) into 1ch, sk4] to end plus sl.st.1 into 4th ch. after starting point. Turn the work to the wrong side and work sl.st.1 into the 1st opening between dc1 and trc3.
2nd round (wrong side) – ch4, (trc2 CCW, ch2, dc1) into sm.op., [(trc3 CCW, ch2, dc1) into 1op.] to end plus sl.st.1 into 4th ch. after starting point. Turn the work to the right side and work sl.st.1 into the 1st opening between dc1 and trc3.
3rd round (right side) – ch4, (trc2 CW, ch2, dc1) into sm.op., [(trc3 CW, ch2, dc1) into 1op.] to end plus sl.st.1 into 4th ch. after starting point. Turn the work to the wrong side and work sl.st.1 into the 1st opening between dc1 and trc3.
Repeat the pattern starting from the 2nd round.
After you crochet about 10 rounds of the pattern, use a larger size crochet hook to make the garment wider.
Step 3
Crochet from the middle (foundation chain) of the blouse up
Attach the yarn and crochet 1st round (step2) regular way using loops of initial foundation chain. Then alternate 2nd and 3rd rounds until you crochet about 7 rounds in total.
Step 4
Back part
(work 14 repeats / [])
1st row (wrong side) – ch3, [(trc3 CCW, ch2, dc1) into 1op.] to end, sk2, dc1 plus RC3
2nd row (right side) – [(trc3 CW, ch2, dc1) into 1op.] to end, sk2, dc1 plus RC3
3rd row (wrong side) – [(trc3 CCW, ch2, dc1) into 1op.] to end, sk2, dc1 plus RC3
Alternate 2nd and 3rd rows until you crochet 12 rows in total or as many as necessary.
Step 5
Right front part
Skip 2 repeats/[] from the back part and work 7 repeats.
1st row = 1st row
2nd row = 2nd row
Decrease chains
3rd row (wrong side) – Vst. into op., [(trc3 CCW, ch2, dc1) into 1op.] to end, sk2, dc1 + RC3
4th row (right side) – [(trc 3 CW, ch2, dc1) into 1op.] to end, dc1 into Vst. + RC3
5, 7 rows = 3rd row
6, 8 rows = 4th row
Work rows without decreasing chains
9, 11 rows – [(trc3 CCW, ch2, dc1) into 1op.] to end, sk2, dc1 + RC3
10, 12 rows = 2nd row
Step 6
Left front part
(work like a mirror reflection to the right front part)
Skip 2 repeats from the back part
1st row = 1st row
Decrease
2nd row (right side) – Vst. into op., [(trc3 CW, ch2, dc1) into 1op.] to end, sk2, dc1 + RC3
3rd row (wrong side) – [(trc 3 CCW, ch2, dc1) into 1op.] to end, dc1 into Vst. + RC3
4, 6 rows = 2nd row
5, 7 rows = 3rd row
Continue crocheting rows without decreasing chains
8, 10, 12 rows = 2nd row (step 4 – back part)
9, 11 rows = 3rd row (step 4 – back part)
Step 7
Finish up
Join the front and back shoulder pieces matching closely repeats on both sides. For that, you may work sl.st. on the wrong side of the garment or sew them together.
Edges – sc to end.

Abbreviations
ch – chain
dc – double crochet
op – opening between dc and trc
RC – returning chain
sc – single crochet
sk – skip a base chain
sl.st. – slip stitch
sm.ch. – same chain (reuse the same base chain)
trc CW – triple crochet clockwise (wrap the yarn around a hook clockwise)
trc CCW – triple crochet counterclockwise (wrap the yarn around the hook counterclockwise)
V-neck blouse crochet pattern

Comments
Hi was wondering how to
Hi was wondering how to convert the top to size medium and a large
Hi tammy,
Hi tammy,
Thanks for the good question. It will depend on your gauge/tension. I would use a larger size crochet hook to convert the blouse to a medium size. For the large size, I'd work 4 more repeats. To do so, make a foundation chain of 180 chains (36 repeats). For the back part, work 16 repeats. For each front part, crochet 8 repeats. Under each arm, skip 2 repeats. Happy crocheting!
I am currently working on
I am currently working on this Crochet V-Neck blouse and I am having a very difficult time doing the Counterclockwise Triple Crochet. I cannot seem to get the second loops through the hook? I have a friend who crochets all the time and she never heard of doing this stitch that way. I do see what it looks like on the right side, but I have to do the CW stitch instead. Any suggestions?? I've even looked on the internet for an explanation or tutorial on how to do it and all it refers to is turning your work around counter clockwise and chaining 4 and wrapping your yarn Clockwise. Thank you for your help!
Hi luckylady1,
Hi luckylady1,
I suggest watching the video 'Crochet pineapple stitch blouse - Part 1 of 2' (Youtube) from about 16:05 to 17:50 where I've shown how to work this stitch more slowly. You may also find the video by visiting this page http://interunet.com/crochet-a-raglan-blouse-pineapple-pattern. It is all about how the stitch will look from the right side of the garment. I just wanted triple crochet stitches to look the same on the right side of the blouse regardless whether I work right or wrong sides. You may work all triple crochet stitches clockwise. That way you will add more texture to the fabric. Happy crocheting!
Thank you for suggesting
Thank you for suggesting watching that video. I will and hopefully will be able to do the CCW stitch for the rest of the blouse.
Hello, i was able to learn
Hello, i was able to learn how to do the CCW stitch by watching the video that you suggested but I have been trying to finish this crochet top, and I'm totally lost as to where I go next to start the other side. Could you advise me where to start the other side. I've included a picture of what I've done so far. Thank you!
Hi luckylady1,
Hi luckylady1,
Thank you for attaching the picture. From the picture I see that you work fewer repeats than I did. I made a foundation chain of 160 chs or multiples of 5 chs (step 1). So, 160 chs / 5 chs = 32 repeats. For the back part I used 14 repeats, for each front part I used 7 repeats, and I skipped 2 repeats under each arm. In addition, I started to crochet from under bust down and then I attach the yarn to the initial foundation chain and start crocheting from the under bust up (step 3, please watch the video from about 8:09). You may watch the step 4 from about 9:20. If you wanted to worked fewer repeats with a purpose to fit the blouse to your size, then you need to divide the number of repeats for each back and front parts differently.
Hi Sana, I read your comment
Hi Sana, I read your comment and watched the video sections you suggested. I cast on 160 chains as I wanted a small. I did the 10 rows with a larger hook and then switched to the smaller one as you said and did 7 more rows or whatever the pattern called for. I have 14 repeats and 12 rows for the back. I thought I started the front under the bust 2 repeats in from the back to start the first front V, but am confused at your comment when you refer to the second front part? Did I miss a section to be crocheted before I start the V section of the blouse? Thank you for any help you can give me. I came this far, watched your video many, many times, and referred to the pattern, but am missing something?
Hi luckylady1,
Hi luckylady1,
Thank you for giving me more details. When I took a closer look, I've noticed that you sometimes did not flip the garment to the wrong side (I marked it on the picture with red arrows). I guess that's the reason why your number of repeats was changed/decreased. My suggestion is to frog off the back and front parts, attach the yarn to the initial foundation chain/your starting point (step 3 - crochet under bust up), crochet 7 rounds, and then work the back and two front parts. Since you started with the 160 chs, then you should have 32 repeats. My suggestion will work only if the bottom part (step 2 - crochet from the under bust down) is not too small/tight on you. Hope this will help.
Hi Sana, thank you for taking
Hi Sana, thank you for taking the time to look closer at my work. I had a friend look at it as well and she discovered that my initial foundation repeats did not equal the 32 you mentioned in your previous comment. I only had 27. I was less the 5 multiples. Therefore therefore did not have enough to make the other side of the V to finish my blouse. I did not understand that in the beginning of your instructions. if you mentioned that in the pattern, and in the tutorial, based on the size being made that would help us be aware of how many foundation repeats we should be starting with. Hope that makes sense. I will either try what you suggested, or take out the V and just finish off by gluing straight up and attaching the tops and start a new one correctly. Thank you again for your suggestions. I hope you consider mine.
Pages