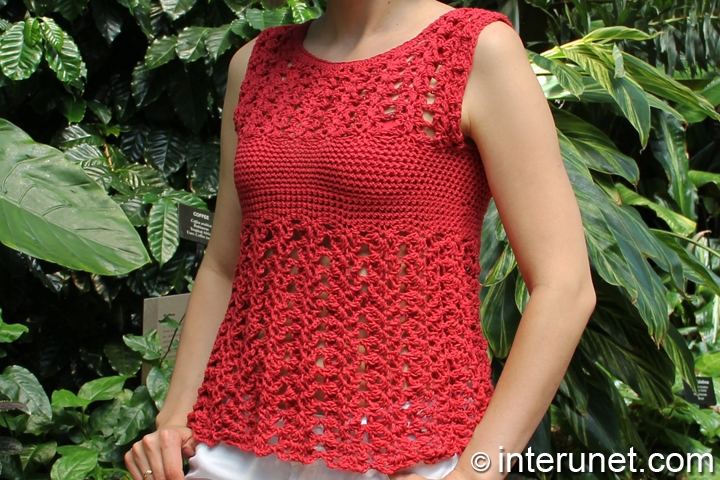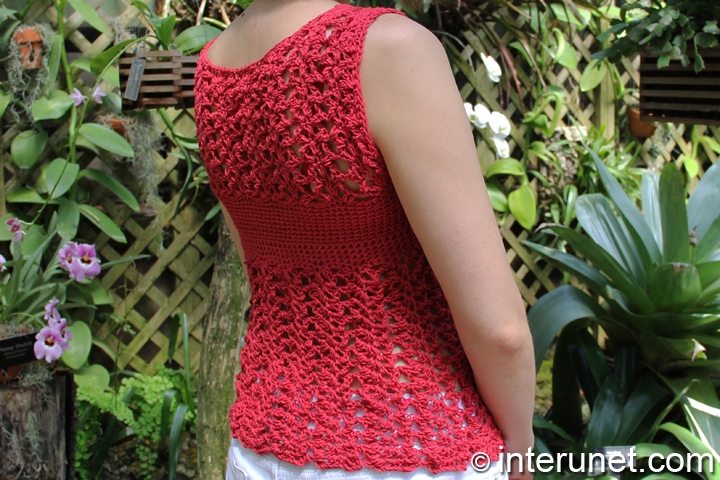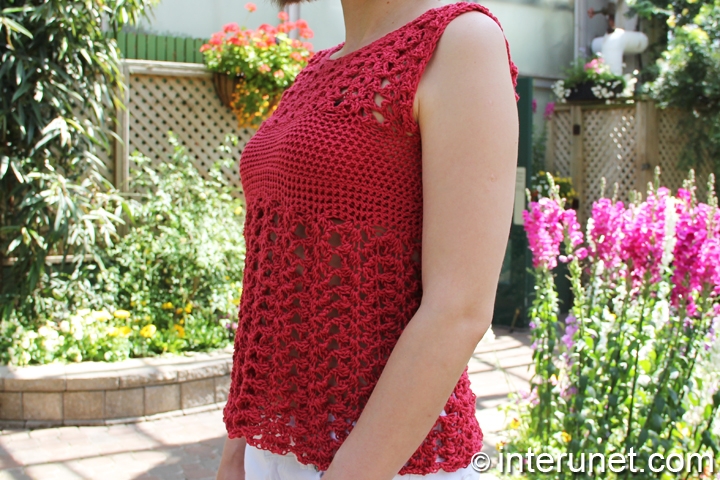
Yarn - Bernat Cotton-ish (crimson twine) / light 3 / 2.4 oz (70 g) / 282 yards (258 m) / 2 balls needed
Hook - I-9 (5.5 mm) and F (3.75 mm) or other size hooks needed to obtain gauge
Gauge - About 13 sc chains go into 4 inches and about 2 columns go into 4 inches
Top Size - US 6
Complexity - Easy

Crochet women’s summer top - red azalea pattern
Step-by-step crochet instructions
In order to make the summer top, it is necessary to start from the middle of the garment and work all the way down. In addition, use different size crochet hooks to avoid increasing chains. Then attach the yarn to the initial foundation chain and crochet from the middle up.
Step 1
Make a foundation chain of 103 chains (ch.) or multiples of 6 chains plus 1 additional ch. Connect the first and last chains together with slip stitch (sl.st.)
Step 2
Crochet from the middle down
1st round – sc to end
2 – 4 rounds – blsc to end
5th round – blsc to end plus sl.st.1
If desired, you may work more rounds of blsc
Step 3
Red azalea pattern
6th round – ch.1, [skip 3, dc2 in 1 ch., bump*, dc3 in 1 ch., bump, dc2 in 1 ch.] to end plus sl.st.1
*bump – ch.2, sc1 on the 1st of the 2 chains
7th round – ch.1, [dc2 in 1 ch., bump*, dc3 in 1 ch., bump, dc2 in 1 ch. on 3 chains between each 2 bumps of the previous round] plus sl.st.1
8 -19 rounds or more = 7th round
Flip the garment to the wrong side because on the wrong side of the pattern looks better.
Step 4
Crochet from the middle up
Attach the yarn on the other side of your initial foundation chain.
1 – 10 rounds – sc to end increasing 1 ch. every other round. After that you should have 5 chains more or 108 chains in total.
Step 5
Front part
Continue Red azalea pattern for 54 chains (multiples of 6 chs) or half of your total chains working right and wrong sides.
1st row – ch.1, [skip 3, dc2 in 1 ch., bump*, dc3 in 1 ch., bump, dc2 in 1 ch.] to last 4 chains, skip 3, dc1 + 1 returning chain (rc)
After the 1st row, you should form 8 columns of flowers.
2nd row – ch.1, [dc2 in 1 ch., bump*, dc3 in 1 ch., bump, dc2 in 1 ch. on 3 chains between each 2 bumps of the previous round] to end. At the end of the row, work dc1 in the last chain of the row +rc1
3 – 7 rows = 2nd row
Step 6
Front shoulder piece:
8 – 10 rows - work the pattern for 2 columns
Step 7 (optional)
Work sl.st. down to 7th row, and continue sc to last 2 columns skipping chains between each set of bumps. The other option is to cut the yarn and secure it. Then attach it before last 2 columns to continue the pattern for the 2nd shoulder piece.
Step 8 = step 6
Step 9
Back part – work the pattern for 9 rows
1st back shoulder piece – crochet the Red azalea pattern for 2 columns one row. From the 10th row work sl.st. down to 9th row and proceed sc to last 2 columns.
2nd back shoulder piece – crochet the pattern to end.
Step 10
Flip the garment on the wrong side, and join front and back shoulder pieces matching closely columns. That way the seam won’t be visible.
Step 11
Edges
Work sc to end for all edges.
Step 12
Weave in all the end of the yarn including your starting point.

Abbreviations
ch. – chain
blsc - back loop single crochet
dc – double crochet
rc – returning chain
sc – single crochet
sl.st. – slip stitch
Crochet red azalea stitch summer top
Español
Manera de realizarlo:
a) Montar 103 cadenas (múltiplo de 6 +1) y cerrar con punto corrido
b) 1 vuelta – insertar la aguja en la segunda cadena y hacer medio puntos (uno en cada cadena) hasta terminar
2, 3, 4 vueltas = 1 vuelta
5 vuelta – tejer un medio punto en cada cadena base hasta terminar y un punto corrido
c) 6 vuelta – levantar 1 cadena, *saltar 3 cadenas, tejer 2 varetas en 1 cadena, hacer el picot, tejer 3 varetas en 1 cadena, hacer el picot, tejer 2 varetas en 1 cadena, repetir*. Cerrar la vuelta con punto corrido.
picot – levantar 2 cadenas, insertar la aguja la segunda cadena y hacer un medio punto
7 vuelta – levantar 1 cadena, *(tejer 2 varetas en 1 cadena, hacer el picot, tejer 3 varetas en 1 cadena, hacer el picot, tejer 2 varetas en 1 cadena) dentro 2 picots de la anterior vuelta, repetir*. Cerrar la vuelta con punto corrido.
Repetir la séptima vuelta.
Luego usar un aguja grande para hacer la prenda más amplio y repetir la séptima vuelta hasta obtener el largo deseado.
d) conecte el hilo a la cadena inicial fundación, tejer medio puntos (uno en cada cadena) y hacer 5 aumentos.
108 medio puntos.
e) Parte delantera
Usar 54 cadenas (múltiplo de 6) o media de las cadenas (108 / 2 = 54).
1 hilera - levantar 1 cadena, *saltar 3 cadenas, tejer 2 varetas en 1 cadena, hacer el picot, tejer 3 varetas en 1 cadena, hacer el picot, tejer 2 varetas en 1 cadena, repetir*; saltar 3 cadenas, tejer 1 vareta + levanter 1 cadena. Dar vuelta.
2 hilera - levantar 1 cadena, *(tejer 2 varetas en 1 cadena, hacer el picot, tejer 3 varetas en 1 cadena, hacer el picot, tejer 2 varetas en 1 cadena) dentro 2 picots de la anterior hilera, repetir*; tejer 1 vareta + levantar 1 cadena. Dar vuelta.
3 – 7 hileras = 2 hilera
f) El hombro
8 – 10 hileras = 2 hilera (tejer 2 columnas)
g) Parte trasera
1 hilera = 1 hilera
2 – 9 hileras = 2 hilera
El hombre
10 hilera = 2 hilera (tejer 2 columnas)
h) Unir hombros
i) Borde
Tejer medio puntos hasta terminar

Comments
Hi ella_1,
Hi ella_1,
Yes, you may use the yarn. If I use that thin yarn, I would work dc in steps 2 and 4 instead of sc (just a suggestion). Happy crocheting!
do you have instructions for
do you have instructions for different sizes?
and when do you use which hook?
thanks
Hi ybh8ful,
Hi ybh8ful,
This pattern can be adjustable to any size. I would advise you to crochet a small sample (step 5) to know your gauge and to estimate how many repeats it is necessary to work to your underbust circumference accordingly. To widen the garment from the bottom, I used a larger size crochet hook from about my waistline until I reached the desired length of the blouse. Happy crocheting!
Hi Sasha,
Hi Sasha,
I made two of these; one for my niece and another for a customer. I love this pattern. Thank you. I will be making more of your patterns.
You're welcome, Creative
You're welcome, Creative Joyce. I'm glad that you liked my work. Happy crochet!
Adorable
Adorable
Hi Christy,
Hi Christy,
Thanks for the post. I appreciate it. Happy crochet!
I HAVE 9 FLOWERS IN THE BACK
I HAVE 9 FLOWERS IN THE BACK IS THAT RIGHT SO FAR EVERY THING IS GONE RIGHT SO FOR CAPITAL LETTERS KEY BOARD MESSED UP
do u skip and stitches under
do u skip and stitches under arms when u do the the back piece
Hi bcrfairview,
Hi bcrfairview,
I did not skip sts under arms. If you worked 8 flowers/repeats for the front part, then skip 3 sts under each arm to work the same number of repeats for the back part as for the front one. Happy crochet!
Pages