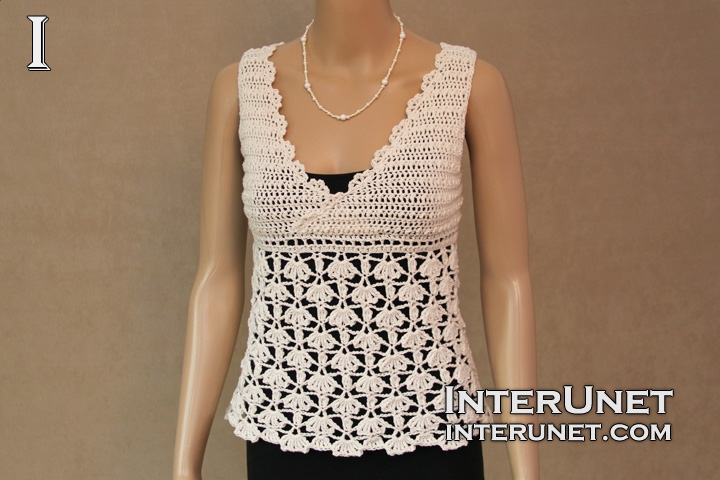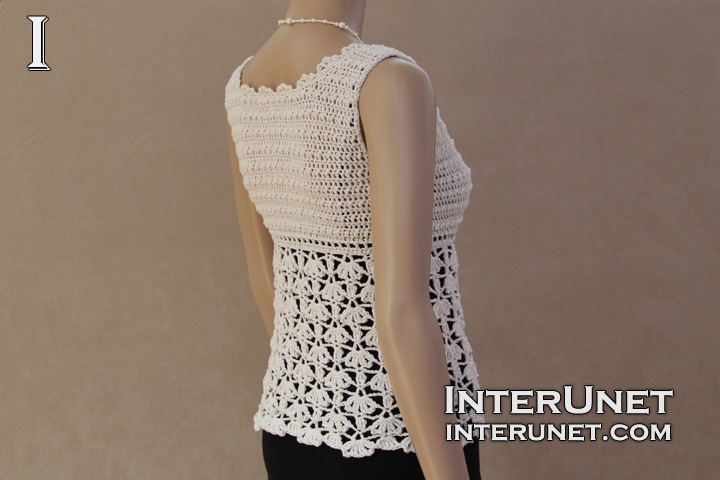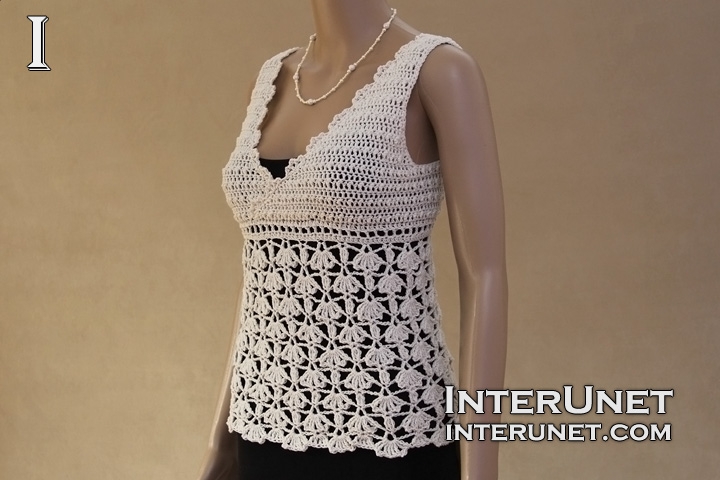
Yarn - Bernat Cotton-ish (cotton ball) / light 3/ 2.4 oz (70 g) / 282 yards (258 m) / about 2 balls needed
Hooks - F/5 – 3.75 mm and E/4 – 3.50 mm or other size hooks needed for the gauge
Gauge - 2 repeats go into about 4.5 inches using a smaller size crochet hook,
2 repeats go into about 5 inches using a larger size crochet hook, and
16 dcs go into about 4 inches.
Top Size - XS
Complexity - Advanced beginner

Crochet lace blouse – White Ivy tank top crochet pattern
Step-by-step crochet instructions
Begin crocheting the summer top from the underbust down.
Step 1
Make a foundation chain of 130 chs or mult. of 10 chs. Join it into a ring with the sl.st.
Step 2
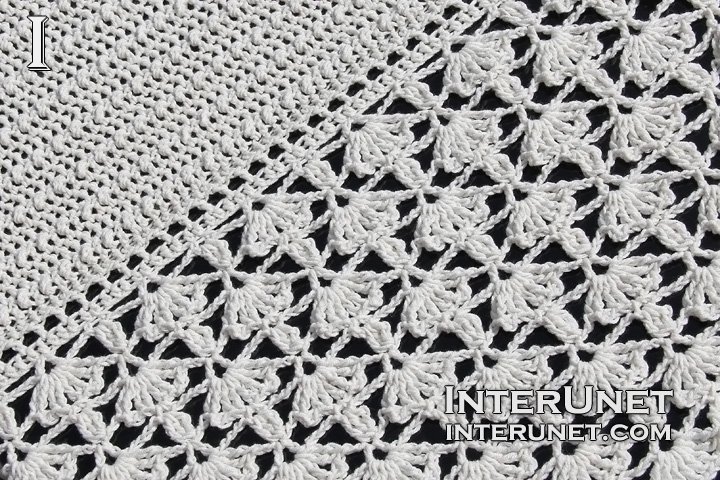
White Ivy stitch
1st round – ch4, dc1 into sm.ch, ch3, sk4, (sc1, ch2, scc1) into sm.ch, ch3, [sk4, Vst, ch3, sk4, (sc1, ch2, scc1) into sm.ch, ch3] to end; sl.st1 into 3rd ch
2nd round – sl.st.1 under ch, ch5, (trc2, picot1, trc2) into Vst, ch2, trcCl into arch of 2chs, ch2, [flower1 into Vst, ch2, trcCl into arch of 2chs, ch2] to end; (trc2, picot1, trc1) into 1st Vst of the prev.round + sl.st.1 into 4th ch
3rd round – [(sc1, ch2, sc1) under ch*, ch4, Vst above trcCl, ch4] to end + sl.st.1 into first arch of 2 chs
4th round – ch3, trcCl*, ch2, flower into Vst, ch2, [trcCl into arch of 2chs, ch2, flower into Vst, ch2] to end + sl.st.1 into 4th ch
5th round – ch4, dc1 into sm.ch, ch4, (sc1, ch2, sc1) under ch*, ch4, [Vst above trcCl, ch4, (sc1, ch2, sc1) under ch*, ch4] to end + sl.st.1 into 3rd ch
*work arch of 2chs under middle ch of a flower
Begin crocheting the pattern starting from the 2nd round. After you crochet about 4 inches of the White Ivy st., continue crocheting the pattern using a larger size crochet hook to widen the garment from the bottom until you reach the desired length of the blouse.
Crochet your last round as your second round, but work trc5 into arch of 2chs instead of trcCl
Last round – sl.st.1 under ch, ch5, (trc2, picot1, trc2) into Vst, trc5 into arch of 2chs, [flower1 into Vst, trc5 into arch of 2chs] to end; (trc2, picot1, trc1) into 1st Vst of the prev.round + sl.st.1 into 4th ch
Cut the yarn and secure it.
Step 3
Crochet from the underbust up
Come back to your initial foundation chain and attach the yarn there.
1st round – ch1, hdc to end + sl.st.1 into 2nd ch
2nd round – ch4, [sk1, dc1, ch1] to end + sl.st.1 into sl.st.1 into 3rd ch
3rd round = 1st round
Step 4
Body
Work long rows
After the 3rd round, ch2, then turn your work to the wrong side. Use back loops only.
1st row – h3ch, bl ddec1, [bl dc1, bl dc1*] to end; then reuse the very 1st ch and work dc1 there. After that use following 19 front loops and work [bl dc1*, bl dc1] x 8, ddec1 + RC2
Your row should be longer than rounds.
2nd row – h3ch, ddec1, dc to last 3chs; ddec1 + RC2
3rd row – h3ch, ddec1, [dc1, dc1*] to last 4chs; dc1, ddec1 + RC2
Alternate the 2nd and 3rd rows until you crochet about 7 rows.
Step 5
First front part
Decrease 1 ch from each side of a row
8th row – h3ch, dec1, dc23, dec1 + RC2
9th row – h3ch, dec1, [dc1, dc1*] to last 3chs; dc1, dec1 + RC2
10th row – h3ch, dec1, dc to last 2chs; dec1 + RC2
11, 13 rows = 9th row
12, 14 rows = 10th row
Step 6
Decrease 1 ch from the neck side only
15th row – h3ch, [dc1, dc1*] to last 3chs; dc1, dec1 + RC2
16th row – h3ch, dec1, dc to end + RC2
Alternate 15 and 16 rows until you have 7 chs left.
Step 7
Work rows without decreasing chs
21st row – h3ch, [dc1, dc1*] to last 1ch; dc1 + RC2
22nd row – h3ch, dc to end
Step 8
Second front part
Work the second front part as a mirror reflection to the first front part.
Return to the 7th long row, count 27 chs and attach the yarn into 27th ch. Make 2 chs to pick up the height. Then repeat the step 5.
Decrease 1 ch from the neck side only
15th row – h3ch, dec1, [dc1, dc1*] to last 1ch; dc1 + RC2
16th row – h3ch, dc to last 2chs; dec1 + RC2
Alternate 15 and 16 rows until you have 7 chs left. Then repeat the step 7.

Step 9
Back part
Return to the 7th long row again, skip 8 chs from each front part, and attach the yarn into 9th ch.
Work rows decreasing 1 ch from each side of a row
8th row = 10th row (front part)
9th row = 9th row (front part)
Work rows without decreasing chains
10th row = 21st row
11st row = 22nd row
Alternate 10 and 11 rows.
Step 10
First back shoulder piece
18th row – h3ch, dc10, dec1 + RC2
19th row – h3ch, dec1, [dc1, dc1*] to last 1ch; dc1 + RC2
20th row – h3ch, dc to last 2chs; dec1 + RC2
21st row = 19th row
22nd row = 20th row
Work 2 more rows without decreasing chains (step 7).
Step 11
Second back shoulder piece
Work sl.sts down to your 17th long row and sc to last 12 chs of the row. Then make 2 chs to pick up the height.
18th row – h3ch, dec1, dc to end + RC2
19th row – h3ch, [dc1, dc1*] to last 3chs; dc1, dec1 + RC2
Alternate 18 and 19 rows until you have 7 chs left, then work last 2 rows without decreasing chs (step 7).
Join front and back shoulder pieces together from the wrong side of the garment.
Step 12
Edges
Picot fan/flower stitch
Attach the yarn into your front part, ch1, [sk row*, fan/flower1, sk row*, sl.st.1] to end
*sk row – skip a row or more to work about even intervals between each fan and sl.st.
Single crochet around armholes. Cut the yarn and secure it.

Abbreviations
bl – back loop
ch – chain
dc – double crochet
*dc – unusual double crochet – work 1 unfinished dc, then yo and insert your hook between previous dc and unfinished dc, grab the yarn and pull it through. You should have 4 loops on your hook. Draw the yarn through all 4 loops.
dec – decrease – work 2 unfinished dcs, and then pull the yarn trough the 3 loops on your hook (you should decrease one chain)
ddec – double decrease – work 1 unfinished dc, sk1, work 1 unfinished dc, then draw the yarn through 3 loops on your hook (you should decrease 2 chs)
fan/flower – [(dc1, picot1) x 3, dc1] into one chain
flower – trc2, picot1, trc2, ch1, trc2, picot1, trc2
hdc – half double crochet
picot – ch2 and sc1 into the 1st ch of the initial 2 chs
RC – returning chain
sc – single crochet
sk – skip a base chain/chains
sm.ch – the same base chain
trc – triple crochet
trcCl – triple crochet cluster – work 3 unfinished trcs, then pull the yarn through all 4 loops on your hook
*trcCl – work 2 unfinished trcs, and then draw the yarn trough 3 loops on your hook
Vst – V- stitch – (dc1, ch1, dc1) into sm.ch or first ch4 of a round and dc1 into sm.ch
yo – yarn over
White Ivy tank top - crochet lace blouse

Comments
Hi Sana, I followed your
Hi Sana, I followed your video tutorial and the outcome was beautiful. Received a lot of appreciation and compliments for the design. Uploading the pic here for you to check out. I made a slight change by adding a color in the borders. Thank you :)
You're welcome, deepikadutt.
You're welcome, deepikadutt. I'm very glad that you like the pattern and crocheted such a beautiful blouse. I love your adjustments with the yarn color. Thank you for modeling it. Your work looks very neat and accurate. Congratulations!
Hi sana, I want to make large
Hi sana, I want to make large size blouse how many foundation chains should i make?? My yarn is bit thinner than this one. Plz advice me. I dnt knw wht is the yarn size
Hi Nilukshi,
Hi Nilukshi,
If your gauge will be about the same as mine, I would suggest starting with 160 chs. I'd advise you to practice your gauge first before making estimates. Make a sample of dc sts to estimate how many chs you need to work to your underbust circumference accordingly. Happy crochet!
Thanks sana, I'm going to
Thanks sana, I'm going to start it today
Hi sana, im working on the
Hi sana, im working on the body part of this dress. Do i need to make any changes while crocheting as my bust 36" nd i have made 200 foundation chains. Please advice me that do i need to crochet more than 7rows nd what about front part? already im on my 7th rowThank u
Hi Nilukshi,
Hi Nilukshi,
You may work more long rows. It depends on how deep you want your armholes to be. For each front part, I worked about 1/4 of my chains and for the back part 2/4, skipping 8 chs under each arm. Happy crochet!
Thanks sara, I hav finished
Thanks sara, I hav finished it. Make small difference by adding small sleeve. I cnt upload pictures here due to error. So unable to upload a photo. Thanks alot for your advices
It shouldn’t be an issue with
It shouldn’t be an issue with uploading pictures unless the file is bigger than 2 Mb. Which error do you see? I will look into the problem as I’d love to see your work.
Hi sana. Here I have upload a
Hi sana. Here I have upload a picture. Last te its not allowed to upload the picture as my picture size bigger than 2MB. :)
Pages