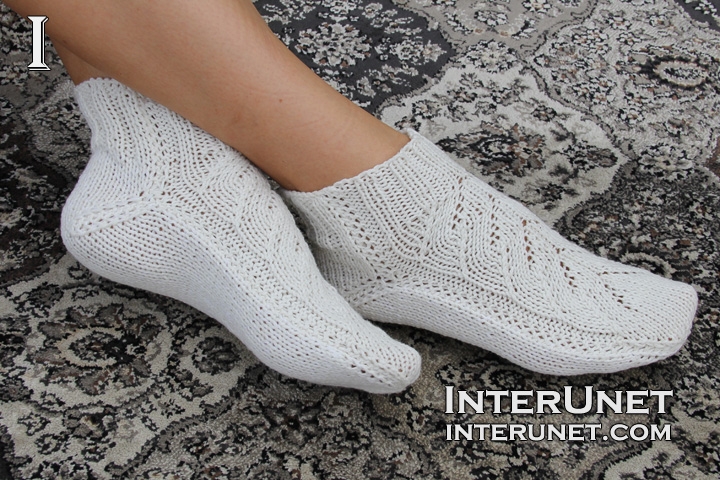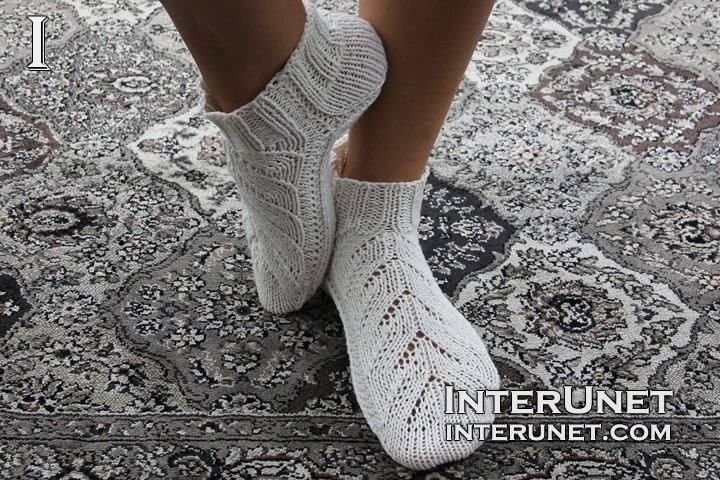
Yarn - Bernat Cotton-ish (cotton ball) / light 3/ 2.4 oz (70 g) / 282 yards (258 m) / less than 1 ball needed
Knitting Needles - Double pointed US 3 (3.25 mm) 7 in (17.78 cm)
Gauge - About 17 k sts go into 4 inches (10 cm)
Socks Size - US 8
Complexity - Advanced Beginner

Women’s socks knitting pattern - braids stitch
Step-by-step knitting instructions
Step 1
Cast on 24 sts on two double pointed needles to make the first loops bigger.
Step 2
Ribbing
1st row (right side) – sl.st.1, [p2, k2] to last 3 sts; p2, k1
2nd row (wrong side) – sl.st.1, [k2, p2] to last 3sts; k2, p1
Alternate the 1st and 2nd rows until you have 15 rows in total or knit the desired length of the ribbing.
Step 3
Braids pattern
16th row (wrong side) – sl.st.1, k2, p9, pick up 1 st., p9, k2, p1
17th row – sl.st.1, p2, k4, k2tog-R, k3, pick 1 st, p1, pick 1 st, k3, k2tog-L, K4, p2, k1
18th row – sl.st.1, k2, p9, k1, p9, k2, p1
19th row – sl.st.1, p2, k3, k2tog-R, k3, pick 1 st, k1, p1, k1, pick 1 st, k3, k2tog-L, k3, p2, k1
20, 22, 24 rows = 18th row
21st row – sl.st.1, p2, k2, k2tog-R, k3, pick 1 st, k2, p1, k2, pick 1 st, k3, k2tog-L, k2, p2, k1
23rd row – sl.st.1, p2, k1, k2tog-R, k3, pick 1 st, k3, p1, k3, pick 1 st, k3, k2tog-L, k1, p2, k1
25th row – sl.st.1, p2, k2tog-R, k3, pick 1 st, k3, k2tog-L, k4, pick 1 st, k3, k2tog-L, p2, k1
26th row = 16th row
Repeat the pattern starting from the 16th row until you knit to end of your pinky toe.
Step 4
Decrease every other row
66th row (wrong side) – sl.st.1, k2, p to last 3 sts; k2, p1
67th row – sl.st1, k2tog-L, k to last 3 sts; k2tog-R, k1
68th row – sl.st.1, p to end
Alternate the 67th and 68th rows until you have 12 sts on your knitting needle.
Step 5
Decrease every row
78th row (wrong side) – sl.st.1, p2tog, p to last 3 sts; p2tog, p1
79th row = 67th row
Alternate the two above rows until you have 4 sts left.
Step 6
Bottom part
Increase two stitches every row
82nd row (wrong side) – sl.st.1, inc1, p to last 1 st; inc1, p1
83rd row – sl.st.1, inc1, k to last 1 st; inc1, k1
Alternate 82nd and 83rd row until you have 12 sts on your needle
Increase 2 sts every other row
86th row (wrong side) = 68th row
87th row = 83rd row
Alternate the 86th and 87th rows until you have 24 sts in total.
Step 7
Knit the back part to beginning of your heel
99th row (right side) – sl.st.1, k to end
100th row = 68th row
Step 8
Heel
Decrease 2 sts from both sides every other row until you have 8 sts left.
Then increase 2 sts every other row until you have gain 24 sts.
Step 9
Alternate 99th and 100th rows until you knit 6 rows or as many as necessary depending on your top part of a sock, and then work the ribbing for the same number of rows as in step 2.
Step 10
Cast off all the stitches.
Join sides starting from the heel. You may sew it or use a crochet hook.

Abbreviations
inc – increase – insert a right needle into the base stitch of the previous row (you may place it to the left needle), grab the yarn, and pull it through to have one extra stitch on the working needle. That way you increase one stitch without developing a hole.
k – knit
k2tog-L – knit two stitches together to the left side – insert a right needle into 2 sts, grab the yarn, and pull it through.
k2tog-R – knit two sts together to the right side – insert a right needle into the2nd st then into the the 1st stitch, grab the yarn, and draw it through
p – purl
pick 1 st – pick one stitch up – insert a needle under a yarn between two stitches of the previous row, grab the yarn, and pull it through. You should increase one stitch and develop a hole under it.
sl.st. – slip stitch
st – stitch
How to knit socks on two needles - braids stitch

Comments
Hi! I am trying to make
Hi! I am trying to make these socks exactly as you made them. After you have completed step 6, increasing back to 24 stitches, the video says you need 62 rows for the bottom of the socks before the heel. Do the 62 rows include the 17 rows to increase the stiches to 24, meaning 45 more rows, or are the 62 rows in addition to the 17 rows for the toe?
And thank you for doing this video with very detailed instructions. I'm a beginner and this is a fantastic way to learn!
Hi Slylet,
Hi Slylet,
Thank you for the good question. In the step 7, you may read 'Knit the back part to beginning of your heel'. This means that it is more important to knit to beg. of a heel than to work the same number of rows for the top and bottom parts of a sock. You may knit the same number of rows for the both parts only if you are 100% sure that your gauge/tension is exactly the same. You're not knitting in the round, and your gauge may change. Rows 82 - 85 (or 4 rows) - I increased my number of sts to 12 sts. Rows 86 - 98 (or 12 rows) - I increased my # of sts to 24 sts. Then I knitted 50 rows more without increasing or decreasing sts before the heel (this number may vary). In my 62 rows, I included 50 rows + 12 rows of increase. Happy knitting!
I love this pattern. I am a
I love this pattern. I am a beginner at knitting socks and this is so much easier. Thanks
I love this pattern. Thanks
I love this pattern. Thanks
You are welcome. I'm glad
You are welcome. I'm glad that you liked the pattern. Happy knitting!
your instruction, esp camera
your instruction, esp camera work so close up is fabulous; i love to see how you handle the yarn and hold the needles very helpful
Hi BARBARALOWELL,
Hi BARBARALOWELL,
I'm glad that you liked my work. Thank you for the comment. I appreciate it. Happy knitting!
Hi, I keep having this
Hi, I keep having this problem where after repeating step 3 and finishing knitting row 17, I start on row 18 and I slipped a st, knit 2, purl 9, knit 1, purl 9 and i'm left with 4 stitches left when I should have 3. help?
Hi Teadrinker,
Hi Teadrinker,
I think that one decrease is missing. You may send me a picture of your work (as close as possible). That way I will be able to tell you exactly what is wrong. Happy knitting!
I had linked the image but i
I had linked the image but i guess it got removed
Pages