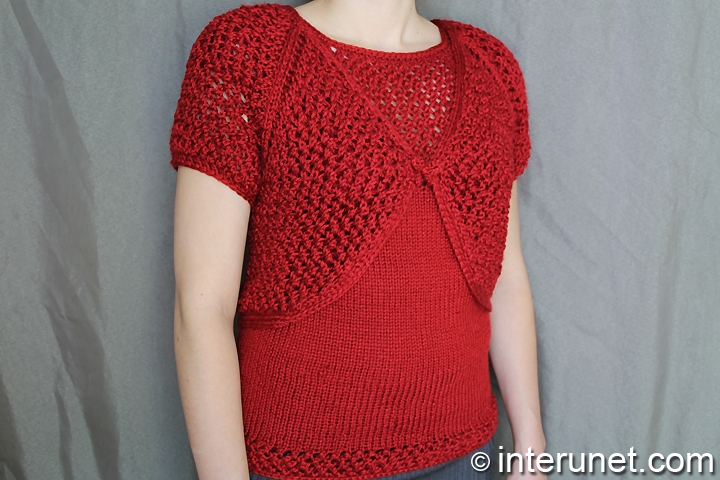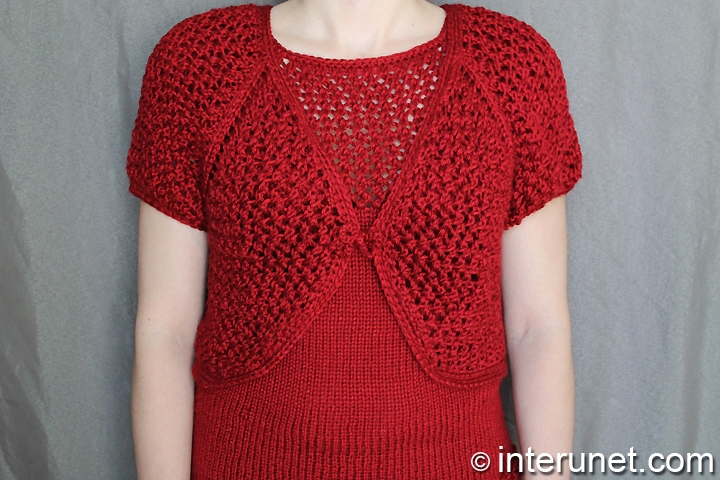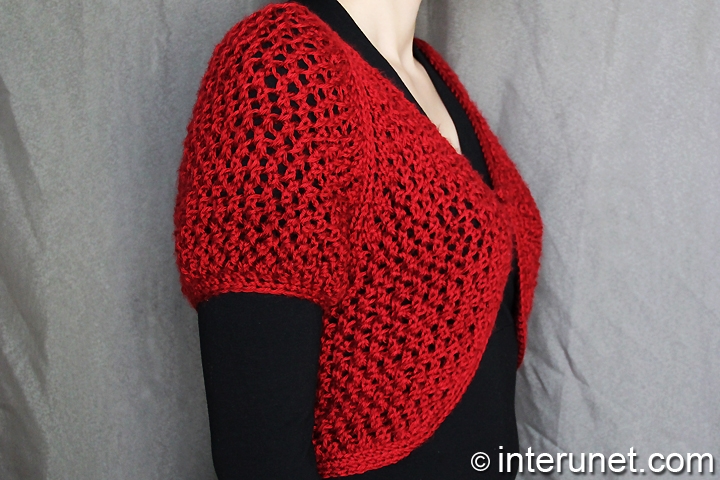
Yarn - Caron Simply Soft / medium 4 / 315 yds (288 m) / 1 1/4 balls needed
Needles - 29” and 16” long circular needles US 5
Gauge - about 8 repeats (yo, p2tog) go into 4 inches (10 cm)
Hook - US F (3.75 mm)
Cardigan Size - US 6
Complexity - Intermediate

Knitted women’s top
Step-by-step knitting instructions
Step 1
Cast on 58 stitches.
Step 2
1st row - k1, yo; k2, yo, k14, yo; k2, yo, k20, yo; k2, yo, k14, yo; k2, yo, k1. That’s way you divide the stitches to 5 parts (back, 2 shoulder parts, and 2 front parts).
In other words:
Front part - k1, yo;
Shoulder part - k2, yo, k14, yo;
Back part - k2, yo, k20, yo;
Shoulder part - k2, yo, k14, yo;
Front part - k2, yo, k1
After the 1st row, your total number of stitches should be increased by 8 stitches.
2nd and all even rows - purl all stitches to end
3rd row - k2, yo; [k2, yo, k2, (yo, p2tog) to last 2 sts of a part, k2 and yo] repeat that 3 times; k2, yo, k2
5th row - k3, yo; [k2, yo, k2, (p2tog, yo) to last 2 sts of a part, k2 and yo] repeat that 3 times; k2, yo, k3
Step 3
In addition to regular increasing of 8 stitches every other row, it is necessary to increase additional 9 sts on each front parts of the women’s top. So, starting from the 7th row, begin adding 10 stitches (instead of 8 sts) every 4 rows. That way you will make an even number of stitches on back and front pieces of the cardigan.
7th row - (k2, yo) twice; [k2, yo, k2, (yo, p2tog) to last 2 sts of a part, k2 and yo] repeat that 3 times; (k2, yo) twice, k2
Step 4
9th row - k2, (p2tog, yo) to last 2 sts of the part, k2, yo;
[k2, yo, k2, (p2tog, yo) to last 2 sts of a part, k2 and yo] repeat that 3 times;
k2, yo, k2, (p2tog, yo) to last 2 sts of the part, k2
11th row - k2, yo, k1, (yo, p2tog) to last 2 sts of the part, k2, yo;
[k2, yo, k2, (yo, p2tog) to last 2 sts of a part, k2 and yo] repeat that 3 times;
k2, yo, k2, (yo, p2tog) to last 1 st. of the part, yo, k1
13th row - k1, (p2tog, yo) to last 2 sts of the part, k2, yo;
[k2, yo, k2, (p2tog, yo) to last 2 sts of a part, k2 and yo] repeat that 3 times;
k2, yo, k2, (p2tog, yo) to last 1 st. of the part, k1
15th row - k1, yo, k1, (yo, p2tog) to last 2 sts of the part, k2, yo;
[k2, yo, k2, (yo, p2tog) to last 2 sts of a part, k2 and yo] repeat that 3 times;
k2, yo, k2, (yo, p2tog) to last 2 sts of the part, yo, k2
Repeat the pattern starting from 9th row.
Step 5
Slide both shoulder parts on safety pins.
43rd row - (front part) - k1, (yo, p2tog) to last 2 sts of the part, k2;
(shoulder part) - k1, slide all the rest sts of the shoulder part onto a safety pin plus 1 additional st.;
(back part) - k3, (yo, p2tog) to last 2 sts of the part, k2;
(shoulder part) - k1, slide all the sts of the second shoulder part onto a safety pin plus 1 additional st.;
(front part) - k3, (yo, p2tog) to last 1st., k1
Step 6
Decrease 4 stitches
45th row - k1, (p2tog, yo)14, (p3tog, yo)2, (p2tog, yo)29, (p3tog, yo)2, (p2tog, yo) to last 1st., k1
Step 7
Knit without increasing stitches
47 – 53 rows - k1, (yo, p2tog) to last 1 st.. k1
Step 8
Begin to decrease 2 stitches in a row every other row
55th row - k1, k2tog, (yo, p2tog) to last 3 sts, k2tog, k1
57th row - k2tog, (p2tog, yo) to last 2 sts, k2tog
Repeat the pattern starting from 55th row until you reach the desired length of the top.
Step 9
Cast off all the stitches
Work single crochet from the end of 81st row to its beginning.
Step 10
On a second round, make two ties to tie front pieces together.
Step 11
Slide all stitches from a safety pin back onto circular needles. Continue the pattern until you reach the desired length of the sleeve.
Step 12
Finish the sleeve using a crochet hook. Insert the hook into the first stitch, grab the yarn, and pull it through to pick up height. Then insert your hook into next 2 sts, do yarn over, and pull the yarn through those sts as well. After that wrap the yarn over the crochet hook again and pull it through the 2 stitches that lie on the hook. You should have 1 st. remaining on your hook. Continue adding 1 stitch to the existing stitch that lies on the crochet hook by pulling the yarn through two stitches that lie on circular needles. Then pull the yarn through the 2 sts that lie on the hook. Repeat the process to end of the round.
Work single crochet for the last round. Cut the yarn and secure it.

Abbreviations:
K1 – knit 1stitch
YO – yarn over
P2tog – purl 2 stitches together
P3tog – purl 3 sts together
K2tog – knit 2 sts together
Tie front cardigan knitting pattern

Comments
how many stiches does it
how many stiches does it require for M size and L size? and What is the gauge?
Hi job.megha,
Hi job.megha,
Since it is a top down knitting technique, I would start with the same number of sts and work rows until my back and front parts will be wide enough to the chest circumference accordingly. I added the gauge to the written instruction. Happy knitting!
I tried many times to follow
I tried many times to follow your steps on making this.
I kept having problem so I tried over & over again.
Then I started to count very carefully (on every row).
Did you check step 7's instruction? you said it will increase 10 stitches but it only add 8 instead. After 5th rows it has 82 stitches. But your 7th row only has 90 stitches?
Another question is after repeating row 9 to 15, it should be 40 rows. why the next step is 43rd row?
Hi Loi Taylor,
Hi Loi Taylor,
This written instruction goes along with a video tutorial. I checked the video (17:30), and I've noticed that at the end of the row 7 should be (k2, yo) twice - the same as I started the row. I'm not sure why you count 8 increases/yo, there were 9 increases instead of 10. Thank you for letting me know about the typo.
Please watch the video starting from about 29:30, to understand why the next step is 43rd row. I repeated the pattern until I knit 42 rows in total. If you have questions, it is better to ask them right away in order not to redo a project many times. Happy knitting!
Thanks for the quick answer,
Thanks for the quick answer, Sana. Now it makes sense.
I redid it because I thought I wasn't careful enough.
That's why I was very very careful on the last try & made sure I counted to make sure I didn't make mistake.
What I meant to say in my first question was that I had 2 extra stitches left with your original written instruction on row 7.
For the second question:
So we will knit 9th - 15th row 3 times plus 9th & 10th rows for the 4th time then starts 43rd row?
Hi Loi Taylor,
Hi Loi Taylor,
Yes, you understood it correctly. Happy knitting!
thank you for the reply.
thank you for the reply.
one more question:
I tried to count how many time to do the pattern before the last 2 stitches every row so I wouldn't make mistake.
I noticed 9th & 11th row on the front parts you do only once the pattern (yo & p2tog). 13th & 15th row on the front parts you do 3 times. May I ask how many times of the pattern on the 17th & 19th row? once only or more?
sorry for that stupid
sorry for that stupid question.
I guess the 17th row would do 4 pattern (p2tog yo) on the front parts, right?
Hi Loi Taylor,
Hi Loi Taylor,
Yes, I repeated (p2tog, yo) 4 times at the beg. of 17th row. Happy knitting!
I wanted to to a kids size of
I wanted to to a kids size of this one, I much preferred knitting than crocheting, what or how should I do if I want to make a kids size? Thank you and have a nice day.
Pages