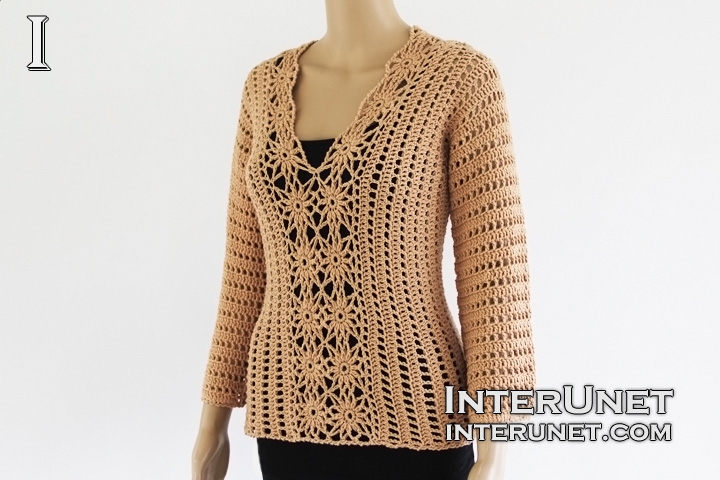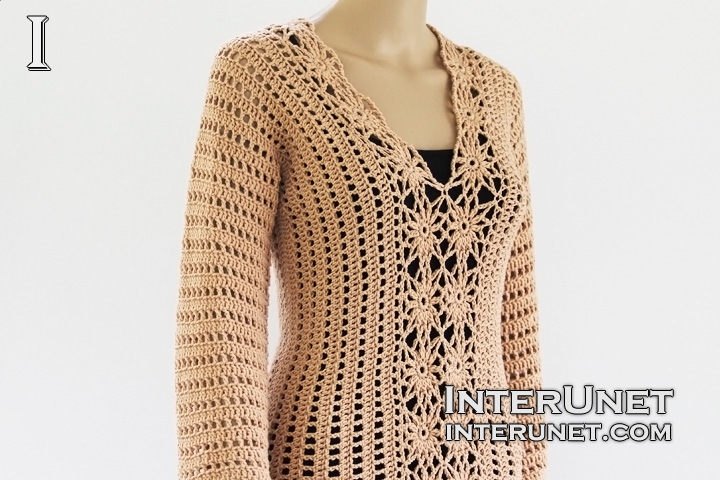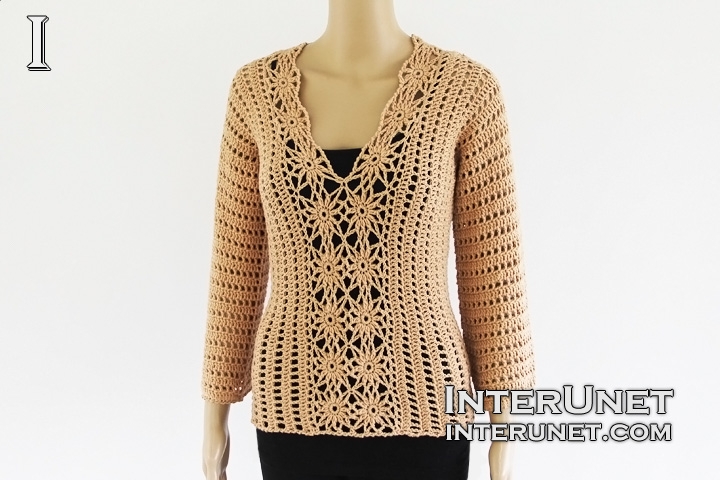
Yarn - Australian Superfine Merino Wool Yarn by Cleckheaton (shade - Dune) / 8 ply / 2.3 oz (65 g) / 142 yards (130 m) / about 6.5 balls needed
Hook - G/6 4.25mm or other size hook needed for the gauge
Gauge - 20 dc and 10 rows go into about 4 inches (10 cm) and one motif is about 2 x 2 inches
Shrug Size - XS/S
Complexity - Beginners friendly stitch

Lace shrug sweater crochet pattern
Step-by-step crochet instructions
Part 1 video tutorial
Begin crocheting the shrug from a sleeve.
Step 1
Make a foundation chain of 61 chains. Join it into a ring with the sl.st.
1st round – ch3, dc59 plus sl.st.1 into 3rd ch
2nd round – ch4, sk1, [dc1, ch1, sk1] to end + sl.st.1 into 3rd ch
Alternate the 1st and 2nd rounds until you crochet 16 rounds.
Step 2
Increase
17th round – ch3, dc14, inc1, dc29, inc1, dc14 + sl.st.1 into 3rd ch
After the round, you should have 2 chains more.
18th round = 2nd round
19th round = 1st round
Alternate the 18th and 19th rounds until you crochet 24 rounds.
25th round – ch3, dc15, inc1, dc30, inc1, dc14 + sl.st.1 into 3rd ch
26, 28, 30 rounds = 2nd round
27, 29 rounds =1st round
31st round – ch3, dc16, inc1, dc31, inc1, dc14 + sl.st.1 into 3rd ch
32nd round = 2nd round
Step 3
Body
After the 32nd round, chain 74 or multiples of 2 chs.
1st row (right side) – h4ch, dc71*, dc65**, then use other loops of the foundation chain to dc71 + RC4
*dc71 to end of your foundation chain of the body
** dc65 around your sleeve
2nd row (wrong side) – h5ch, trc1, (ch1, sk1, trc1) x 11, [ch1, sk1, dc1] to last 24chs; (ch1, sk1, trc1) x 12 + RC3
3rd row – h4ch, dc to end + RC4
Alternate the 2nd and 3rd rows until you crochet 12 rows.
Step 4
Back parts
1st half
13th row – h4ch, dc91 + RC3
14th row – h4ch, dc1, [ch1, sk1, dc1] to end + RC3
Repeat the two above rows 4 times or until you crochet 20 rows in total.
2nd half
Attach the yarn 91 chs before the end of the 12th row and chain 3 to pick up the height.
Then repeat the 13th and 14th row of the 1st half until you crochet 20 rows in total also.
Step 5
Join back parts
Match closely chains and use a sewing needle to join two back parts together or a crochet hook.
Step 6
Front parts
2nd half
21st row – h4ch, dc71, hdc3, sc2, sl.st.1
22nd row – ch1, h4ch, hdc1, (ch1, sk1, hdc1) x 2, [ch1, sk1, dc1] to end
1st half
Work sl.sts from the middle of the back part to last 76 chs of the 20th row (or attach the yarn 76 chs before the end of the row 20.
21st row – sc2, hdc3, dc71 + RC4
22nd row – h4ch, (dc1, ch1, sk1) x 35, (hdc1, ch1, sk1) x 3, sl.st.1

Part 2 video tutorial
Step 7
Crochet and join motifs
1st motif
Make a foundation chain of 5 chs and join it into a ring with sl.st.1
1st round – ch1, sc12 into the ring + sl.st.1 into 1st ch
Join motifs into the garment as you work your last 2nd round.
2nd round – ch3, dc1 into sm.ch., ch3, sc1 into a 1st ch of right front part, ch3, (petal1, ch2, sk3 of front part, sc1 into a ch of front part, ch2) x 2, petal1, ch3, sk3 of front part, sc1 into a ch of front part, ch3, petal1, [(ch5, petal1) x 2, ch7, petal1] x 2, ch5, petal1, ch5 + sl.st.1 into 1st ch above the very first petal of the round.
To make a front open shrug, do not join motifs in the middle.
2nd motif
Begin crocheting your 2nd motif as the 1st one.
1st round = 1st round of 1st motif
2nd round - ch3, dc1 into sm.ch., ch3, sc1 into a 13th ch of left front part, ch3, (petal1, ch2, sk3 of front part, sc1 into a ch of front part, ch2) x 2, petal1, ch3, sk3 of front part, sc1 into a ch of front part, ch3, petal1, (ch5, petal1) x 2, ch3, sc1 into a middle 4th ch of an arch of 7 chs of 1st motif, ch3, (petal1, ch2, sc1 into an arch of 5 chs of 1st motif, ch2) x 2, petal1, ch3, sc1 into middle 4th ch of an arch of 7 chs of 1st motif, ch3, (petal1, ch5) x 2 + sl.st.1 into 1st ch above the very first petal of the round.
3rd motif
Begin crocheting your 3rd motif as the 1st one.
1st round = 1st round of 1st motif
2nd round - ch3, dc1 into sm.ch., ch3, sc1 into sc ch between 2 motifs, ch3, (petal1, ch2, sc1 into an arch of 5 chs of a motif, ch2) x 2, petal1, ch3, sc1 into a ch of front part (last used ch of prev.motif), ch3, (petal1, ch2, sk3 of front part, sc1 into a ch of front part, ch2) x 2, petal1, ch3, sk3 of front part, sc1 into a ch of front part, ch3, petal1, (ch5, petal1) x 2, ch7, (petal1, ch5) x 2 + sl.st.1 into 1st ch above the very first petal of the round.
4th motif
Begin crocheting your 4th motif as the 1st one.
1st round = 1st round of 1st motif
2nd round - ch3, dc1 into sm.ch., ch3, sc1 into 12th ch from prev.motif of left front part, ch3, (petal1, ch2, sk3 of front part, sc1 into a ch of front part, ch2) x 2, petal1, ch3, sk3 of front part, sc1 into a ch of front part, ch3, petal1, (ch2, sc1 into an arch of 5 chs of a motif, ch2, petal1) x 2, ch3, sc1 into a sc ch between motifs, ch3, (petal1, ch2, sc1 into an arch of 5 chs of a motif, ch2) x 2, petal1, ch3, sc1 into middle 4th ch of an arch of 7 chs of a motif, ch3, (petal1, ch5) x 2 + sl.st.1 into 1st ch above the very first petal of the round.
After you join 10 motifs, stop joining motif from the middle of the garment to shape the neckline. Around the neck, it is necessary to join 11 more motifs. In addition, skip bigger intervals when joining your last 3 motifs from the back side of your neck.
Step 8
Edge
Work reverse sc to end.

Abbreviations
[ ] – repeat
ch – chain
dc – double crochet
h#ch – insert a hook into the number chain from your hook
hdc – half double crochet
inc – increase – work dc2 into one base chain
petal – work 2 unfinished dc (draw the yarn through first 2 loops only), and then pull the yarn through all 3 remaining loops on your hook.
RC – returning chain
sc – single crochet
sk – skip a chain
sl.st. – slip stitch
sm.ch. – same base chain
trc – triple crochet
Lace sweater shrug crochet pattern - two parts video tutorial.

Comments
Thanks for not forgetting my
Thanks for not forgetting my request :) but tell me the instructions if i wanted to make it size eur 40
Hi Engymohsen,
Hi Engymohsen,
If your gauge will be about the same as mine, I would suggest to work 2 extra rows for each half of the body part (size US12 chest circumference 39 inches (99 cm.)). So, instead of working 12 long body rows, crochet 14 rows for each half of the sweater. To make sure that your gauge will be the same for both halves of the shrug, work sleeve rounds, body rows, back and front rows at the same time from different yarn balls. Happy crocheting!
Thanks alot sana :)
Thanks alot sana :)
I worked the sleeve as ur
I worked the sleeve as ur pattern but when i mesured it . Its 10 inches length. I didn't work the extra 2 rounds yet . So i need ur help to continue the inc
And if u noticed iam using
And if u noticed iam using alize diva yarn
Hi Engymohsen,
Hi Engymohsen,
Thank you for attaching the picture of your work. To understand what causes the difference, please write me your gauge. If you think that the sleeve is wide enough, I would suggest working more sleeve rounds until you reach the desired length of each sleeve, and then work your last increase. If your gauge is different from mine, disregard my suggestion to work 2 extra body rows. Instead, crochet as many body and back part rows as necessary until you reach to about middle of your back.
Hi sana . No the sleeve needs
Hi sana . No the sleeve needs to be wider and My gauge is 30 st = 4 inches.
Hi Engymohsen,
Hi Engymohsen,
I increased just 6 chs (2chs in each increase round), you may increase as many chs as necessary. Add an even number (like 2, 4, 6, ...) in each increase round to make the pattern work after adding chs. My gauge is a lot different from yours, that's why it is hard to say for me how many chs you need to increase for each sleeve. It depends on many factors like your preference how wide a sleeve should be and your upper arm circumference. If your gauge is 30 dc go into 4" and I estimate that your upper sleeve circumference should be about 15", then it is necessary to increase about 50 chs to have 110 chs in total.
I do not know the thickness of the yarn you use, but suggest to choose a thicker yarn and/or larger size crochet hook for the project to match your gauge with mine. That way it will be easier to adjust the pattern to a different size.
Thanks sana. I will continue
Thanks sana. I will continue the same pattern but with a different hook . Thats easier to make the chs as yours to continue the front and back parts . Thanks alot and happy crocheting !
Iam waiting for ur comment
Iam waiting for ur comment
Pages