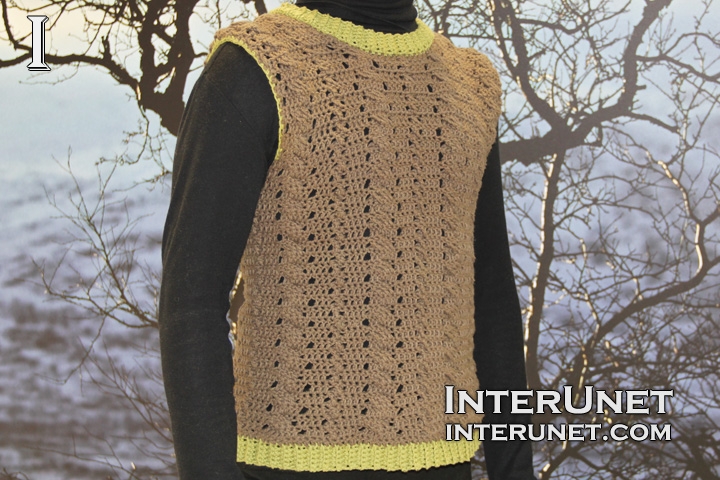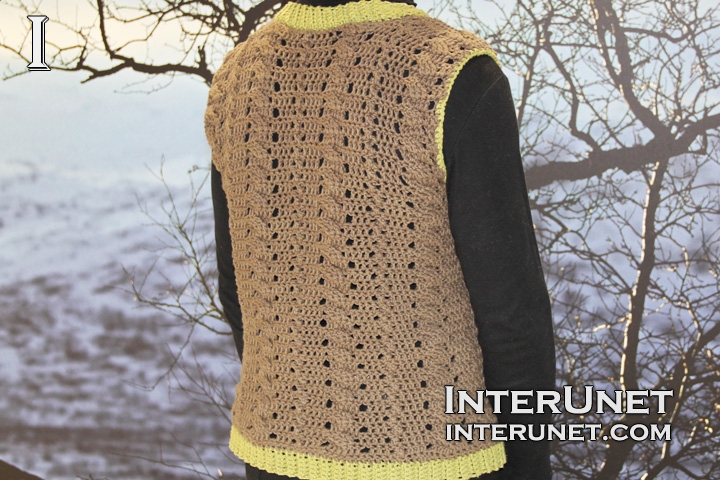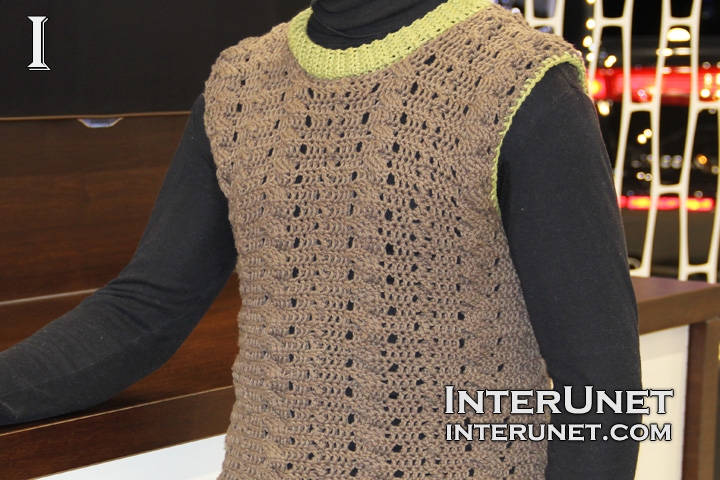
Yarn - Lily Sugar’n Cream (color: Warm Brown) / medium 4 / 4 oz (113 g) / 200 yards (184 m) / 4 balls needed
Hook - H/8 (5.00 mm) or other size hook needed for the gauge
Gauge - About 14 chs in 4 inches (10 cm.)
Size - S (chest circumference 36 inches)
Complexity - Easy

How to crochet a sleeveless sweater vest - braid stitch
Step-by-step crochet instructions:
Step 1
Bottom ribbing
Make a foundation chain of 7 chains.
1st row – sc to end plus RC1
2nd row – blsc to end + RC1
3 – 119 rows = 2nd row
120th row – blsc to end
Step 2
Join the 1st and last rows of the bottom ribbing together. Flip the garment to the wrong side to hide the seam.
Step 3
Using a different color yarn, pick up 128 dc on the edge/border of the ribbing or multiples of 16 dc
1st round – ch2, dc to end plus sl.st. 1 in the 3rd ch. from st.pt.
You should have 128 chs in total including the chain on your hook.
Step 4
Braids pattern
2nd round – ch2, dc1, sk1, trc1, trc1 in sk.ch., dc3, ch1, sk1, [dc6, ch1, sk1, dc3, sk1, trc1, trc1 in sk.ch, dc3, ch1, sk1] to last 8 chs; dc6, ch1, sk1, dc1 + sl.st.1 in 3rd ch from st.pt.
3rd round – ch2, dc1 in sm.ch, dc1, sk1, trc1, trc1 in sk.ch, dc4, [sk3, trc3, trc3 in sk.chs, dc4, sk1, trc1, trc1 in sk.ch, dc4] to last 8 chs; sk3, trc3, trc3 in sk.chs, dc1, sk1 + sl.st. in 3rd ch from st.pt.
Alternate the 2nd and 3rd rounds. You should crochet about 27 rounds.
Step 5
Back part
1st row (wrong side) – ch3, dc1 in sm.ch, [ch1, sk1, dc6, ch1, sk1, dc3, sk1, trc1, trc1 in sk.ch, dc3] to last 9chs; ch1, sk1, dc6, ch1, sk1, dc1 + RC3
2nd row (right side) – h4ch, dc2, [sk3, trc3, trc3 in sk.chs, dc4, sk1, trc1, trc1 in sk.ch, dc4] to last 8chs; sk3, trc3, trc3 in sk.chs, dc2 + RC3
3rd row (wrong side) – h4ch, dc1, [ch1, sk1, dc6, ch1, sk1, dc3, sk1, trc1, trc1 in sk.ch, dc3] to last 9chs; ch1, sk1, dc6, ch1, sk1, dc1 + RC3
4, 6, 8, 10, 12, and 14 = 2nd row
5, 7, 9, 11, and 13 = 3rd row
Step 6
Back shoulder piece
15th row (wrong side) – h4ch, dc1, ch1, sk1, dc6, ch1, sk1, dc3, sk1, trc1, trc1 in sk.ch, dc3 + RC3
16th row (right side) – h4ch, dc3, sk1, trc1, trc1 in sk.ch., dc4, sk3, trc3, trc3 in sk.chs, dc2
Work the second back shoulder piece as a mirror reflection to the first one, working the 15th row on the right side of the garment.
Step 7
Front part
Skip 6 chs from the back part and attach the yarn near a braid.
1st row (right side) = 1st row (back part)
2nd row (wrong side) = 2nd row (back part)
3rd row (right side) = 3rd row (back part)
4, 6, and 8 = 2nd row
5 and 7 = 3rd row
Step 8
Front shoulder piece
9th row (right side) – h4ch, dc1, ch1, sk1, dc6, ch1, sk1, dc3, sk1, trc1, trc1 in sk.ch, dc3, ch1, sk1, dc3 plus RC2
10th row (wrong side) – h4th, dc6, sk1, trc1, trc1 in sk.ch, dc4, sk3, trc3, trc3 in sk.chs, dc2 + RC3
11th row – h4ch, dc1, ch1, sk1, dc6, ch1, sk1, dc3, sk1, trc1, trc1 in sk.ch, dc5 plus RC2
12th row – h4th, dc4, sk1, trc1, trc1 in sk.ch, dc4, sk3, trc3, trc3 in sk.chs, dc2 + RC3
13th row – h4ch, dc1, ch1, sk1, dc6, ch1, sk1, dc3, sk1, trc1, trc1 in sk.ch, dc3 plus RC2
14th row – h4th, dc2, sk1, trc1, trc1 in sk.ch, dc4, sk3, trc3, trc3 in sk.chs, dc2
Work the second front shoulder piece as a mirror reflection to the first one starting from the wrong side of the fabric.
Step 9
Join shoulder pieces together. You may sew or crochet them.
Step 10
Neck ribbing
Work the neck ribbing as the bottom one, but crochet 74 rows or 37 ribs.
Join the last and first row together.
Join the neck ribbing into the garment from the wrong side of the fabric.
Step 11
Edges
Work sc for the armhole edges

Abbreviations
blsc – back loop single crochet
ch – chain
dc – double crochet
h4ch – insert a hook into the 4th chain from your hook
RC – returning chain
sc – single crochet
sk – skip a base chain
sl.st. – slip stitch
sm.ch. – same base chain
st – stitch
st.pt. – starting point (marker)
trc – triple crochet
trc in sk.ch. – triple crochet in the previous skipped chain/chains
How to crochet a sweater vest for a man - sleeveless sweater crochet pattern

Comments
Hi,this s an awesome pattern.
Hi,this s an awesome pattern. I would like to crochet vest for medium size. What will be the patter ln for medium size and/or large size vest. Thanks
Hi Vaishnavi Sriram,
Hi Vaishnavi Sriram,
Thanks for the good questions. For the large size, I would recommend working 10 repeats or 160 chains and 5 braids for each back and front parts (assuming that your gauge will be the same as mine). For the medium size, I would advise you to adjust gauge/tension by using a larger size crochet hook and work the same number of chains as I worked. The other option is to adjust gauge by using a smaller size hook and/or thinner yarn working 160 chs. Before starting the vest project, crochet a small sample alternating the 2nd and 3rd rows (step 5) to know your gauge and then make your calculations accordingly. Happy crocheting!