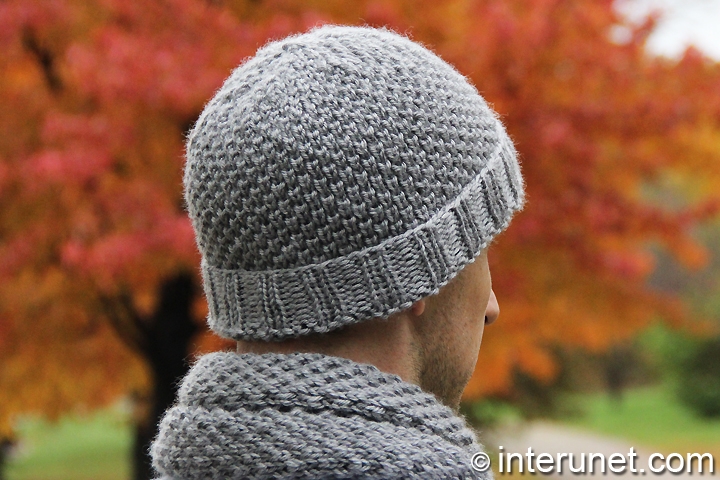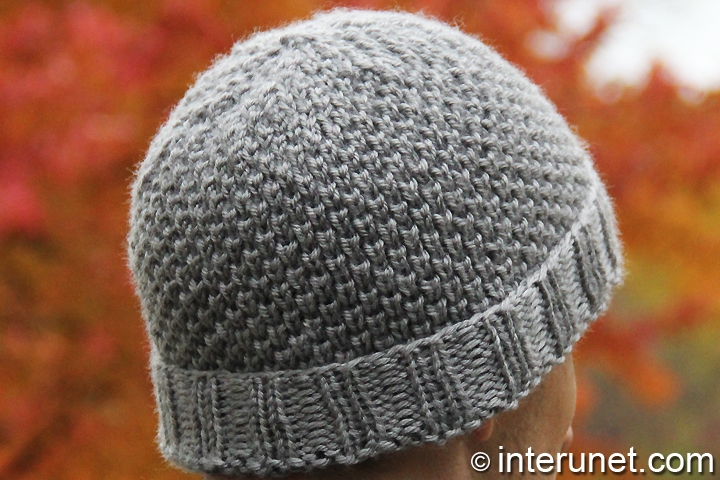
Yarn - Red Heart Soft / worsted 4 / Net Weight - 113 g / 212 yds (194 m) / less than 1 ball needed
Needles - 16 in long circular needles US 5 and double pointed US 3
Gauge - about 13 sts go into 4 inches (10 cm)
Head Circumference - 58 cm
Complexity - Easy

Men’s hat knitting pattern
Step-by-step knitting instructions
Step 1
Cast on 72 stitches on two needles (I used 16 in circular and one double pointed needle). That way you make initial loops bigger and it will be easier to knit the first round.
Remove the double pointed needle and spread the loops on the circular needle making sure that there weren’t any twists developed.
Step 2
Begin to knit in round – knit 2 and purl 2 for 10 rounds.
Step 3
Mark your starting point.
Step 4
Make your wrong side as right side. Continue knitting in opposite direction. Knit all stitches to end. Decrease two stitches (knit two stitches together twice).
Step 5
Start to knit a new pattern.
1st round – [make a loop (yarn over), skip 1 (slide the st on the right needle without knitting it), knit 1] repeat that to end. Skipping stitches won’t only create a unique design for your hat, but make it warmer compare to other regular patterns.
2nd round and all even rounds – knit all stitches to end (knit a regular stitch with a loop together and knit 1).
3rd round – [knit 1, make a loop, skip 1] to end.
Repeat that for about 40 rounds.
Step 6
Begin gradually decreasing the number of stitches.
1st round – knit two stitches together in 14 sts.
2nd round and all even rounds – knit all stitches to end (knit 1 st. and knit a regular stitch with a loop together).
3rd round – knit two stitches together in 12 sts.
5th round – knit two together (k2tog) in 10 sts.
7th round – k2tog in 8 sts.
9th round – k2tog in 6 sts.
11th round – k2tog in 4 sts.
13th round – k2tog in 3 sts.
15th round – k2tog in 2 sts.
17th round – k2tog all stitches.
18th round – knit 3 stitches together.
Step 7
Cut the yarn and secure it.
Knit a hat for a man

Comments
Нить – Red Heart Soft
Нить – Red Heart Soft /worsted 4 /Net Weight - 113 g/ 212 yds (194 m)
Спицы – #5 круговые 40 см и 5 чулочных спиц #3
Окружность головы – 58 cm
Сложность – Лёгкое
Шаг 1
Наберите 72 петли
Шаг 2
Резинка
1 – 10 круги - лиц.2 и изн.2 до конца
Шаг 3
Наметьте начало кругов.
Шаг 4
Выверните работу на изнаночную сторону. Провяжите один круг лицевыми и убавьте 2 петли.
Шаг 5
Узор
1 круг- [накид, проп.1 (снимите петлю с левой спицы на правую не провязывая), лиц.1] до конца
2 круг – лиц. до конца (вяжите лиц. петлю с накидом вместе и лиц.1).
3 круг – [лиц.1, накид, проп.1 (1п. сн. не провязывая)] до конца
4 круг = 2 круг
Повторите узор где-то 40 кругов
Шаг 6
Убавление петель
Поделите число петель на 5 и продолжайте вязать узор убавляя 1п в каждых 14 петлях
1 круг – лиц.2вместе 1 в каждых 14 петлях
2й и все чётные круги – лиц. до конца (вяжите лиц. петлю с накидом вместе и лиц.1).
3 круг – лиц.2вместе 1 в каждых 12 петлях
5 круг – лиц.2вместе 1 в каждых 10 петлях
7 круг – лиц.2вместе 1 в каждых 8 петлях
9 круг – лиц.2вместе 1 в каждых 6 петлях
11 круг – лиц.2вместе 1 в каждых 4 петлях
13 круг – лиц.2вместе 1 в каждых 2 петлях
15 круг – лиц.2вместе до конца
17 круг – лиц.3вместе
Шаг 7
Отрежьте нить и закрепите её.
I really enjoy the look of
I really enjoy the look of this stitch and wonder if it has a name? I would also like to know if you have the pattern to make the scarf. I think I might have to purl on the return. I may try a small swatch. I have made this hat for gifts 4 times and I'll continue making it because it's just as simple as the basic knit around but has a lot more texture.Thank you for sharing this pattern.
You're welcome, amarley. I
You're welcome, amarley. I call it a cell stitch. Yes, I do have the scarf pattern as well, please visit http://interunet.com/how-to-knit-a-scarf-for-a-man. I wanted the scarf to curl, so I did not add one extra stitch at the beginning and ending of a row. If you do not want the side edges to curl, it would be necessary to cast on 2 extra stitches. To make a small sample is a very good idea, I also do that all the time before starting any project. Enjoy your knitting!
I knit this and the 40 rounds
I knit this and the 40 rounds were too many for my wool type (though the width was fine). I think 'knit to 4 inches" or "knit to 10 cm" then start to decrease would be better than an exact # of rounds.
thanks also for the video. I thought that I needed to decrease 14 stitches, then 12, 10 etc., but it turned out I had to knit 2 together every 14 stitches (12,10) etc. The video made this clear for me.
cheers and have a Merry Christmas
Hi Nicola,
Hi Nicola,
Thanks for the comment. I appreciate it. Crocheters may adjust the pattern as desired to their own preferences. I knit the hat for my husband to his head size accordingly. I've written to start decreasing after 40 rounds, but you are right, I should've write to knit about 40 rounds or as many as necessary. I'll add that to the written instruction. Thank you for noticing this. Happy knitting!
My nephew really likes this
My nephew really likes this hat but Ive yet to learn how to needle knit, but I do know how loom knit. The bottom part is easy. I know how to that, but I'm trying to figure out the top part in a loom knitting adaptation. I think he'd like the scarf pattern too.
Hi I need a gauge to make
Hi I need a gauge to make sure I casted on the right number of stitches for the hat
Hi I'm sorry but I am really
Hi I'm sorry but I am really waiting for your reply
Hi Gigi411,
Hi Gigi411,
My gauge is about 13 sts in 4 inches. Happy knitting!
Hi, lovely hat. :) I have
Hi, lovely hat. :) I have one question though, In step 4 you say to "Decrease two stitches (knit two stitches together twice)" but the video shows you doing one decrease. Is it one or two? Thank you!
Pages