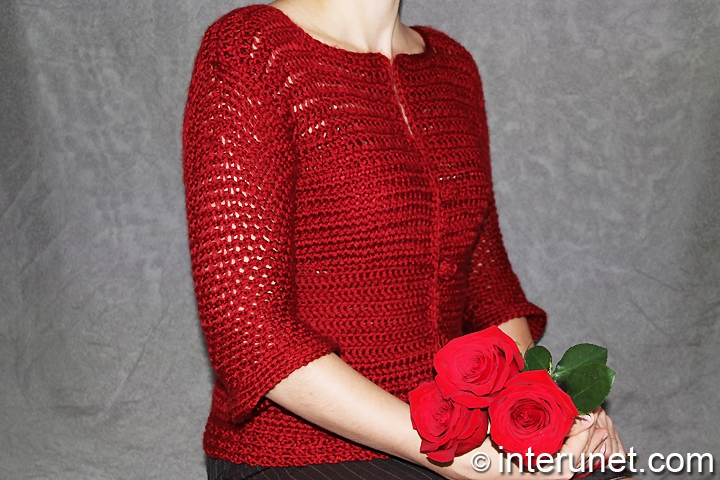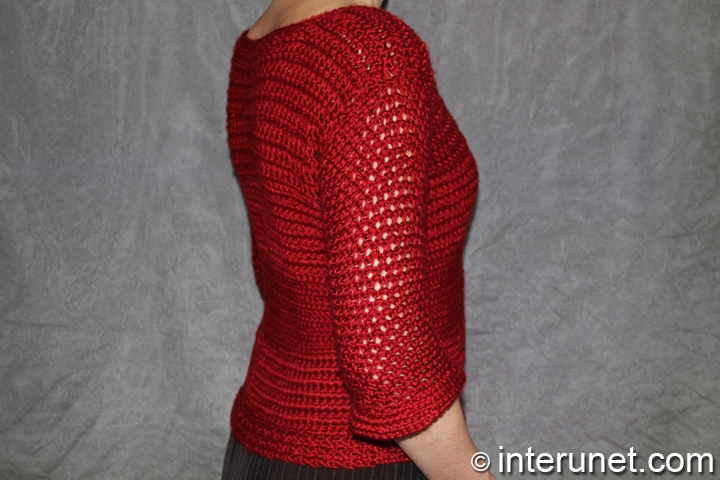
Yarn - Caron Simply Soft / medium 4 / 315 yds (288 m) / 2 balls needed
Hook - US F (3.75 mm) or other size hook to obtain gauge
Gauge - about 13 chains go into 4 inches
Cardigan Size - US 4 - 6
Complexity - Intermediate

Crochet women’s cardigan
Step-by-step crocheting instructions
Step 1
Make a foundation chain of 108 chain stitches and work one returning chain.
Step 2
1st row (right side) - starting from the second chain stitch from the hook, do single crochet to end, at the very end work the returning chain.
2nd row - starting from the second chain stitch from the hook, do reverse single crochet to end, at the very end work the returning chain.
Alternate 1st and 2nd rows for 10 more rows.
Step 3
13th row (right side) - starting from the second chain stitch from the hook, do back loop only single crochet to end, at the very end work the returning chain.
14th row - starting from the second chain stitch from the hook, do front loop only reverse single crochet to end, at the very end work the returning chain.
Alternate 13th and 14th rows for 10 more rows.
Step 4 = Step 2
Step 5
Rose petals pattern
1st row - in the second stitch from the hook make one single crochet, [create two more stitches to the existing one (reuse the base stitch to make second loop and in the following chain stitch make third loop) and crochet those three stitches together. At the very end, work the returning chain.
2nd row = 1st row.
Step 6
Crochet the front piece only. Continue the rose petals pattern for 24 chain stitches only from the hook for about 10 rows.
Step 7
Work the front shoulder piece. Continue crocheting the pattern for 14 chain stitches from the hook for about 6 rows.
Cut the yarn and secure it.
Step 8
Skip about 6 stitches from the front piece of the cardigan and crochet the back piece. Continue the pattern for 48 chain stitches from the hook for about 14 rows.
Step 9
Work the back shoulder piece. Continue the pattern for 14 chain stitches from the hook for 2 rows.
Step 10
Connect the two shoulder pieces together.
Cut the yarn and secure it.
Step 11
Work the other back shoulder piece.
Step 12
Work the other front piece with other front shoulder piece.
Step 13
Connect the other two shoulder pieces together.
Step 14
Use chain pattern for the sleeves.
1st round - [create 3 chain stitches then insert the hook into second stitch from the chain, grab the yarn, and pull it through the stitch and the 3rd chain stitch]. Repeat the process to end. At the very end, make 3 transition chains (stitches). By doing so, you should form small bumps of 3 chains.
2nd rounds - [insert the hook into the middle of 3 chain bump, grab the yarn, and pull it through both stitches] to end. At the very end, make 3 transition chains.
Every 4 rounds gradually reduce one stitch in a round. To do so, you need to make a stitch in the following two bumps from the hook and then crochet those three stitches together.
Repeat the process for about 30 rounds or until you reach the desired length of the sleeve.
Step 15
At the end of the sleeve, do back loop only single crochet for about 4 rounds.
Cut the yarn and secure it.
Step 16
Attach the yarn and work single crochet to cover edges of two front pieces and neck line of the cardigan. That will give one edge to the whole piece and a nicer look to it.
Step 17
Work the chain pattern for the bottom of the cardigan.
Step 18
Sew buttons.
Make loops for the buttons. On the opposite side of a button, create about 9 chain stitches and attach it back to the garment. Cut the yarn and secure it. Repeat the process for all the other buttons.
Cardigan crochet pattern

Comments
Quiero saber como se comienza
Quiero saber como se comienza desde el cuello apenas estoy aprendiendo grasias ati si va en español Venezuela
I love the look of this
I love the look of this cardigan. It is difficult to follow the video, so I am happy to have the written instructions and I hope it comes out just as beautiful as it looks
Hi, this is the first time to
Hi, this is the first time to upload a picture here.
Yes, you definitely should
Yes, you definitely should repeat step 3 at the bottom of the cardigan because it does look short. The picture is not close enough to count the rows, but the shape looks right.
Yes, I have to add more rows
Yes, I have to add more rows at the bottom too. I don't know I thought I follow all the steps. I think I messed up on the counts.
And here's the back part.
And here's the back part.
It looks like you have 10
It looks like you have 10 long rows for the back. Is that correct? If yes, you need to work more long rows and reduce the number of short/shoulder rows accordingly. Please let me know if you understand what I mean.
Hi Interunet, I thought I did
Hi Interunet, I thought I did more than 10 rows, but I'm sure that I will need to add more rows, that means I have to ripp out the shoulders part and go back to back part. I think that's the easiest way to do it right? I really appreciate your help. I'm sorry if I ask you a lot of questions.
hello,
hello,
I,ve seen your video ,its beautiful sweater but i want to make it for my daughter could you please tell me how get the pattern right for her size . shes 8 yrs, like the no. of chains and all.
Hi trupti bhore,
Hi trupti bhore,
Thanks for the good question. The needed number of chains to start with will depend on your gauge/tension and the girl's chest circumference. If your gauge would be about the same as mine, I'd advise you to start with 86 chains. I count all the chains including one loop on a hook. When you crochet to the armholes point, skip 2 chains under each arm, work 20 chs for each front part and 40 chs for the back part. Happy crochet!
Pages