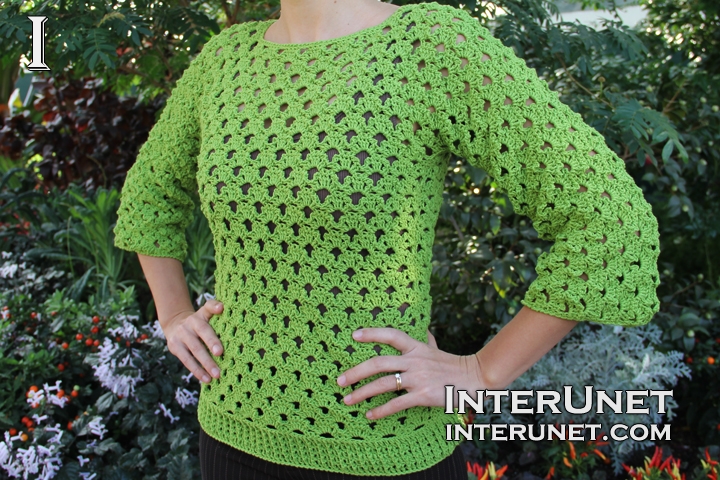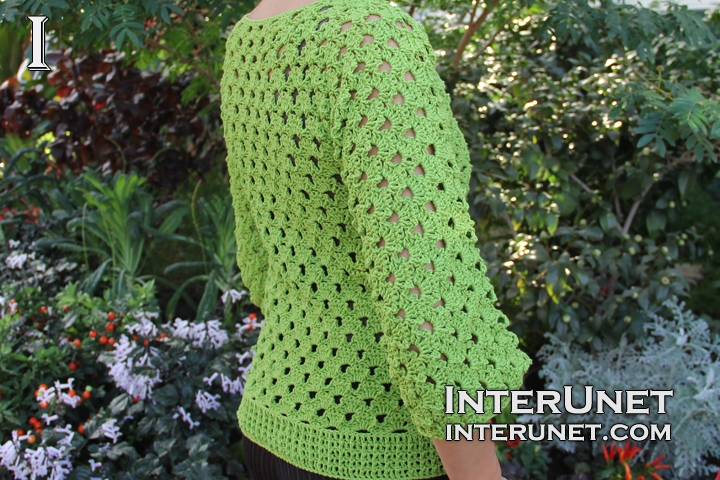
Yarn - Bernat Cotton-ish (color: Cotton Field) / light 3 / 2.4 oz (70 g) / 282 yards (258 m) / about 5 balls needed
Hook - G/6 4.25mm or other crochet hook needed for the gauge
Gauge - About 3 flowers go into 4.5 inches (11.4 cm)
Sweater Size - US 6
Complexity - Intermediate/Advanced beginner

Crochet women’s sweater – lace sweater crochet pattern
Step-by-step crochet instructions
The sweater is crocheted in two separate pieces and then joined together.
First half of the sweater
Step 1
Body
Make a foundation chain of 77 chains or multiples of 6 chs plus 5 additional chs. I count all the loops including the loop on my hook.
1st row (wrong side) – insert a hook into the 2nd chain from your hook, sc3, [ch3, sk3, sc3] to end plus RC2
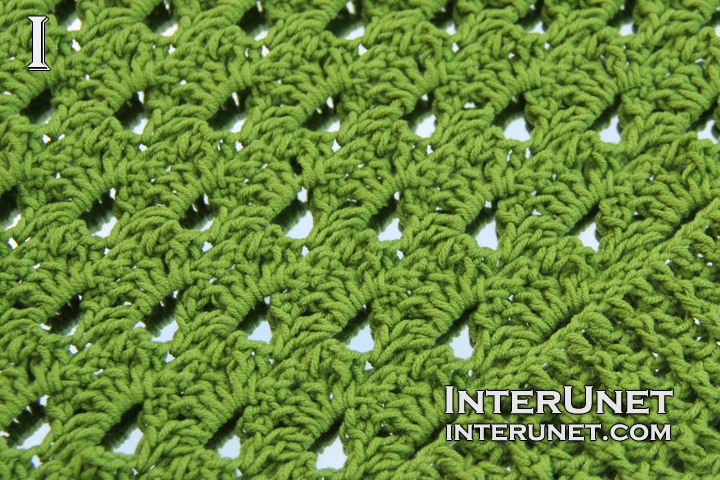
2nd row (right side) – insert a hook into the first arch of 3 chs, crochet flower1*, then work one flower into each arch to end of the row. At the end of the row after last flower, work dc1 into the very last chain and RC6
*flower - dc2, picot1, dc3, picot1, dc2
3rd row – [work sc3 above dc3 of the prev. row (between 2 picots), ch3] to end; dc1 into the last chain plus RC2
4th row – insert a hook into the 1st arch, work half flower1*, then crochet 1 flower into each arch to last one arch; work into last arch dc2, picot1, dc1, dc1 into 3rd ch plus RC2
*half flower – dc2, picot1, dc2
5th row – work sc1 above second dc of the prev.row, ch3, sk picot2, [sc3, ch3, sk picot2] to end; sc2 plus RC2
Repeat the pattern starting from the 2nd row until you crochet the desired length under arms.
Step 2
Sleeves/long rows
After you crochet about 33 rows or repeat the 4-row pattern 8 times, add 72 chs or multiples of 6 chs, depending on how long you want your sleeves to be.
33rd row – work sc1 above second dc of the prev.row, ch3, sk picot2, [sc3, ch3, sk picot2] to end; sc2 plus RC72
34th row – insert a hook into 2nd ch from your hook, work sl.sts to end of the sleeve, ch2, work one flower into each arch to end, dc1 into last chain of the row plus RC72
35th row – insert hook into 2nd ch from hook, sc3, [ch3, sk3, sc3] x 11 or to end of the sleeve; ch3, sk2, sk picot1,[ sc3 above dc3 of the prev.row, ch3] to end of the body; sk2, sc3, [ch3, sk3, sc3] to end plus RC2
Repeat the pattern (rows 2 – 5). Work the 36th row as your 2nd row, 37th row as your 3rd row and so on.
Work the second piece or other half of the sweater as the first one.
Step 3
Neckline
Back part
After you work about 15 long rows, crochet the 16th row as usual, but work just 14.5 flowers. After the last flower, ch2, sk2, and work sl.st.1 into following sc stitch. Then continue working sl.sts above next 5 flower/arches for the neckline. Work ch2 and proceed the pattern as usual to end of the row (work one flower into each arch).
Front part
Work 13 long rows, then begin the 14th row as usual, but work 14.5 flowers. After the last half flower, work RC2 and work two more rows of the pattern regular way. At the end of the 16th row after last flower, work 2 chs, sl.st.1 into the last ch of the row. Then work sl.sts down to the 13th row and continue working sl.sts above following 5 flowers/arches. After that, make 2 chs, work half flower1 into the next arch, and then one flower into each arch to end of the row. Crochet two more rows as usual.
Step 4
Join sleeves from the top
Place the two pieces of the sweater together (right side to right side), wrong side up. Work sl.st. into the 1st ch, then insert a hook into the ch. above second dc of the prev.row and into the same ch of the second piece, grab the yarn and pull it through the 3 loops on your hook. Make 3 chains, skip 2 picots on each side, join 3 chs above 3 dc of the prev. row. That way continue to end of the sleeve.
At the end of the sleeve after last 3 chs, sk picot1, work dc1 into the last chain as usual, then work 2 chs, sk picot1, and sl.st.1 into 2nd dc of the second piece.
Step 5
Edges
Work reverse single crochet
Step 6
Join sides
You may sew up them or use a crochet hook.
After you join sides, work reverse single crochet for the sleeve edges/borders.
Step 7
Bottom ribbing
Attach a yarn to the initial foundation chain, work the pattern in the round.
1st round – make 3 chs to pick up a height, and then work dc to end of the round. At the end of the round, work sl.st.1 into the 3rd chain.
2nd round – ch3, dc1 into a loop (right below the chain from the right side of the garment), [dc1, dc1 into a loop] to end plus sl.st.1 into 3rd ch
Repeat the 2nd round until you crochet the desired length of the ribbing.
After the ribbing, work reverse single crochet for the edge/border.

Abbreviations
ch – chain
dc – double crochet
picot – ch2, sc1 into the first chain of those 2 chs
RC – returning chain
sc – single crochet
sk – skip
sl.st. – slip stitch
st – stitch
Lace sweater crochet pattern

Comments
Hi! If the one piece of the
Hi! If the one piece of the sweater is bigger, it will be ok? Or the 2 pieces must be exactly the same?
Hi chara,
Hi chara,
It depends on how big the second piece is compare to the first one. I would suggest to place the bigger piece as the back part and smaller piece as the front part and try to join them anyway. Do it from the top to bottom. Then you will see whether you like it or it looks weird. My front and back parts of the sweater were exactly the same.
Ok thank you!
Ok thank you!
Hi Sana, I want to share my
Hi Sana, I want to share my finish lace sweater.
Hi Luz,
Hi Luz,
Thank you for sharing the picture with us. It looks beautiful as always. I've filmed a tutorial how I crocheted the button, please check it out. Happy crocheting!
Hi Sana, thank you for the
Hi Sana, thank you for the crocheted button tutorial.
You're welcome, Luz. Happy
You're welcome, Luz. Happy crocheting!
Hi Luz,
Hi Luz,
I've attached the chart how I would adjust the size of my latest project to XL and how I would change the beginnings and endings of rows to add half repeat to each front and back parts. If you have any questions, please ask on the page http://interunet.com/crochet-lace-cardigan. Happy crocheting!
Hi, this is my own version
Hi, this is my own version (had too little blue, so I used for the edges the brown). Fits perfectly on the body, even if it looks straight.
On me :)
On me :)
Pages