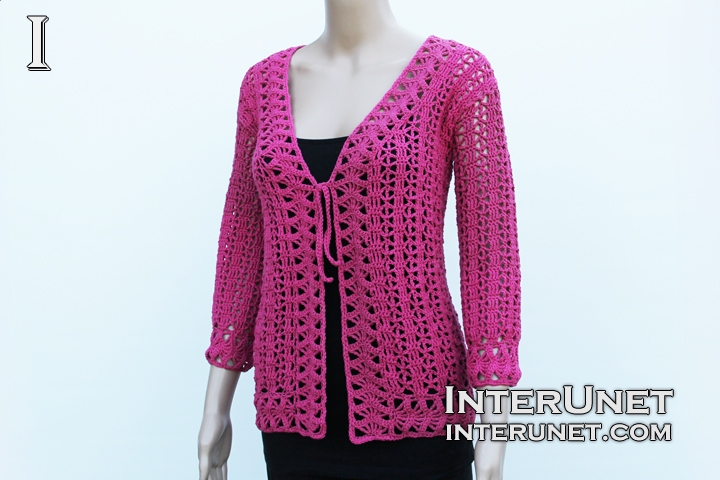
Yarn - Bernat Cotton-ish (cotton candy) / light 3 / 2.4 oz (70 g) / 282 yards (258 m) / about 5 balls needed
Hooks - E/4 – 3.50 mm and F/5 – 3.75 mm or other size hooks needed for the gauge
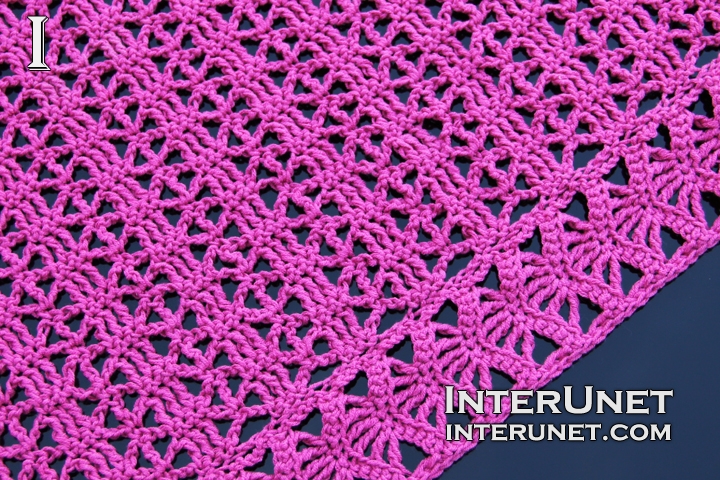
Gauge - Three repeats (main pattern) go into about 4.25 inches (10.8 cm.)
Cardigan Size - XS/S
Complexity - Intermediate / Advanced beginner

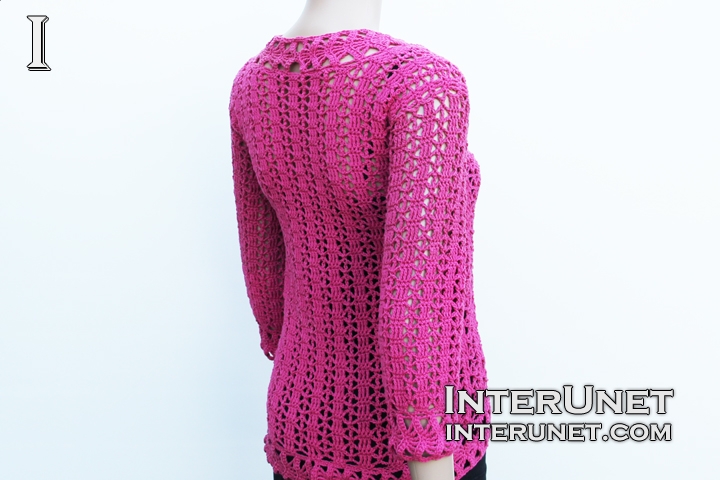
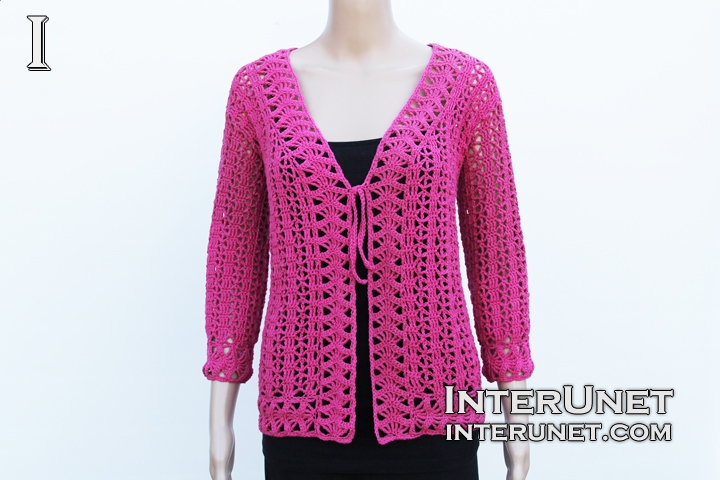
Pink tie front cardigan jacket crochet pattern
Step-by-step crochet instructions
Part 1 video tutorial
Begin crocheting the cardigan from the bottom to top.
Step 1
Make a foundation chain of 137 chs or multiples of 6 chs plus 5 additional chs.
Use a larger size crochet hook.
1st row (wrong side) – h2ch, sc3, [ch5, sk3, sc3] to end + RC4
2nd row (right side) – h6ch, trc2, [ch2, sk2, sc1, ch2, sk2, trc3] to end + RC1
3rd row – h2ch, sc3, [ch2, sk2, trc1, ch2, sk2, sc3] to end + RC4
Alternate the 2nd and 3rd rows about seven times, and then continue crocheting the pattern using a smaller size crochet hook.
Step 2
Decrease
30th row – h7ch, trc1, [ch2, sk2, sc1, ch2, sk2, trc3] to 1 last repeat; ch2, sk2, sc1, ch2, sk2, trc1, sk1, trc1
31st row – h2ch, sc1, [ch2, sk2, trc1, ch2, sk2, sc3] to 1 last repeat; ch2, sk2, trc1, sk2, dc1
32nd row – h2ch, sc1, ch2, sk2, trc3, [ch2, sk2, sc1, ch2, sk2, trc3] to 3 chs; sk2, dc1
Use a larger size crochet hook.
33rd row = 3rd row
Step 3
First front part
34th row – h7ch, trc1, [ch2, sk2, sc1, ch2, sk2, trc3] x 3, sk2, dc1
35th row – h2ch, sc3, [ch2, sk2, trc1, ch2, sk2, sc3] to 1 last repeat; ch2, sk2, trc1, sk2, dc1
36th row – h2ch, sc1, ch2, sk2, trc3, [ch2, sk2, sc1, ch2, sk2, trc3] to end + RC1
37th row = 3rd row
38th row = 2nd row
Alternate the 37th and 38th rows until you crochet 50 rows in total.
Step 4
Back part
Skip 7 chs from the 1st front part and attach the yarn.
34th row – ch2, sk2, trc3, [ch2, sk2, sc1, ch2, sk2, trc3] x 10, sk2, dc1
35th row = 3rd row
36th row = 2nd row
Alternate the 35th and 36th rows until you crochet 49 rows.
First back shoulder part
50th row – h6ch, trc2, [ch2, sk2, sc1, ch2, sk2, trc3] x 2, sk2, dc1
51, 53 rows = 3rd row
52, 54 rows = 2nd row
Join back and front shoulder pieces together working like the 3rd row.
Second back shoulder part
Attach the yarn or sl.st. down to 49th row of the back part.
50th row – (ch1, sk2, sc3, ch1, sk2, sl.st.1) x 5, ch2, sk2, trc3, [ch2, sk2, sc1, ch2, sk2, trc3] to end + RC1
51, 53 rows = 3rd row
52, 54 rows = 2nd row
Step 5
Second front part
Begin the 2nd front part as your back part: skip 7 chs from the back part and attach the yarn.
34th row – ch2, sk2, [trc3, ch2, sk2, sc1, ch2, sk2] x 3, trc1, sk1, trc1
35th row – h2ch, sc1, [ch2, sk2, trc1, ch2, sk2, sc3] to end + RC4
36th row – h6ch, trc2, [ch2, sk2, sc1, ch2, sk2, trc3] x 2, sk2, dc1
37th row = 3rd row
38th row = 2nd row
Alternate the 37th and 38th rows until you crochet 50 rows as for the first front part.

Part 2 video tutorial
Step 6
Sleeves
Make a foundation chain of 55 chs or multiple of 6 chs plus 1 additional ch using a smaller size crochet hook.
Join it into a ring with a slip stitch.
1st round – ch2, sc2, [ch5, sk3, sc3] to last 3 chs; ch5, sk3 + sl.st.1 into 2nd ch
2nd round – ch4, trc2, ch2, sk2, sc1, ch2, sk2, [trc3, ch2, sk2, sc1, ch2, sk2] to end + sl.st.1 into 4th ch
3rd round – ch2, sc2, ch2, sk2, trc1, ch2, sk2, [sc3, ch2, sk2, trc1, ch2, sk2] to end + sl.st.1 into 2nd ch
Crochet alternating 2nd and 3rd rounds until you crochet to about your elbow, and then continue working the pattern using a larger size crochet hook to widen the garment.
Work your last round like your 3rd round - ch2, sc2, ch2, sk2, trc1, [ch2, sk2, sc3, ch2, sk2, trc1] to last 2 chs; ch3, sk2 + sl.st.1 into 2nd ch
Join sleeves into the garment as you work your 2nd round.
Step 7
Sleeve edges
Attach the yarn and chain 18.
1st row – h10ch, (Vst1, ch1) x 2, Vst1, sk4, unfinished trc, sk3 of a sleeve foundation chain, sl.st.2
2nd row – h2ch, flsc12, sc1 + RC4
Alternate 1st and 2nd rows until you crochet 11 repeats.
Join your very last repeat with the 1st one as you work your last row like the 2nd row.
Lastly, work sc around your sleeve edge.
Step 8
Bottom edge
Crochet one bottom edge to the right and repeat the 2 rows of the pattern (Step 7) seventeen times, but sk2 chs of initial foundation chain instead of 3 chs of a sleeve foundation chain for the 1st row.
Work the 2nd bottom edge to the left. Chain 13 and work sl.st.1 into the very 1st chain of the initial foundation chain, ch3, sk2 of initial foundation chain, sl.st.1.
1st row – h10ch, (Vst1, ch1) x 2, Vst1, sk4, trc1 + RC1
2nd row – h2ch, flsc to end, sl.st.1, ch3, sk2 of initial foundation ch, sl.st.1
Alternate 1st and 2nd rows until you crochet 17 repeats
Join the two last repeats of the bottom edge together. One repeat finish as usual, work flsc to end. For the 2nd repeat work flsc to the middle Vst, and then work sc 3 using front loops of the repeat and using back loops of the opposite repeat. After that, work flsc to finish the 2nd row of the 2nd repeat. Chain 4 and work sl.st.1 into the other repeat. Cut the yarn and secure it.
Step 9
Body edge
Work the body edges like bottom edges, but skip a height of a trc instead of ch2. Crochet 35 repeat from both sides and join them together at the back of the neckline. Lastly, sc all the way around.
Step 10
Ties
Chain 32, h2ch, sc to end.

Abbreviations
ch – chain
dc – double crochet
flsc – front loop single crochet
h#ch – insert a hook into the # chain from the hook
RC – returning chain
sc – single crochet
sk – skip a chain
sl.st. – slip stitch
trc – triple crochet
Vst – (trc1, ch1, trc1) into 1ch
Tie front pink lace cardigan jacket crochet pattern

Comments
Since you work more repeats
Since you work more repeats for your size, you need to use more repeats for each front part and back part accordingly. I would suggest using 5 repeats/[ ] for each front part and 14 repeats/[ ] for the back part. Wrap the garment around your upper arm to estimate how many repeats you need to use for each sleeve. Happy crochet!
Hi Sana I started this
Hi Sana I started this cardigan using the same no of stiches as yr pattern, but when I finished the sleeves I found the armhole of my cardigan was bigger than the sleeve . Can you please advice . Thanks
Hi SSeaman18,
Hi SSeaman18,
Sleeves should be slightly smaller than armholes. However, if you believe that your armholes are much bigger than the sleeves, you may frog off one or two rows from both front and back shoulder parts (to make armholes smaller) or use a larger size crochet hook to widen the end of each sleeve. Happy crochet!
Hi Sand,
Hi Sand,
I have a 290m yarn. I wanna know how many balls I would need for this Cardigan.
I am gonna crochet to bust 36"
Tia
Another question. How do I
Another question. How do I measure my gauge. I Don know how to measure with repeats.
thank you sana for your
thank you sana for your crochet pattern
You're welcome, beno.
You're welcome, beno. Beautiful work as always. Congratulations! Happy crochet!
How would I go about making
How would I go about making this a cropped cardigan? I love your patterns an videos. Thank you for all the help you give us.
Hi Judsretired,
Hi Judsretired,
To make it as a cropped top, I would work the first 3 rows (step1) only, then skip step 2, and continue the pattern exactly starting from the step 3. Happy crochet!
Hi, pls tell me the pattern
Hi, pls tell me the pattern for XL size 40 bust size
Pages