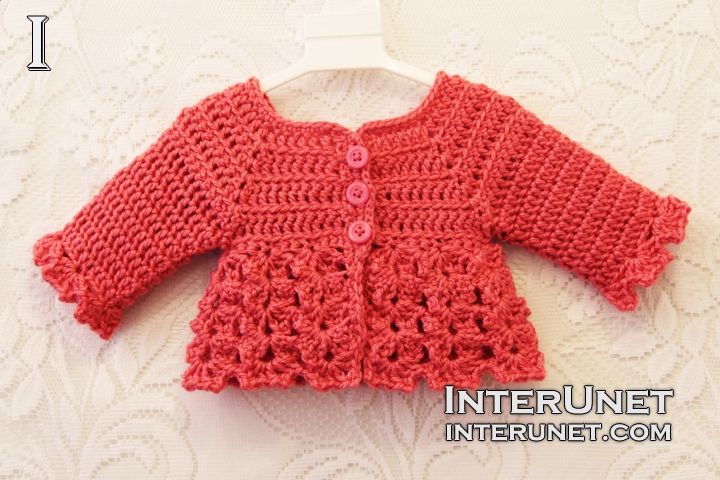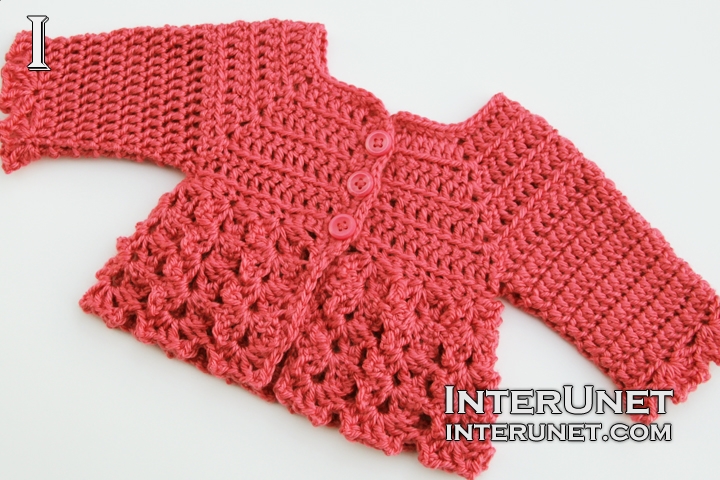
Yarn - Bernat Softee Baby (color – soft red) / light 3/ Net Weight – 5 oz (140 g) / 362 yds (331 m) / less than 1 ball needed
Hooks - I/9 - 5.5 mm or other size hook needed for the gauge
Cardigan Size - 0 – 3 months
Gauge - About 14 dc sts go into 4 inches (10 cm)
Complexity - Beginner friendly stitch
Cardigan jacket with buttons for a baby girl
Step-by-step crochet instructions
Part 1 video tutorial
Step 1
Begin crocheting the cardigan from the top to bottom.
Make a foundation chain of 55 chains
Step 2
Increase
1st row (right side) – h3ch, dc6, Vst1, (dc12, Vst1) x 3, dc6 + RC1
2nd row (wrong side) – h2ch, fl sc7, Vst1 into Vst of prev.row, (fl sc14, Vst1 into Vst of prev.row) x 3, fl sc6, sc1 +RC2
3rd row – h3ch, dc8, Vst1 into Vst of prev.row, (dc16, Vst1 into Vst of prev.row) x 3, dc8 + RC1
4th row – h2ch, fl sc9, Vst1 into Vst of prev.row, (fl sc18, Vst1 into Vst of prev.row) x 3, fl sc8, sc1 +RC2
5th row – h3ch, dc10, Vst1 into Vst of prev.row, (dc20, Vst1 into Vst of prev.row) x 3, dc10 + RC1
6th row – h2ch, fl sc11, Vst1 into Vst of prev.row, (fl sc22, Vst1 into Vst of prev.row) x 3, fl sc10, sc1 +RC2
If you need to adjust the pattern to a bigger size, continue alternating 1st and 2nd rows increasing chains until the two front and back parts will be wide enough to the child’s chest circumference (leaving about 1 inch for growth).
Step 3
Join front and back parts together
7th row – h3ch, dc12, dc1 into Vst of prev.row, sk 1st shoulder part, dc1 into Vst of prev.row, dc24, dc1 into Vst of prev.row, sk 2nd shoulder part, dc1 into Vst of prev.row, dc12 + RC1
8th row – h2ch, fl sc to last 1ch; sc1 + RC2

Part 2 video tutorial
Step 4
Bottom pattern
Use a smaller size crochet hook.
9th row – h6ch, [flower1, sk3] to last 1ch; dc1 + RC2
10th row – flower1 into Vst of prev.row to end; sk last picot and work dc1 + RC2
11th and all other rows = 10th row (use a larger size crochet hook to widen the garment)
Step 5
Sleeves
Attach the yarn underarms.
1st round – ch3, dc to end + sl.st.1 into 3rd ch
2nd round = 1st round
Use a smaller size crochet hook
3rd and 4th rounds = 1st round
Decrease
5th round – ch3, dc12, dec1, dc12 + sl.st.1 into 3rd ch
6th round = 1st round
7th round – ch3, dc12, dec1, dc11 + sl.st.1 into 3rd ch
8th round = 1st round
9th round – ch4, (dc1, picot1, dc2) into sm.ch, sk4, [flower 1, sk4] to end; (dc2, picot1) into 1ch + sl.st.1 into 3rd ch
Step 6
Finish up
Edge – sc to end
Sew up 3 buttons
Button holes
1st row (right side) – sc2, (ch2, sk1, sc3) x 2, ch2, sk1, sc2 + sl.st.1
2nd row (wrong side) – h2ch, sl.st. backwards to end
Cut the yarn and secure it.
Abbreviations
ch – chain
dc – double crochet
dec – decrease – work 2 unfinished double crochets, and then draw the yarn through remaining 3 loops on your hook
flower – (dc2, picot1, Vst1, picot1, dc2) into 1ch
fl sc – front loop single crochet
h#ch – insert a hook into the # chain from the hook
picot – ch2, and work sc1 into the 1st ch of those 2chs
prev. – previous
sc – single crochet
sk – skip
sl.st. – slip stitch
sm.ch. – the same base chain
Vst – V stitch – (dc1, ch1, dc1) into 1ch
Jacket cardigan for a baby girl - two parts video tutorial

Comments
love it. Easy to make.
love it. Easy to make.
Hi elynwoods65,
Hi elynwoods65,
Thanks for your post. I appreciate it. I'm glad that you liked the pattern. Happy crochet!
Very nice n easy pattern...my
Very nice n easy pattern...my daughter is 15years old can you tell me d same pattern for 15years please..
Hi Rashi82,
Hi Rashi82,
This is a top-down crochet technique, so the number of chains will depend on your gauge and how wide you want the neckline to be. I would suggest trying about 79 chs or more.
1st row (right side) – h3ch, dc10, Vst1, dc16, Vst1, dc20, Vst1, dc16, Vst1, dc10 + RC1. Then work rows increasing chains in each part until the back and 2 front parts will be wide enough to her chest circumference accordingly. Happy crochet!
Thanks a tons..thanx for
Thanks a tons..thanx for helping..
Can you please help me how to
Can you please help me how to increase or decrease for same pattern is there any chain multiple or some formula kindly explain how to proceed if i inc or dec no. of chains then what will be first row
The cardigan has 2 front, 2
The cardigan has 2 front, 2 shoulder, and 1 back parts. For the first row, I suggested working 10 dc for the 1st front part, 16 dc for the 1st shoulder part, 20 dc for the back part, 16 dc for the 2nd shoulder part, and 10 dc for the 2nd front part. Your number of chains may vary in each part, but the number of chs for the 2 front parts should be equal the back part or 10 chs (1st front) + 10 chs (2nd front) = 20 chs (back), and the number of chs for the 1st shoulder part should be equal the 2nd shoulder part or 16 chs (1st shoulder) = 16 chs (2nd shoulder). To increase chains, it is necessary to crochet all chains in each part and work increase/Vst into increase of the previous row to add chs. If my suggested number of chs to start with is not long enough, you may write me how many chs you plan to work, and I'll write you how to crochet the 1st row. Happy crochet!
Thanks alot dear...god bless
Thanks alot dear...god bless you...
Hi sana
Hi sana
my daughter is 1year old can you tell me the same pattern for 1 year old
Thanks a lot
Hi eli,
Hi eli,
At the bottom of the step 2, you may read that it is necessary to work more increase rows until it will be wide enough to her chest circumference accordingly leaving some room for growth. And then, work more sleeve rounds and bottom rows (step 4). Happy crochet!
Pages