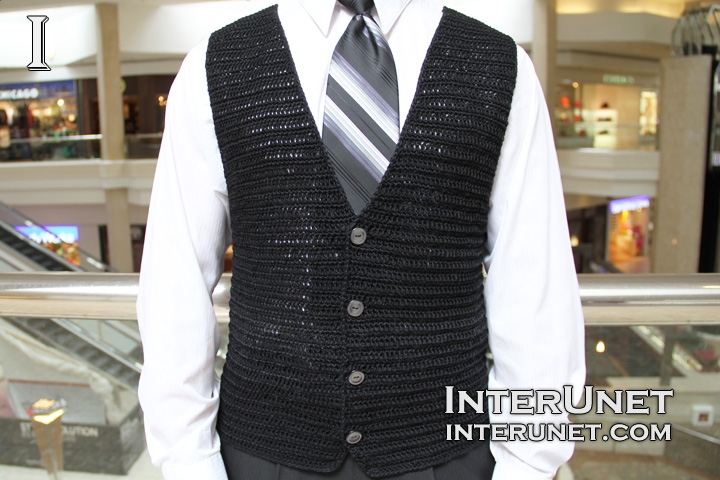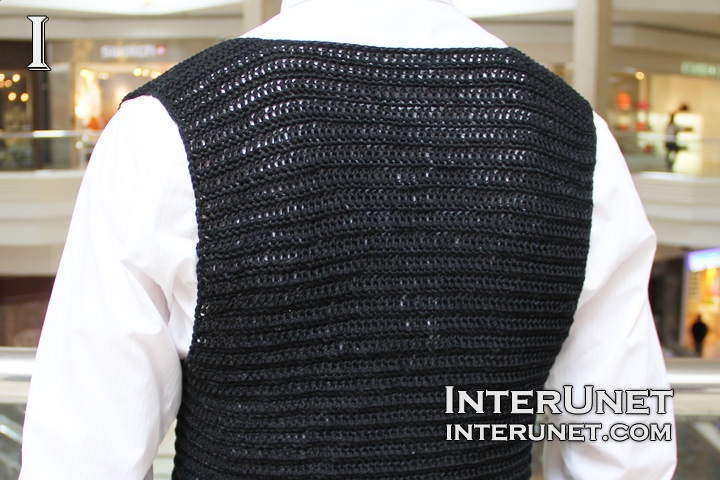
Yarn - Aunt Lydias crochet thread Fashion 3 / weight 1 super fine / 137 m (150 yd) / about 5.5 balls needed
Hook - E-4 / 3.50 mm or other size hook needed for the gauge
Gauge - About 18 sc in 4 inches (10 cm)
Vest Size - S
Complexity - Easy

Crochet men’s button up vest jacket - easy to follow beginners stitch
Step-by-step crochet instructions
Step 1
Foundation chain
Make a foundation chain of 158 chain stitches. I count all the chains including the chain on the crochet hook.
Step 2
Increase
1st row (wrong side) – h4ch, dc2 on 1ch, dc to last 1 ch; dc2 on 1ch + RC1
2nd row (right side) – h2ch, sc to end + RC3
3, 5, and 7 rows = 1st row
4 and 6 rows = 2nd row
Step 3
Work the pattern without increasing chains and make buttonholes
8th row – h2ch, sc to last 6 chs; (sl.st.1, ch2, sk2, sc1)*, sc2 + RC3
*buttonhole
9th row – h4ch, dc to end + RC1
10, 12, 14, & 16 rows =2nd row
11, 13, 15, & 17 rows = 9th row
Repeat the above two more times. You should have 3 button holes.
Step 4
Decrease chains from the neck side and increase chs underarms
38th row – h2ch, sc to last 6 chs; (sl.st.1, ch2, sk2, sc1)*, sc2 + RC2
39th row – h4ch, dc 40, dc2 on 1ch, dc78, dc2 on 1ch, dc to last 2 chs; CL1 + RC1
40th row – h2ch, sc to end + RC2
41st row = 39th row
Step 5
1st front part (right)
Decrease from both sides
42nd row – h2ch, sc36 + RC2
43rd row – h4ch, dc to last 2 chs; CL1 + RC1
44th row – h2ch, sc to end + RC2
45 & 47 rows = 43rd row
46th row = 44th row
Decrease from one side
48th row – h2ch, sc to end + RC3
49, 51, 53, 55, 57, 59, 61, 63, 65, 67, 69, 71, 73 rows = 43rd row
50, 52, 54, 56, 58, 60, 62, 64, 66, 68, 70, 72, 74 rows = 48th row
Step 6
Front shoulder part (right)
Work the pattern without decreasing chains
75th row – h4ch, dc to end + RC1
76th row = 48th row
77th row = 75th row
78th row – h2ch, sc to end
Step 7
Back part
Skip 12 chains from the right front part
Decrease from both sides
42nd row – attach the yarn, work sc 66 + RC2
43rd through 47th rows = 43rd through 47th rows of the front part
Work the pattern without decreasing chains
48th row – h2ch, sc to end + RC3
49th row – h4ch, dc to end + RC1
Alternate 48th and 49th rows.
Step 8
Back shoulder parts
75th row – h4ch, dc17 + RC1
76 & 78 rows = 48th row
77th row = 75th row
Step 9
2nd front part (left)
Skip 12 chains from the back part
Decrease from both sides
42nd row – attach the yarn, sc to end + RC2
43rd row – h4ch, dc to last 2 chs; CL1 + RC1
44th row – h2ch, sc to end + RC2
45 & 47 rows = 43rd row
46 & 48 rows = 44th row
Decrease from one side
49th row – h4ch, dc to end + RC1
51, 53, 55, 57, 59, 61, 63, 65, 67, 69, 71, 73 rows = 49rd row
50, 52, 54, 56, 58, 60, 62, 64, 66, 68, 70, 72 rows = 44th row
74th row – h2ch, sc to end + RC3
Front shoulder part (left)
Work the pattern without decreasing chains
75 & 77 rows = 49th row
76th row =74th row
78th row – h2ch, sc to end
Step 10
Finish up the vest
Join shoulder parts together. You may sew them or use a crochet hook.
Work sl.sts for all the edges (around the arms, back and front parts).
Sew up buttons.

Abbreviations
ch – chain
CL – cluster – yo, insert a hook into a, grab the yarn, and pull it through. You should have 3 loops on your hook, pull the yarn through the first 2 sts. You have 2 loops left on the hook. Yo, insert the hook into a following chain, grab the yarn, and pull it through and then through the first 2 sts on your hook. Lastly, pull the yarn through 3 remaining sts on your hook.
dc – double crochet
dc2 on 1ch – two double crochets on one base chain to increase one ch.
h#ch – insert a hook into the 2nd or 4th chain from the hook as indicated
RC – returning chain
sc – single crochet
sk – skip a ch
sl.st. – slip stitch
st – stitch
How to crochet a vest jacket - men’s waistcoat crochet pattern

Comments
what number do I need for an
what number do I need for an 1x?
Hi MAJones1225,
Hi MAJones1225,
The number of chains to start with depends on your gauge/tension. I would advise to practice your gauge before making any estimates. To adjust the pattern to XL size, please read my comment to Vee Jackson. Happy crochet!
I did see that on but I want
I did see that on but I want the one for a 1x size. I did a chain of 232
As I wrote you before, the
As I wrote you before, the number of chains depends on your gauge. The other factor to consider is how the vest should fit (snugly or loosely).
I've written adjustments to the pattern for XL size or 46" chest circumference. For 48" chest circumference I would chain about 210, but you may make a foundation chain as long as needed. You can also adjust your gauge by using a larger size crochet hook or thicker yarn. Happy crochet!
thank you
thank you
Hi, I would like to know the
Hi, I would like to know the measurements to a make a vest of size L (LARGE). pls reply
Hi reddy,
Hi reddy,
To adjust the pattern to size L, please read my comment to Sandra. To save time, check your gauge before starting the project. Happy crochet!
I would like to know the
I would like to know the measurements for making a Large size vest
Hi,
Hi,
I see by step 4 that you have 3 button holes. When do you do the 4th button holes and under step 3 am I repeating step 3 for two more times? Which means I am going beyond 38 rows?
Hi MAJones1225,
Hi MAJones1225,
At the end of the 38th row (step 4) you should see an */asterisk mark. That is the 4th button hole.
When you count from 8 to 17, you'll get 10 rows. If you repeat the pattern 2 times, you'll add 20 more rows or 17+10+10 =37 rows. Happy crochet!
Pages