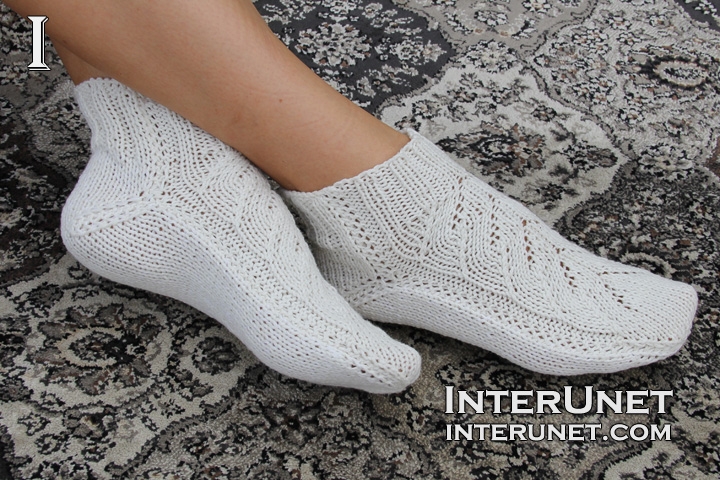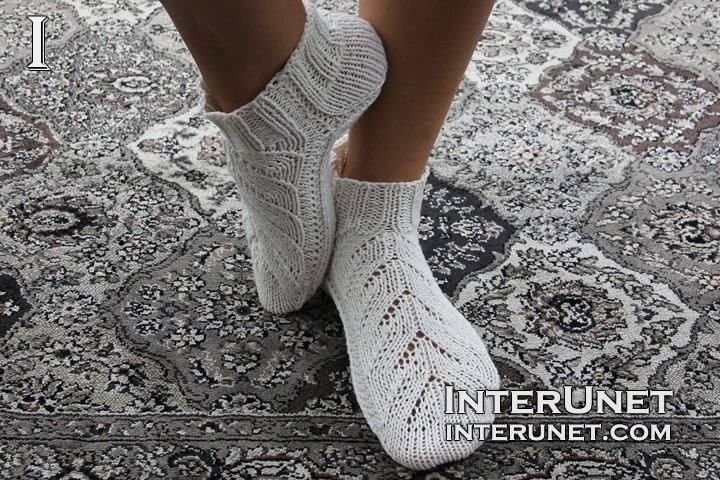
Yarn - Bernat Cotton-ish (cotton ball) / light 3/ 2.4 oz (70 g) / 282 yards (258 m) / less than 1 ball needed
Knitting Needles - Double pointed US 3 (3.25 mm) 7 in (17.78 cm)
Gauge - About 17 k sts go into 4 inches (10 cm)
Socks Size - US 8
Complexity - Advanced Beginner

Women’s socks knitting pattern - braids stitch
Step-by-step knitting instructions
Step 1
Cast on 24 sts on two double pointed needles to make the first loops bigger.
Step 2
Ribbing
1st row (right side) – sl.st.1, [p2, k2] to last 3 sts; p2, k1
2nd row (wrong side) – sl.st.1, [k2, p2] to last 3sts; k2, p1
Alternate the 1st and 2nd rows until you have 15 rows in total or knit the desired length of the ribbing.
Step 3
Braids pattern
16th row (wrong side) – sl.st.1, k2, p9, pick up 1 st., p9, k2, p1
17th row – sl.st.1, p2, k4, k2tog-R, k3, pick 1 st, p1, pick 1 st, k3, k2tog-L, K4, p2, k1
18th row – sl.st.1, k2, p9, k1, p9, k2, p1
19th row – sl.st.1, p2, k3, k2tog-R, k3, pick 1 st, k1, p1, k1, pick 1 st, k3, k2tog-L, k3, p2, k1
20, 22, 24 rows = 18th row
21st row – sl.st.1, p2, k2, k2tog-R, k3, pick 1 st, k2, p1, k2, pick 1 st, k3, k2tog-L, k2, p2, k1
23rd row – sl.st.1, p2, k1, k2tog-R, k3, pick 1 st, k3, p1, k3, pick 1 st, k3, k2tog-L, k1, p2, k1
25th row – sl.st.1, p2, k2tog-R, k3, pick 1 st, k3, k2tog-L, k4, pick 1 st, k3, k2tog-L, p2, k1
26th row = 16th row
Repeat the pattern starting from the 16th row until you knit to end of your pinky toe.
Step 4
Decrease every other row
66th row (wrong side) – sl.st.1, k2, p to last 3 sts; k2, p1
67th row – sl.st1, k2tog-L, k to last 3 sts; k2tog-R, k1
68th row – sl.st.1, p to end
Alternate the 67th and 68th rows until you have 12 sts on your knitting needle.
Step 5
Decrease every row
78th row (wrong side) – sl.st.1, p2tog, p to last 3 sts; p2tog, p1
79th row = 67th row
Alternate the two above rows until you have 4 sts left.
Step 6
Bottom part
Increase two stitches every row
82nd row (wrong side) – sl.st.1, inc1, p to last 1 st; inc1, p1
83rd row – sl.st.1, inc1, k to last 1 st; inc1, k1
Alternate 82nd and 83rd row until you have 12 sts on your needle
Increase 2 sts every other row
86th row (wrong side) = 68th row
87th row = 83rd row
Alternate the 86th and 87th rows until you have 24 sts in total.
Step 7
Knit the back part to beginning of your heel
99th row (right side) – sl.st.1, k to end
100th row = 68th row
Step 8
Heel
Decrease 2 sts from both sides every other row until you have 8 sts left.
Then increase 2 sts every other row until you have gain 24 sts.
Step 9
Alternate 99th and 100th rows until you knit 6 rows or as many as necessary depending on your top part of a sock, and then work the ribbing for the same number of rows as in step 2.
Step 10
Cast off all the stitches.
Join sides starting from the heel. You may sew it or use a crochet hook.

Abbreviations
inc – increase – insert a right needle into the base stitch of the previous row (you may place it to the left needle), grab the yarn, and pull it through to have one extra stitch on the working needle. That way you increase one stitch without developing a hole.
k – knit
k2tog-L – knit two stitches together to the left side – insert a right needle into 2 sts, grab the yarn, and pull it through.
k2tog-R – knit two sts together to the right side – insert a right needle into the2nd st then into the the 1st stitch, grab the yarn, and draw it through
p – purl
pick 1 st – pick one stitch up – insert a needle under a yarn between two stitches of the previous row, grab the yarn, and pull it through. You should increase one stitch and develop a hole under it.
sl.st. – slip stitch
st – stitch
How to knit socks on two needles - braids stitch

Comments
I think the first problem is
I think the first problem is row 25 (middle decrease) – sl.st.1, p2, k2tog-R, k3, pick 1 st, k3, k2tog-L, k4, pick 1 st, k3, k2tog-L, p2, k1
It is hard to see sts on the yarn color you've chosen (it is very beautiful though), but I believe that you worked your 26th row as the row 18. That's why your 27th row has purl sts on the right side of the garment. You may pause the video at about 14:09 to see how 25th row should look like. Happy knitting!
(All posts with links are removed from both the site and youtube channel)
Oh. I probably got lost while
Oh. I probably got lost while following the instructions...
I'll start over again. Thank you.
Hi, I ran into a problem
Hi, I ran into a problem again lol
After knitting 25 rows, I'm left with an additional stitch. I'm supposed to have 24 stitches, right? but I have 25 =/
Hi Teadrinker,
Hi Teadrinker,
Yes, after the 25th row you should have 24 sts and after the 26th row you should have 25 sts. Check all your decreases. Maybe one decrease is missing. Happy knitting!
Ah, I finally got it
Ah, I finally got it correctly. Just to make sure, after repeating row 16 x amount times, you knit across, right? to get on the wrong side?
Hi Teadrinker,
Hi Teadrinker,
Are you writing about step 4? If yes, then knit decreasing sts every other row. Happy crochet!
I am on Step 8 heel. The
I am on Step 8 heel. The decrease and increases amount to 16 rows for decreases and 16 rows for increases. I have knit the back part to beginning of heel but this seems like a lot of rows for the heel. Will all these extra rows be taken up when I get to the joining of the heel with my crochet hook? I have frogged these socks so many times already that I am puzzled.
Step 8 heel requires 16 rows
Step 8 heel requires 16 rows for increase and 16 rows for decrease starting at heel. Is this correct?
Hi ferdy,
Hi ferdy,
Yes, it is necessary to work 16 decrease and 16 increase rows for each heel. Then (step 10) join them matching these rows closely. Happy crochet!
My problem was where to start
My problem was where to start the decreases and increases for the heel. Last time I did it it came up to the ribbing so I wripped it out and started the decreases for the heel few rows before on the back. Is there any other way to find out how or where to start the heel besides guessing?
Pages