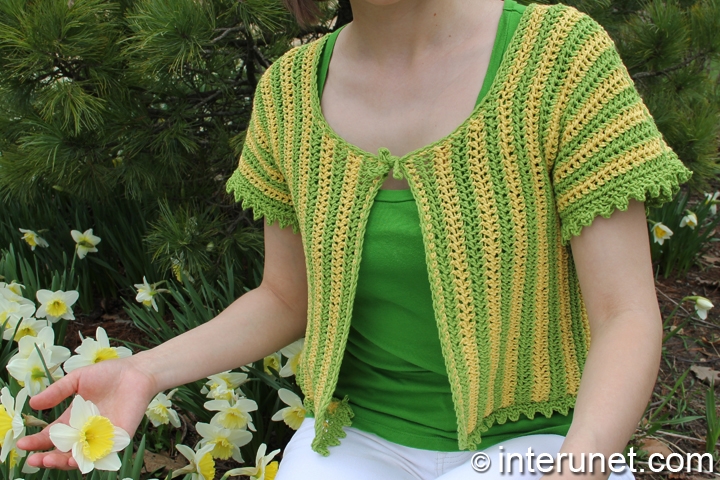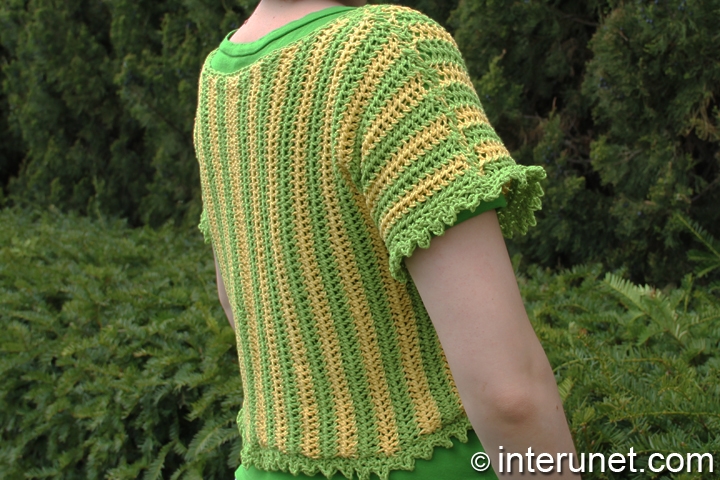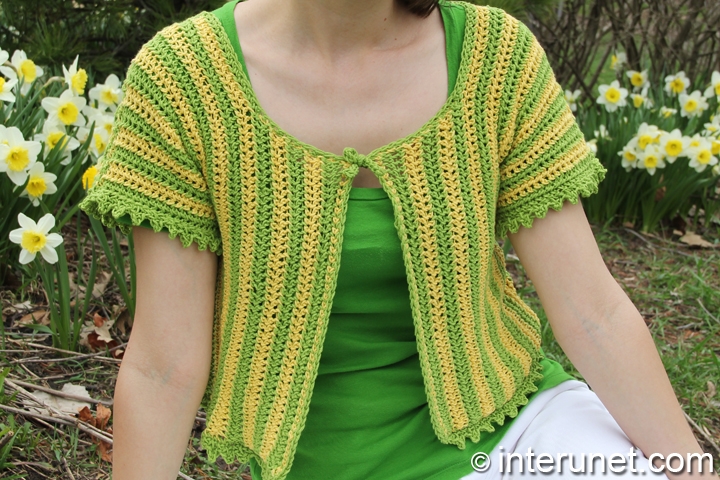
Yarn - Bernat Cotton-ish (color - cotton field & lemon twill) / light 3 / 2.4 oz (70 g) / 282 yards (258 m) / less than 1 ball of each color needed
Hook - I-9 (5.5 mm) or other size hook needed for the gauge
Gauge - width - about 12 rows go into 4 inches and length - about 13 chains go into 4 inches
Top Size - US 6
Complexity - Easy

Crochet women’s short-sleeve summer top - two colors crochet pattern
Step-by-step crochet instructions
To make the top, it is necessary to crochet 4 pieces – 2 front pieces and 2 back pieces. Each piece you need to start with a sleeve. For each sleeve you need to make a foundation chain of 24 chains (ch.) plus 1 returning chain (RC).
Step 1
First front piece, the right sleeve
1st row (right side) – single crochet (sc) to end + 1RC
2nd row (wrong side) – back loop single crochet backwards (blsc bw) to last 1 ch., add/change color, work blsc bw 1 using the different yarn +1RC
3rd row = 1st row
4th row = 2nd row
Step 2
Increase 2 chains
5th row = front loop single crochet (flsc) to end plus 2RC
6 and 8 rows = 2nd row
7th row = 1st row
9th row = 5th row
10th row = 2nd row
Step 3
First front piece, the body
11th row – flsc to end + 35RC
12th row – work sc backwards on the chain and continue blsc bw to end + 2RC
13, 15, 17, 19, 21, 23, & 25 rows = 1st row
14, 16, 18, 20, 22, & 24 rows = 2nd row
Step 4
Neck point
26th row – blsc bw to last 15 chains*, work blsc bw 1 with diff. color + 1RC
*since you did not crochet to end of the row, your yarns will not be on the same level. To get the second yarn on the level of the main color yarn, work slip stitch (sl.st) down to that point.
27th row – flsc to end
28th row – blsc bw to end
29, 31, 33, & 35 = 27th row
30, 32, & 34 = 28th row
Step 5
Second front piece, the left sleeve
Important! In order to keep alternating yarns from the top of the garment, it is necessary to start the 1st row from the wrong side.
1st row (wrong side) – sc bw to end plus 1RC
2nd row (right side) – flsc to last 1 ch., attach/alternate color, work flsc 1 using the different yarn +1RC
3rd row = 1st row
4th row = 2nd row
Step 6
Increase 2 chains from the bottom of the sleeve
5th row = blsc bw to end plus 2RC
6 and 8 rows = 2nd row
7th row = 1st row
9th row = 5th row
10th row = 2nd row
Step 7
Second front piece, the body
11th row – blsc bw to end + 35RC
12th row – work sc on the chain and continue flsc to end + 2RC
13, 15, 17, 19, 21, 23, & 25 rows = 1st row
14, 16, 18, 20, 22, & 24 rows = 2nd row
Step 8
Neck point
26th row – flsc to last 15 chains*, work flsc 1 with diff. color + 1RC
*work slip stitches with the other yarn to get both yarns on the same level
27th row – flsc to end
28th row – blsc bw to end
29, 31, 33, & 35 = 27th row
30, 32, & 34 = 28th row
Step 9
First back piece, the right sleeve
1st row (right side) – sc to end + 1RC
2nd row (wrong side) – blsc bw to last 1 ch., add/change color, work blsc bw 1 using the different yarn +1RC
3rd row = 1st row
4th row = 2nd row
Step 10
Increase chains
5th row = flsc to end plus 2RC
6 and 8 rows = 2nd row
7th row = 1st row
9th row = 5th row
10th row = 2nd row
Step 11
First back piece, the body
11th row – flsc to end + 35RC
12th row – work sc backwards on the chain and continue blsc bw to end + 2RC
13, 15, 17, 19, 21, 23, & 25 rows = 1st row
14, 16, 18, 20, 22, & 24 rows = 2nd row
Step 12
Neck point
26th row – blsc bw to last 4 chains*, work blsc bw 1 with diff. color + 1RC
*work sl.st. down with other yarn to get the second yarn on the same level with main color yarn
27, 29, 31, 33, & 35 = 1st row
28, 30, 32, & 34 = 2nd row
Step 13
Second back piece, the left sleeve
It is important to alternate yarn colors from the top of the garment, that’s why it is necessary to start the 1st row as a wrong side.
1st row (wrong side) – sc bw to end plus 1RC
2nd row (right side) – flsc to last 1 ch., attach/alternate color, work flsc 1 using the different yarn +1RC
3rd row = 1st row
4th row = 2nd row
Step 14
Increase chains from the bottom of sleeves only
5th row = blsc bw to end plus 2RC
6 and 8 rows = 2nd row
7th row = 1st row
9th row = 5th row
10th row = 2nd row
Step 15
Second back piece, the body
11th row – blsc bw to end + 35RC
12th row – work sc on the chain and continue flsc to end + 2RC
13, 15, 17, 19, 21, 23, & 25 rows = 1st row
14, 16, 18, 20, 22, & 24 rows = 2nd row
Step 16
Neck point
26th row – flsc to last 4 chains*, work flsc 1 with diff. color + 1RC
27, 29, 31, 33, & 35 = 1st row
28, 30, 32, & 34 = 2nd row
Step 17
Join (crochet or sew) both back pieces together.
Step 18
Bottom and sleeve edges
*sc 2, ch.3 and sc 1 on the 1st of the 3 chains. Repeat from *.
Step 19
Front and neck edges
Work sc from the bottom of the garment up to the neck point. Create 16 chains for the first tie, work sl.st. to end of the chain, and continue sc all the way around the neck. On the same level with the 1st tie, make the second tie totally the same as you crocheted the 1st one and proceed working sc down.
Step 20
Iron
In order to avoid curled edges, iron the garment before wearing it.

Abbreviations
ch. – chain
dc – double crochet
rc – returning chain
sc – single crochet
sl.st. – slip stitch
Crochet short sleeve summer top
